Ender 3 S1 Stiffening, Gantry- Versteifung - Y Achse (Update V2)
thingiverse
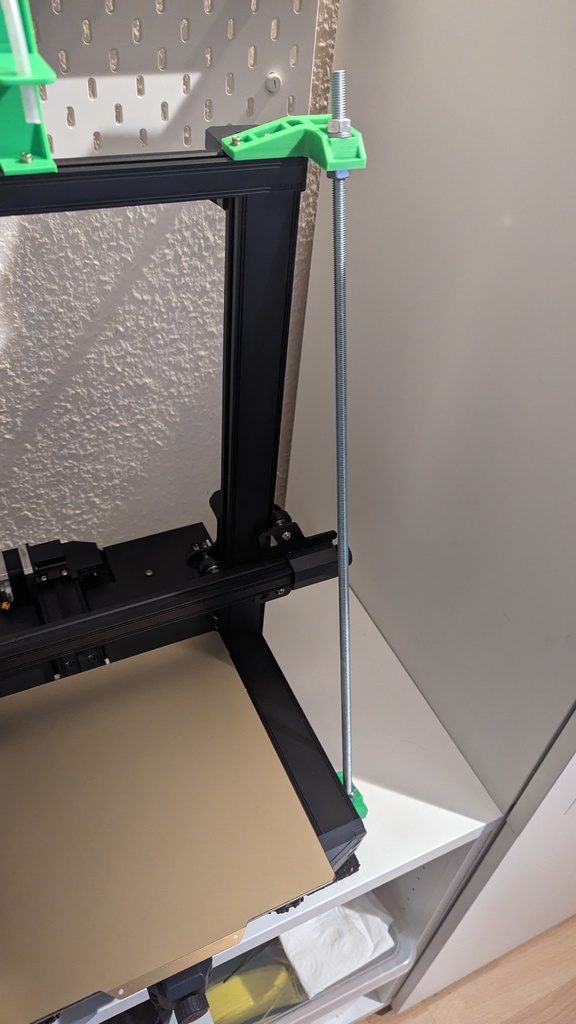
Recommended Print Settings: Outlines 3x Important Note: The Mount on the Bottom is higher as the Original Feet, its visible on the Picture Make sure to lift up the printer with additional feet like anti vibration blocks. My design requieres no drilling or changes at the printer itself. I removed the original display completely because using the Sonic Pad. The Rod will take place where the display was located. Recommended Print Settings: Align the pats on Printer Bed, as you can see on the Picture - Top, Bottom Layer 4x (0,8mm) - Infill 30-35% Mount on the Printer: 8x T Slot Nut (M3 or M4 possible) 8x Bolts M3/M4 x 12mm (needs 1mm thick whasher do avoid hitting the extrusion Ground) M8 threaded rod x min 560mm M8 Hex Nut 8x M8 Washer 8x The V2 Parts are made for Anti Vibration feet like on the Picture with Dia. 8mm Bolts
With this file you will be able to print Ender 3 S1 Stiffening, Gantry- Versteifung - Y Achse (Update V2) with your 3D printer. Click on the button and save the file on your computer to work, edit or customize your design. You can also find more 3D designs for printers on Ender 3 S1 Stiffening, Gantry- Versteifung - Y Achse (Update V2).