Ender 3 tensionable extruder arm
thingiverse
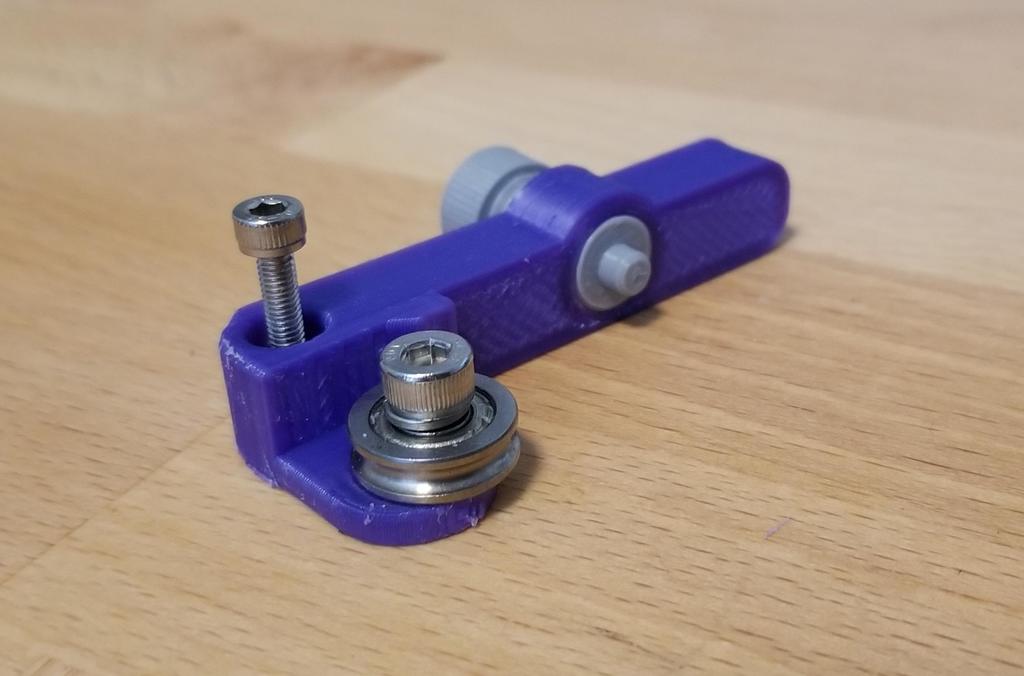
Replacing the stock arm with this tensionable arm on the Ender 3 / CR10 / etc extruder/feeder can give you much more consistent results in 3D printing. The stock feeder doesn't get much tension from the weak springs that come with these printers. This allows you to adjust the tension until you get real bite (should be visible on the filament but not deforming it). You can do a quick test by seeing if you can easily spin the feeder gear with filament preloaded -- if it slips with light force then you've got a stock Creality printer. ;P If you have filament not engaged at the hot end yet, then you can do a pull test while holding the feeder gear still. If it slips easily then again, you probably could use more tension. Also, you can unwind the filament to check for visible bite marks, a sign you have the right amount of grip. It should look like the filament here: http://thrinter.com/tiko-part-2-first-prints-and-adjusting-the-extruder-tension/ --------- Print settings This is best printed at 0.10mm layer height. You also need to print the threads' axis vertically (e.g. bolt standing up). Together, these make consistently working threads. I have had luck up to 0.14, but you may need a tool to slowly spin the threads back and forth as you work the bolt in. You can also make the bolt narrower in your slicer to help, if your printer isn't very accurate -- just don't make the bolt shorter as it will cause it to bind! PLA works great as it is very stiff.
With this file you will be able to print Ender 3 tensionable extruder arm with your 3D printer. Click on the button and save the file on your computer to work, edit or customize your design. You can also find more 3D designs for printers on Ender 3 tensionable extruder arm.