Ender 3 Touchscreen Case & Holder for Raspberry Pi
thingiverse
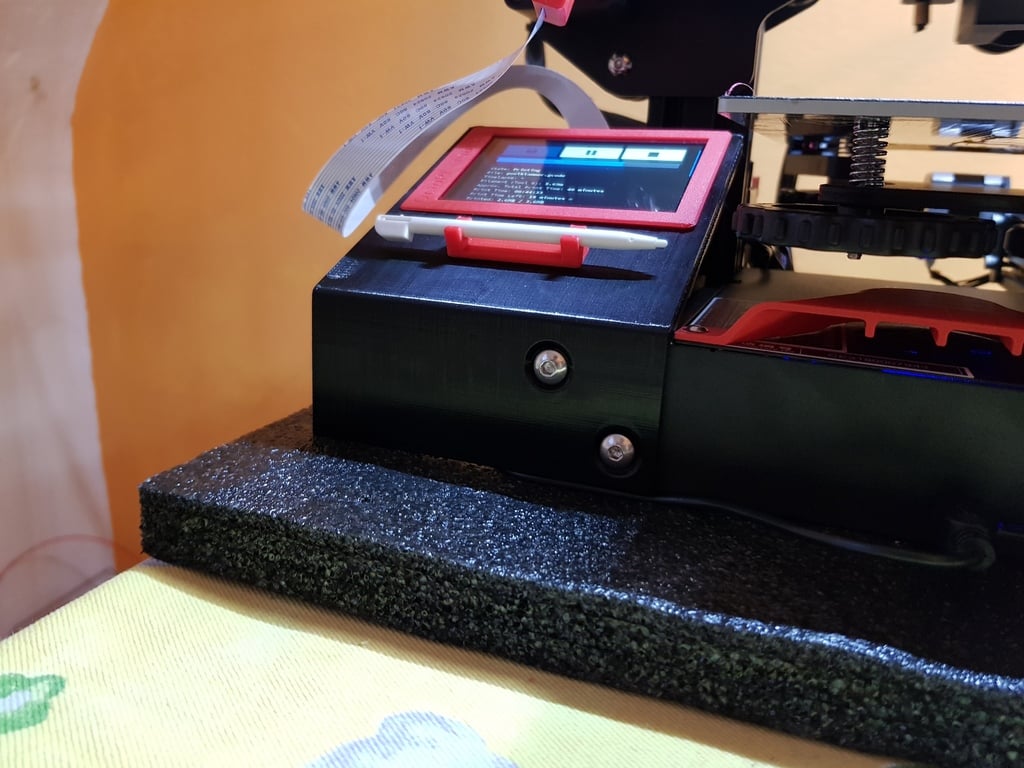
Hi all, I purchased an Raspberry 3.5" Touchscreen. I couldn't find a good place to mount it easily so I was going the hard way and desinged myself a nice holder that fits on my Ender 3. Check out my Profile for some more Ender 3 upgrades. :-) ### Edit: User howchoo created an very well written text & video guide! Please Check out his make for more details before you start printing: https://www.thingiverse.com/make:707262 NOTE: I added a complete guide on how to set up your raspberry to work with octoprint, touchscreen and camera. Many people have trouble with this and I thought this may be helpful to some people. Scroll down to the very bottom. This is made to fit for the Raspberry Pi 3 Model B: https://www.amazon.de/gp/product/B01CD5VC92/ref=oh_aui_search_detailpage?ie=UTF8&psc=1 It might fit other Raspberrys as well but I'm not sure. The touchscreen I used was this one: https://www.amazon.de/gp/product/B01JRUH0CY/ref=oh_aui_search_detailpage?ie=UTF8&psc=1 Again my case might fit other 3.5" Touchscreens as well but you have to try yourself. :-) How to assemble: Scroll down ;-) The Camera-Mount I used (not created myself): https://www.thingiverse.com/thing:2886101 Custom bracket for better clearance to the touchscreen added to my things files: "6_Ender3_Camera_Bracket.stl" If you want to install a MicroSD to SD Adapter print "0_1_Ender3_Touchscreen_SD_Holder_Base.stl". Remove the plastic housing of the SD Adapter. If it's too loose simply put a piece of tape around it. I used this one: https://www.amazon.de/gp/product/B01C84YKVA/ref=oh_aui_search_detailpage?ie=UTF8&psc=1 Changelog: - Added another backplate for the pi to install a 40mm fan - Added a smaller clamp to get a little more clearance between frame and clamp - Removed the camera-cable hole from the pi case and increased the height of the HDMI-hole in order to feed the camera cable trough that. That makes installation much easier. - Added touchscreen-support (between pi and screen), that way everything is much more stable instead of using foam. - Added pictures of assembly - Added complete guide on how to setup your raspberry & touchscreen - Added my version of ModMikes PiCamera Bracket, that way it's not in the way of the touchscreen. He allowed me to: https://www.thingiverse.com/thing:2886101/comments/#comment-2018042 - Added guide as pastebin link to fix some errors - Added how to backup your pi image to the guide - Added "0_1_Ender3_Touchscreen_SD_Holder_Base.stl" if you want to install an MicroSD to SD Adapter. - Added Info abot howchoo's guide
With this file you will be able to print Ender 3 Touchscreen Case & Holder for Raspberry Pi with your 3D printer. Click on the button and save the file on your computer to work, edit or customize your design. You can also find more 3D designs for printers on Ender 3 Touchscreen Case & Holder for Raspberry Pi.