Ender 3 Underbed Piezo
thingiverse
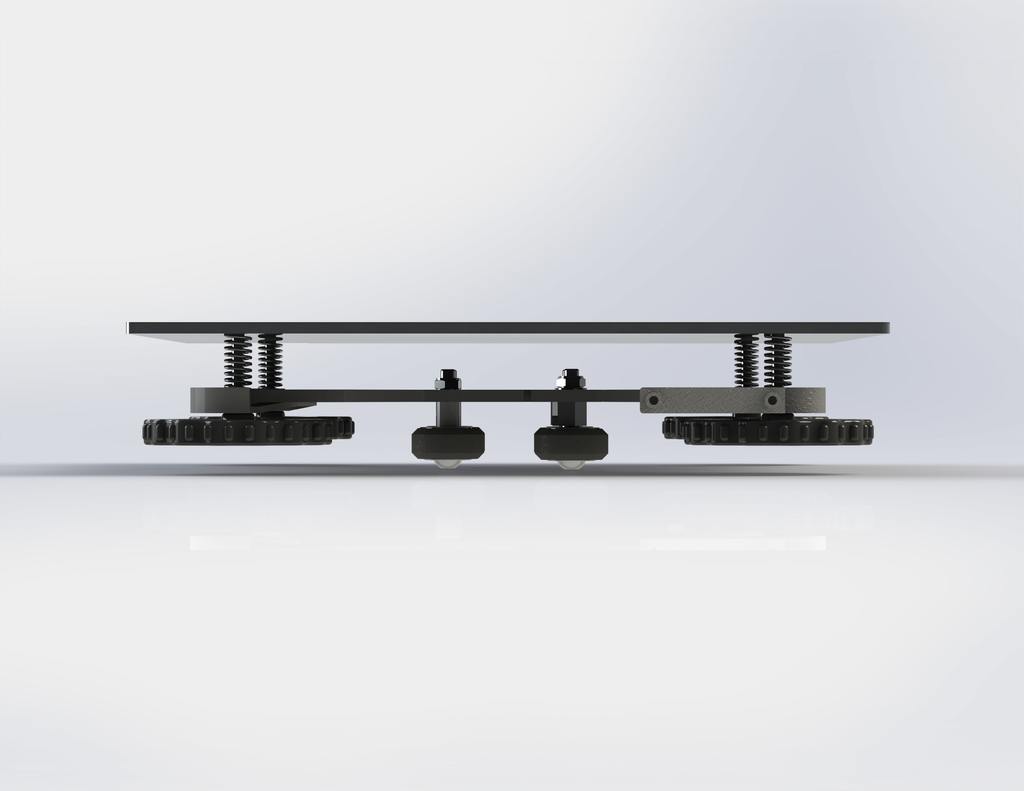
Ender 3 Underbed Piezo Mounts ========================== This is a mount for piezo disks that does not require any modifications to the bed of the Ender 3. It is designed to be used with either PrecisionPiezo products or Pyr0ball's EasyPiezi module. This design is based on a spring arm that preloads the piezo disks on each corner of the bed. When the bed is touched the amount of tension decreses, triggering the sensor. ###What to print You will need the following: * 2 Spring Arms * 2 Mirrored Spring Arms * 4 Piezo holders (Choose your file based on the piezo diameter!) I've also provided different files in case you'd like to mount your piezo PCB to the bed. These replace **one** of the normal (not mirrored) spring arms. **PLEASE PRINT THESE WITH PETG OR ABS! PLA deforms over time and will stop working after a while!** ###How to install Installation is simple and does not require any tools other than the wrenches to remove two of the carriage's wheels. You will need kapton tape and glue (optional) to hold the piezo disks in place however. 1. Remove the bed from the Y carriage by unscrewing it completly. Please be careful with the bed's wiring. 2. Unscrew the two wheels on either side of the carriage. 3. Remove the belt and unmount the carriage from the printer. 4. Place the spring arms on the corners of the bed. The normal spring arms must be mounted on the **FRONT** of the bed carriage, while the mirrored versions go on the **BACK** of the bed carriage. 5. Now take your piezo holders and position them in such a way that the pegs on the spring arms are roughly positioned at the center of the holders and mark their location. 6. Take your kapton tape or glue and secure the piezo holders to the carriage. I personally recommend gluing them in place. 7. Now put your piezo disks on the holders with the white part facing away from the carriage and secure them with a little bit of kapton tape. 8. Pass the piezo wires to the opposite side of the bed (there should be extra holes you can use) and connect them in parallel. It's very important you keep the polarities the same when doing this! Join the cables that go from the center of the pizo disks together, and the ones that go from the edges of the disks together. 9. (Optional) Test that all piezos have been correctly connected with a multimeter. 10. Reattach the carriage and the bed to the printer. 11. Before adding the leveling nuts make sure you insert the spring arms into position. If you decided to print a PCB holder arm, it **MUST** go on the **FRONT RIGHT** corner of the bed. For the rest of the arms follow the order in step 4.
With this file you will be able to print Ender 3 Underbed Piezo with your 3D printer. Click on the button and save the file on your computer to work, edit or customize your design. You can also find more 3D designs for printers on Ender 3 Underbed Piezo.