Ender 3 V2 Drag Chain Extruder Mount and Jogged Link
thingiverse
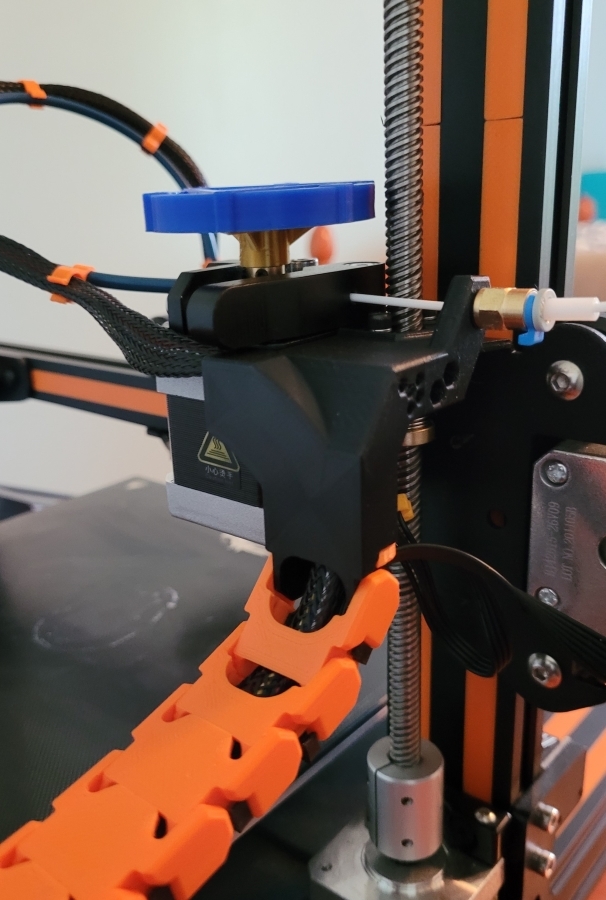
***UPDATE:*** I Found that the PLA filament guide wore out faster than I had anticipated so I decided to redesign it to accept an M5 screw so that I could use one of the pressure fittings that came with the printer with a small length of PTFE tubing that can be more readily replaced if the need should ever arise. THE HOLE IS NOT THREADED! This is by design as you can get a tighter fit by allowing the threading to cut its own path through the plastic. Make sure the hole is round before starting by either filing sanding or drilling with a 5.5mm drill bit (7/32" should work as well) before starting to screw in the fitting. Go slow, make sure it's going in straight and back off frequently before pressing on and it should work beautifully. I also took the opportunity to apply more of what I have learned in CAD to finally achieve more of what I had originally intended for this design. In addition to the M5 updated version of the original I also added an S. variant. This is a rather dramatic redesign and requires your printer to be able to comfortably print 55 degree overhangs though I would recommend facing the top of the model toward your fans for more efficient cooling of these overhangs. Please also note that for the S. Variant I added 0.4mm of material behind the screw holes for extra strength as I have upgraded my extruder assembly since the first iteration and I had extra room to do so, if you are still using the stock extruder assembly this may be a tight fit. ***** This is a slight modification to Ilueen's design. The Extruder mount is used to replace the upper mount and sends the wires over the extruder so that the wires can fit into the wire claw there, but does not accommodate an X-axis drag chain. You will need 2 longer M3 screws to replace the screws holding your Z-axis nut in place as this design uses the same screw holes. I also included a link which allows the Y-axis chain to move more in line with Ilueen's base mount. For the Y-axis I used 14 regular links plus the one jogged link. For the Z-axis I used 18 regular links plus 4 cut links (2 at the top and 2 at the bottom). I printed this in PLA, at 0.2mm layer height and 50% infill. You will probably need supports to print the stiffeners on the inside cleanly. UPDATE: I fixed the Y axis jog link to be more similar to the regular links and it bends back a bit further now, which should relieve some stress. UPDATE: I Was going through my phone and realized that I forgot to credit norp for the original extruder mount that I somewhat loosely based mine on. I had cut off parts I didn't need in Prusa and had been using that for a few days while I designed this extruder mount with the goal of bringing the cable chains in line. I can't seem to add another remix (any help with this in the comments would be appreciated) but here is the link https://www.thingiverse.com/thing:4314829. Thanks to Ilueen and norp for the inspiration and all of the people that inspired them. UPDATE II: My anti-backlash nut finally arrived so, because I had to do a partial disassembly, I decided to make a small change. I added a filament guide to keep the filament from rubbing up against the lead screw and hopefully to ensure clean entry even as the X-axis gets much higher than the spool. This guide works for my printer but if it doesn't line up with yours, let me know in the comments and I'll put up the STEP file so you can edit it as needed. I also remixed the bottom connector to fix some problems I was having with it. You can find the remix here: <a>https://www.thingiverse.com/thing:4820673</a>
With this file you will be able to print Ender 3 V2 Drag Chain Extruder Mount and Jogged Link with your 3D printer. Click on the button and save the file on your computer to work, edit or customize your design. You can also find more 3D designs for printers on Ender 3 V2 Drag Chain Extruder Mount and Jogged Link.