Ender 3 v2 Hidden OctoPi Mount
thingiverse
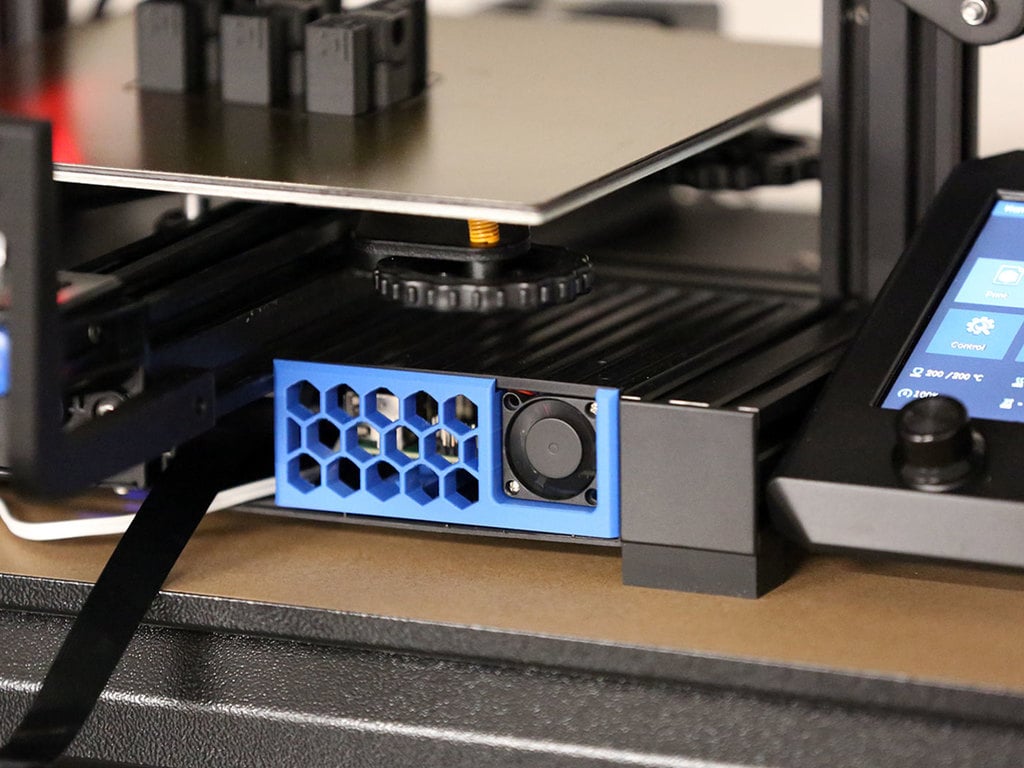
<body>The tool-drawer holder in the Ender 3 v2 is the perfect place to put a Raspberry Pi running OctoPrint’s OctoPi (big shout outs to Gina Häußge and Guy Sheffer). Just screw the RasPi on the frame, plug in the connectors and slide it into the printer.</body> ##Design features## + Compact and tidy Raspberry Pi mounts for three different Pi’s + Active 30mm fan, 40mm fan and passively cooled versions + Push-fits into the drawer shelf of the Ender 3 v2 + Does not require any modifications to the printer + Easy tool-less access from the front + Big openings for airflow and wiring + Allows finger access to micro-SD card and camera connector while mounted on the frame + Big build-plate contact minimizes warping + Prints without supports + Looks like it’s meant to be there ;-) <body>There are three frames, one each for the RasPi 1, Raspi 2, 3 & 4, and the RasPi Zero 2W. The (ancient) RasPi 1 has two diagonal mounting holes, the 2, 3 and 4 have four identically spaced mounting holes, and the Zero 2W has four tightly spaced ones.<br /><br /> Additionally, there are three “flavors” of each frame: to fit a 30mm fan (7-12mm thick), a 40mm fan (preferably 10mm thick i.e., a 4010), and a fan-less version. The latter works fine as the workload on the processor is minimal: the hottest part of the Pi is the USB controller which has never exceeded 60C/140F so far (see IR pictures). The fan-less version can also be used with Pi-integrated cooling solutions.<br /><br /> 5V fans which connect directly to the RasPi’s GPIO pins are readily available prewired with 2.54mm connectors, only on the Z2W will you have to add headers or solder directly yourself. Most RasPi fans come with three wires: red is +5V, black is ground, and the blue wire communicates with the Pi (but is not required). See pictures for details. Mount the fan to frame before installing the Pi.<br /><br /> I found some short (25cm/10”) USB-A to micro-USB cables that provide a tidy connection to the printer. Try to find one with a USB-A plug that’s not too long so it doesn’t have to kink; it’s 40mm between the plug and the sidewall (see picture). There is plenty of room for the power plug at the back. All the cables exit at the front, hidden under the 4040 Y-axis extrusion.</body> <br /> <hr /> <body> Check out more Ender 3 v2 accessories from <a href="https://www.thingiverse.com/department_nine/designs/" title="D9"> Department_Nine</a>!</body> <hr /> <br /> <br />
With this file you will be able to print Ender 3 v2 Hidden OctoPi Mount with your 3D printer. Click on the button and save the file on your computer to work, edit or customize your design. You can also find more 3D designs for printers on Ender 3 v2 Hidden OctoPi Mount.