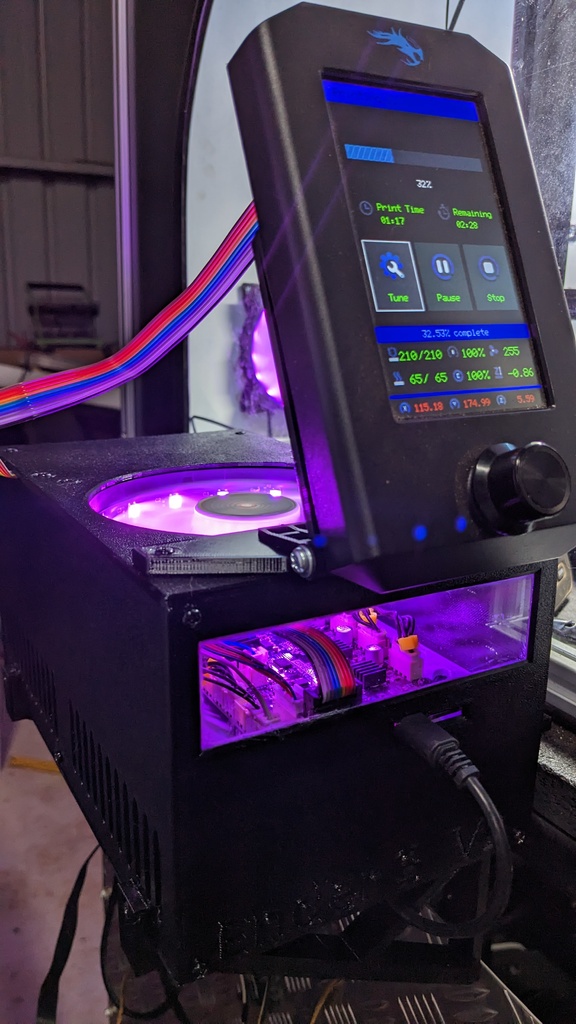
Ender 3 v2 mainboard-powersupply enclosure v2.1
thingiverse
Gooday fellow squirt masters, I have designed and now shared an external enclosure for the ender 3 v2, this is an advanced level build and not for the faint of heart however should you accept such a quest then the details below will help. All the cables are to short to fit as they are unless you have the enclosure turned at a weird angle so extensions are needed, all the screws will self tap so go easy on how tight you do them up. Cooling: Is whisper quiet and really efficient. NOTE: THIS ENCLOSURE IS SETUP ON A POSITIVE PRESSURE SYSTEM A HI-PRESSURE STATIC FAN IS REQUIRED. I tested the power supply both with the lid on and with it off both worked really well but went with it off because I hate the sound of the fan when it kicks in however with the powersupply lid off and the std fan pugged in it didnt AutoStart at all Printing: PLA will work however I went with PETG as my enclosure is in a shed and i found that PLA does tend to remix its self over time at the very least I would print the suboard in PETG/ABS and then the rest in PLA. I went with gyroid infill as I have made the panels as thin as possible so at least 4 top and bottom is better with 25% gyroid infill. You will need to run custom firmware to extend the bed to 235mm yes it does print just takes a little bit of fiddling i have uploaded some firmware that has the edit done for you....NOTE THIS WILL EDIT YOUR PRINTERS FIRMWARE DO SO AT YOUR OWN RISK There is multiple files for the top as you have the option to screw the screen to the top on a hinge if you desire so there is a cable hole for the screen ribbon cable, as well as the option for an open fan top or grill. Screen: Hay im a nice guy I also made a screen mount that can you can print it even pivots if that does it for ya she is held together with 2 m5x25mm bolts and flat washers to suit. Mounting: I have added some mounting arms for either a wall or shelf as well they screw into both sides of the case with the longer screws I recommend running a cable from the side of the power supply to your printer as well to make sure the printer is earthed. Front: I like bling so I have made a window for the front using acrylic but have added a printable template that you could print in clear filament if you cant get anything else. Others: There is two spots to fit LM2596 buck converters for all your power needs https://www.ebay.com.au/itm/155272077697?mkcid=16&mkevt=1&mkrid=705-154756-20017-0&ssspo=JMkkMR-RSz-&sssrc=2349624&ssuid=1bwR5v80QM2&var=455466849396&widget_ver=artemis&media=WHATS_APP Requirements: - Cable extensions for the axis https://amzn.asia/d/7NkyqjD - 26xm3x6mm screw - x2 m3x20mm screw - x4 m3x10mm screw - M5x25mm for screen mount/hinge - M5 flat washer for screen mount/hinge - solder and heatshrink - 120mm Fan HPS Happy printing and please upload pics and info of any issues you come across while printing feel free to edit and pass on to whom ever you would like. https://youtube.com/shorts/3FEpDFXQsUc?feature=share Disclaimer: you will be playing with high voltage items with your power supply being open I do not take any responsibility if you hurt your self you DO THIS MOD AT YOUR OWN RISK
With this file you will be able to print Ender 3 v2 mainboard-powersupply enclosure v2.1 with your 3D printer. Click on the button and save the file on your computer to work, edit or customize your design. You can also find more 3D designs for printers on Ender 3 v2 mainboard-powersupply enclosure v2.1.