Ender 3 V2 Neo with E3D V6 and Titan from Kingroon
thingiverse
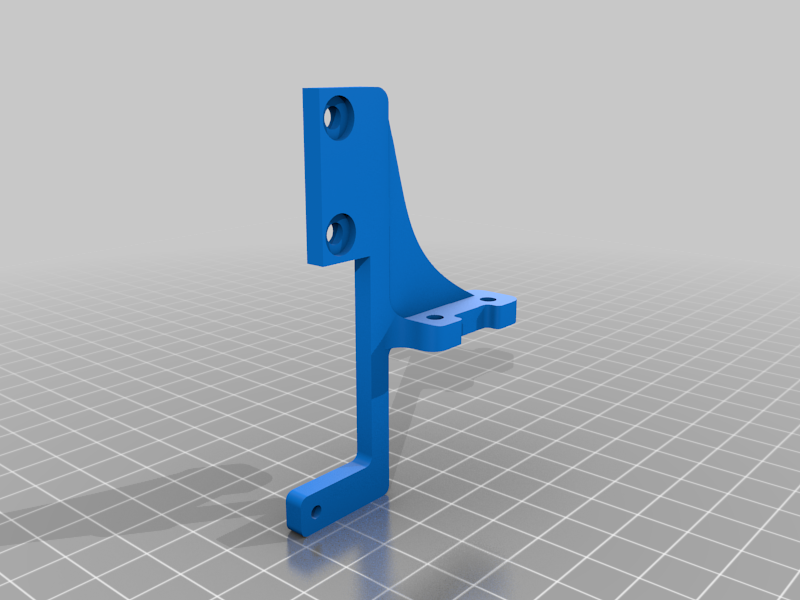
Here an inexpensive E3D V6 clone with Titan extruder in Direct Drive configuration mounted on an Ender 3 V2 Neo. Let's start from important notes: 1. to have the pancake stepper work on the Ender 3 V2 Neo the central wires of the stepper must be swapped (see photo); 2. the VREF voltage of the E stepper has to go from 1.38v to 1v, or the stepper will overheat and fail; 3. E-steps needed to be set near 410 +/-2. Do the E-steps tuning to find better one for you; 4. PID tuning is necessary to have stable temperatures; 5. the stock X belt is too short, you have to build a new one; 6. you have to use Pronterface (or similar tool) to give some commands to correct the offset of the nozzle and CR-Touch positions. It's not necessary to build new firmware. As you can see the X limit switch has been relocated, and needs a 3mm hole drilled just 10mm from back side. The braket I designed is both for the CR-Touch mount and has an hole for the screw M3x15 that activate the X limit switch. Print it in PETG/ABS/ASA because PLA tend to soften with bed heat. You will also need 2x M4x10 to change 2 screws of the shroud to fix the braket. The stock heat cartridge and termistor can be mounted on the E3D heat block. The printable area is maintained to 220x220 (230x230 with Professional Firmware), but the printing results shifted near 5-6mm right. Also the CR-Touch prober is shifted left. To have full Y size it's necessary to change the belt tensioner or cut near 5mm from top where the Y carriage hit. Print my STL. It's possible to have all of the printing area back and move the CR-Touch probe to the right offset with Pronterface and for me the command are: M851 X-55 Y-5 # Change CR-Touch offset from the nozzle M206 X13 Y-5 # Move 13mm left and 5mm top the printing area M500 # to store permanently. But check how you have mounted your kit for the right values. It's impressive how good prints this inexpensive upgrade. And it opens the Ender 3 to the exterminated world of the E3D V6 products. Here you can buy it: https://kingroon.com/collections/creality-ender-3-parts-accessories/products/titan-direct-drive-extruder-kit Also a video of the mod: https://youtu.be/DeMJIMYlP7Q EDIT: Try MRISCOC Professional Firmware, all the area configuration can be done from screen menus: https://github.com/mriscoc/Ender3V2S1/wiki/Calibration-Guides Here the page of the project: https://github.com/mriscoc/Ender3V2S1 Print this modified belt tensioner to move the Y bed another 8 mm forward: https://www.thingiverse.com/thing:5791997 Now my printer is and Enderoon.
With this file you will be able to print Ender 3 V2 Neo with E3D V6 and Titan from Kingroon with your 3D printer. Click on the button and save the file on your computer to work, edit or customize your design. You can also find more 3D designs for printers on Ender 3 V2 Neo with E3D V6 and Titan from Kingroon.