Ender 3 V2 OctoPi Automation Enclosure
thingiverse
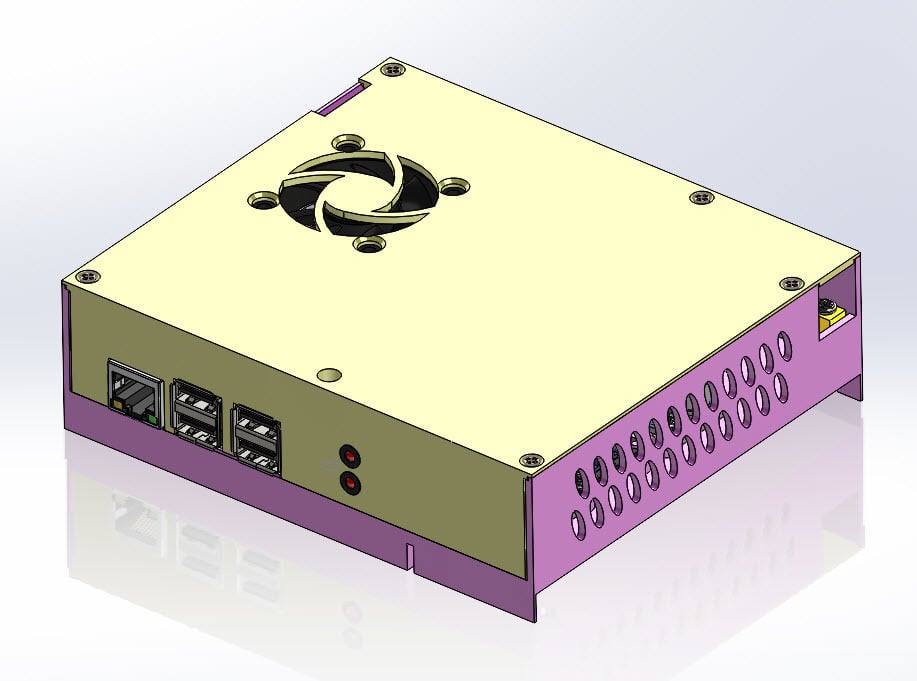
I didn't like any of the solutions I found for mounting an OctoPi on an Ender 3-V2, so I spent a preposterous amount of time creating one. I don't think the storage drawer is very useful, so I designed it to use that space, and to also house a couple relays and step-down buck converters so I can A) power the Pi from the Ender's PSU, B) switch the ender motherboard on and off from the Pi, and C) switch the lighting from the Pi. I did not intend to share it, but I'm really happy with how it turned out, and I spent too much time on it not to show it off. I do not necessarily recommend trying to print this as-is. There are some things I would change if I felt like continuing to work on it. I would get rid of the thin ridge around the top edge that is supposed to make the lid nest in. It is weak and doesn't really serve a useful purpose. I'd probably also get rid of the tab/slot on the sides of the lid's front face. They just don't print with enough precision to be useful. The tab and slot at the bottom of the front face of the lid is okay though, and I think does add to the strength and clean appearance of the unit. I would also add a thin layer under the mounting holes in the support area so they print cleaner (expecting to drill it out after printing), and I'd add an external power LED so I can tell when it's turned on. There is no visible indication that the power is turned on. The way it works, the power switch in back turns on the OctoPi, and then you have to login to that to power up the printer and/or the lights. The enclosure is large enough, and designed with enough precision that if your printer is even slightly out of square, as it almost certainly is if it's an Ender, then you're going to find out about it. I thought mine was pretty good, but I had to spend most of a day rebuilding my printer to get this to print accurately enough to fit in the frame, and to get the holes in the lid to line up close enough to get screws in, and it was still far enough off that I broke some of the lip off around the top of the frame. When the holes in the front line up, the holes in the back are off by about 2mm on mine, but I am able to force it. This is designed specifically to print with a 0.20mm layer height, and you may have problems if you use any other height. The frame also requires a large support. I added some wings to that area to get the edges to print cleaner, so those have to be broken/snipped off. I printed with black Comgrow PLA because that's what I had. I exported my Cura settings in case you want to see. I think the support settings are pretty important, and you definitely want to check "Outer Before Inner Walls" to get the best accuracy you can. As far as the electronics, if you don't recognize what I'm doing, this project probably isn't for you. I don't want anybody to burn their house down because of me, and I'm pretty sure that's a possibility. There's 24 volts exposed inside this box, and it would be easy to create a dangerous short if you aren't careful. Also, probably don't touch this when it's turned on. I don't know how bad it would be, and I don't intend to find out. This was also a fairly expensive project as far as DIY goes if you don't already have the parts. I'll put a list at the bottom of all the stuff I bought for it. Unlike some of you, I did not have a large selection of parts lying around when I started this. I secured the enclosure to the printer frame with 3 M4 T-Nuts that I printed in PLA. I used 6mm M4 button-head bolts threaded directly into the PLA T-Nuts. This works fine as long as you don't overtighten. You may also want to replace the nuts if you remove them. I included the STL files for the T-Nuts. **3/23/2021** - Added mounting holes for 3mm LED lights in the face plate so I could mount a power light and a data light for the Pi so I can see when it is powered on. Also added a small rung so I can zip tie the LED wires to the face plate for support.
With this file you will be able to print Ender 3 V2 OctoPi Automation Enclosure with your 3D printer. Click on the button and save the file on your computer to work, edit or customize your design. You can also find more 3D designs for printers on Ender 3 V2 OctoPi Automation Enclosure.