Ender 3 X gantry carriages, without eccentric nuts, self square.
thingiverse
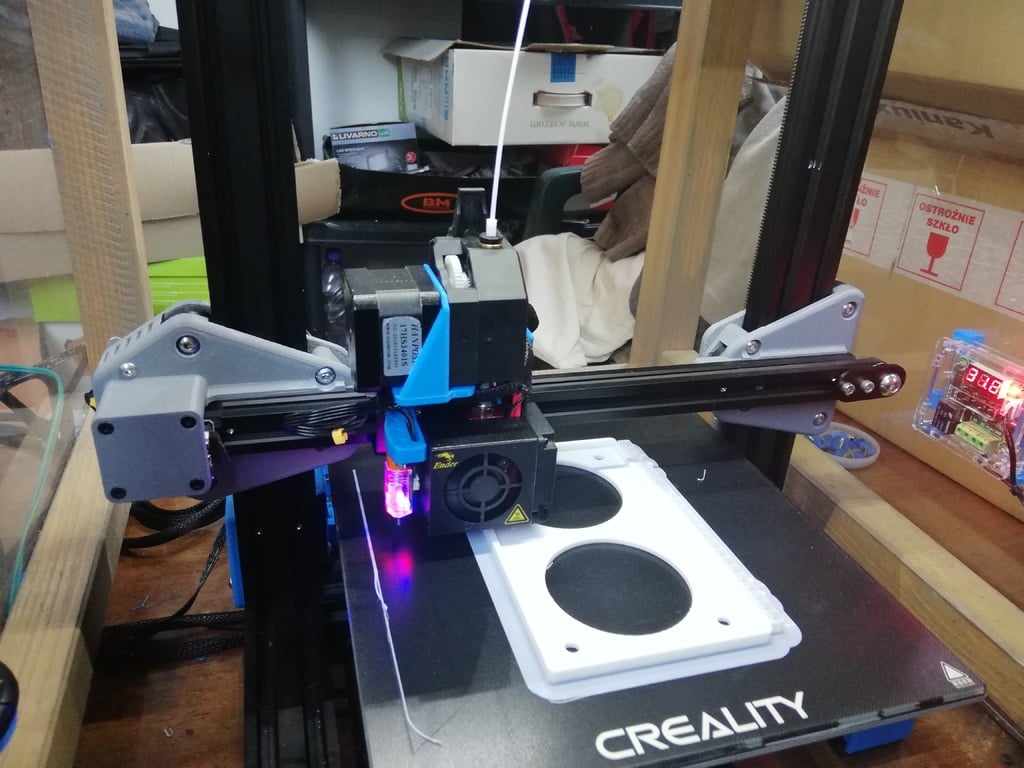
Questions? Announcements. Support. https://www.facebook.com/groups/679001895990790 Disclaimer: This is not project for beginner nor visual bling to your printer. It requires precision and basic assembling skills. Read carefully. (and don't hesitate to ask) ###What? Z brackets for Ender 3 that holds X gantry perpendicular to Z and you don't need to worry about complicated alignment. Also for alignment of wheels is used screw instead of eccentric nut for precise and convenient alignment. Right now only for Direct Drive machines. Works also with dual Z setup from my other former project (https://www.thingiverse.com/thing:4182312). This setup I use mainly with dual Z configuration and Direct Drive with anti-backlash spring-loaded nuts. ###Why? If you ever did rebuild and alignment on Ender 3 X-axis you already know how much precision and work it gets. So I was thinking about how it can be done easily. And I also hate aligning wheels using an eccentric nut. And I have another project which is custom build CR10 S4 and these carriages really help me get it running. https://www.thingiverse.com/thing:4333962 ###How? Right now I don't have time to complete BOM but you will need M5 screws, nuts, and washers. And also some M4 screws and nuts. I will later write it down. Print it with high infill (more than 60) Here I will also report missing information that other users report back and I think you should know: User Jaborza found out that stock hotend wheel screws should be 3-5mm shorter. ( it doesn't apply if your hotend uses an adapter for direct drive like me.) As a general rule, your screw should not be longer than the end of the nut ...may by max 1 mm longer. So pay attention to it. ####Options (for now all without extruder) - stock nut, single or dual Z setup - anti-backlash spring-loaded nut, single or dual Z setup - POM anti-backlash adjustable anti-backlash nut, single or dual Z setup All of these are possible with stock Ender 3 M4 screws for X-axis or M5 CR10 S4 version or drop-in T-nuts. X motor pulley should by pulled 3mm out or use other pulley fixed with screw. For all versions, you need also new adjustable motor mount (https://www.thingiverse.com/thing:2932344) ####Right carriage - The front part comes in 3 variations: stock Ender 3 M4 X-axis screws, CR10 S4 M5 screws, and custom T-nuts. - Back part "carriage-back.stl" is for stock nut or spring-loaded anti-backlash nut. In that case you will also need to print "nut.stl" - Back part "carriage-right-back-ab-pom.stl" is for common adjustable anti-backlash nuts made from Delrin ( POM) - You need also one complete push roller. ####Left carriage ####Push rollers (I just call it that way if you have a better name just left comment) You need two push-rollers , one for each side. They are identical. One roller need: - M5x20 screw - M5 nut - two M5 standard washers (assembly is covered in photos) ###Left carriage CR10(M5version) M5x20 3 M5x25 2 M5x30 4 M4x30 2 M5 nut 6 M5 washer 4 M4 nut 2 Ender 3 ( M4 version) M5x25 2 M5x30 4 M4x20 2 M4x30 2 M5 nut 6 M5 washer 4 M4 nut 2 ###Just some build notes. This is project for skilled builder. Use standard 5mm washers for both side of all wheels. Always use appropriate amount of force. Update Jun 12 2020: Added X switch caps for filament feed relocation to bottom
With this file you will be able to print Ender 3 X gantry carriages, without eccentric nuts, self square. with your 3D printer. Click on the button and save the file on your computer to work, edit or customize your design. You can also find more 3D designs for printers on Ender 3 X gantry carriages, without eccentric nuts, self square..