Ender 3 Z-Axis Floating Nut
thingiverse
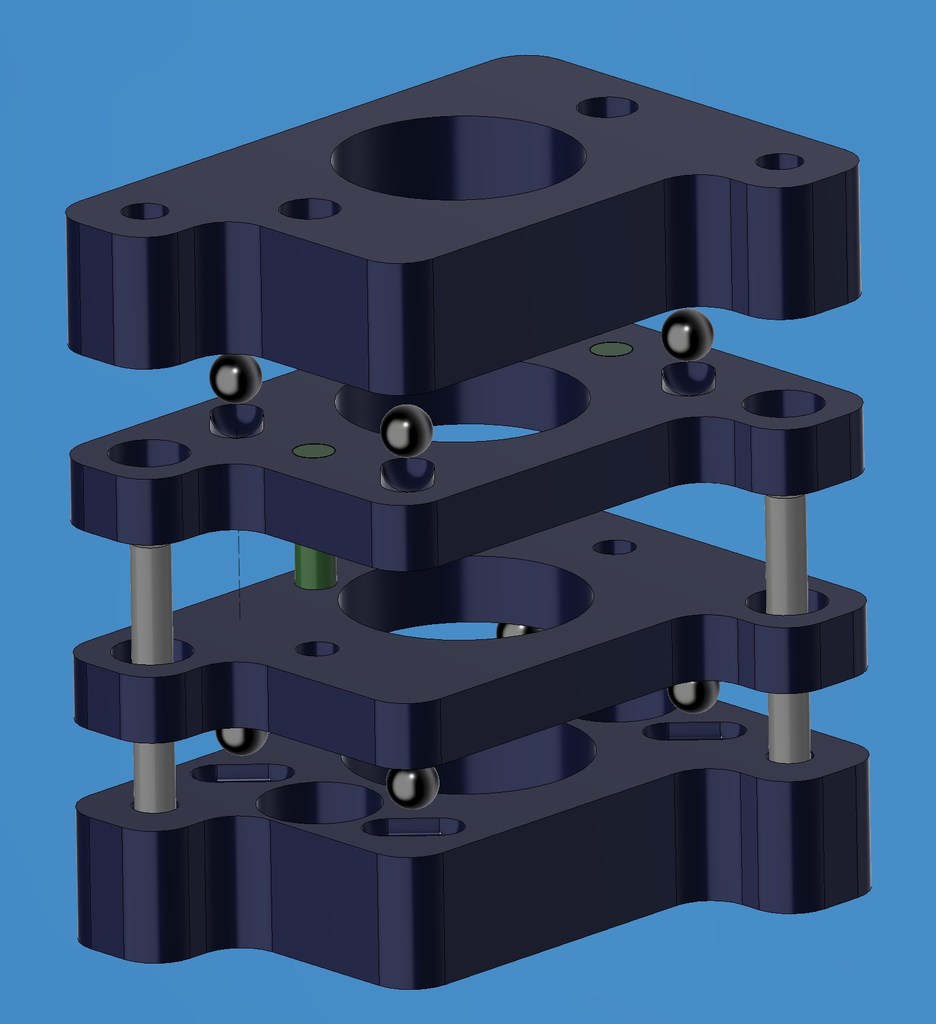
A compact z axis floating bearing without magnets. Uses 8 balls 2.2-2.4mm dia. balls (from a 16x8x6mm bearing) 1. Print all four parts on the flat sides. 2. Use sand paper to smooth the top printed surfaces which mate with each other. 3. Use 2 pieces of filament to pin the centre top & bottom parts together. (green pins in exp. view) 4. Install the brass lead screw nut into the bottom plate. 5. Use two pieces of TPU or flex filament (white pins in exp. view) and thread all three piece together loosely. 6. Add 4 balls to each layer and carefully pull the TPU tight. 7. Apply pressure and run the bearing in to make sure it moving smoothly. 8. Apply superglue to the tpu on one side and let dry. Do the other side and pull the TPU slightly and wait for the glue to set it under tension. 9. Trim off the excess. 10. Install. The photos show a previous version of the centre piece. The gif seems to show properly when you click the larger view.
With this file you will be able to print Ender 3 Z-Axis Floating Nut with your 3D printer. Click on the button and save the file on your computer to work, edit or customize your design. You can also find more 3D designs for printers on Ender 3 Z-Axis Floating Nut.