Ender 5 Klipper Electronics Case
prusaprinters
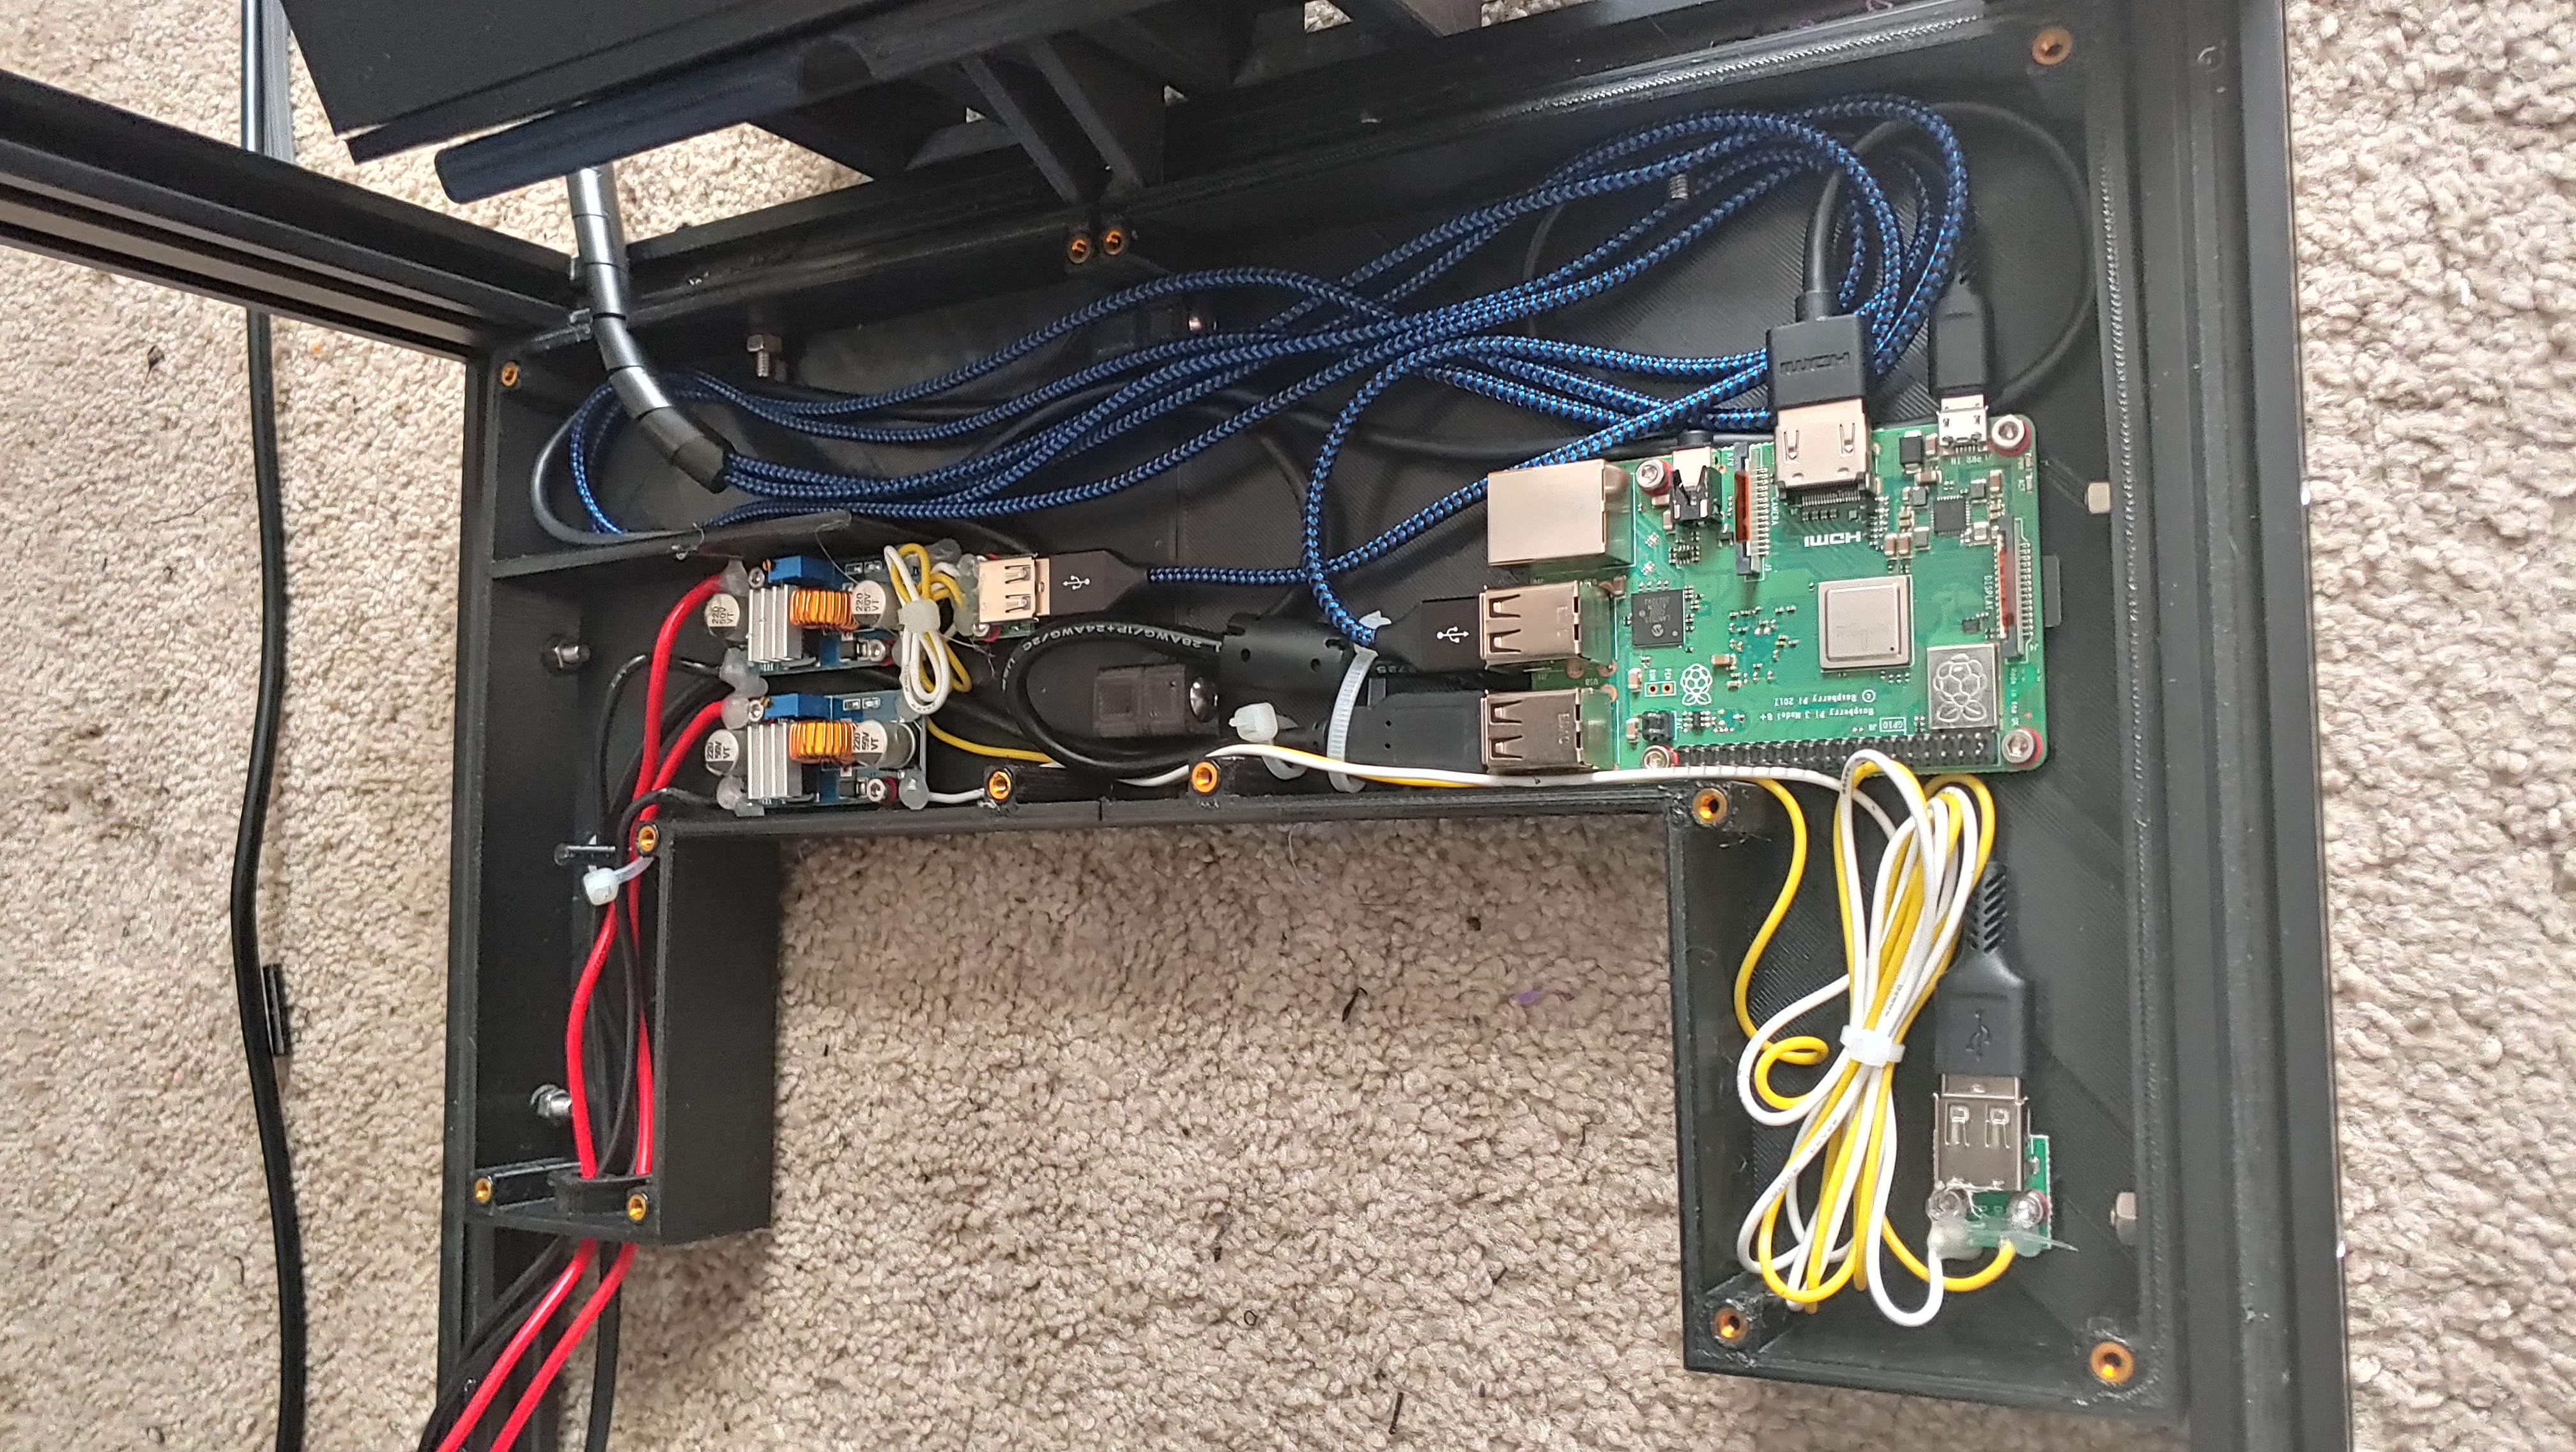
<p><i><strong>NOTE:</strong></i> In order to use this electronics case, you'll have to have mounted your Ender 5's original electronics enclosure to the rear or your machine or otherwise relocated its contents into a custom solution. For those interested, something like this is a good place to start: <a href="https://www.printables.com/model/127714-ender-5-rear-mount-electronics-power-bracket"><i>https://www.printables.com/model/127714-ender-5-rear-mount-electronics-power-bracket</i></a></p><p>You will likely need to source new M5 mounting hardware for this, as you'll likely be reusing it (and then some) to mount the original electronics case to the rear. In order to mount this, you'll require…</p><p><strong>Mounting Hardware:</strong><br>8x M5 Nuts<br>6x M5x25 Screws<br>2x M5x12 Screws</p><p><strong>Hardware to put inside it:</strong><br>1x Raspberry Pi (Model Choice)<br>2x XL4015 Buck Converters<br>2x Mountable USB Type A Female Port PCBs</p><p>The types of XL4015s I used and designed this case for appear to be rather non-standard, so I will be supplying the .STEP file of this design along with the other files so that you may make modifications if desired. I can also possibly edit the mounts to your needs if requested. That said, there is possibly still sufficient room near the back right of the case to glue mount buck converters.</p><p>Assembly is simple, simply insert two M5 Nuts into the two adjoining mounting holes of the Half 2 (Right) part, then adding two M5 screws to the Half 1 (Left) side and tightening the two halves together to form a solid connection. The now single unit then can be installed in the old electronics case's place, where the added screws and nuts will give more rigidity to the part. There are raised circular surfaces on the interior walls of the case to indicate where the nuts should go, as unlike the adjoining mounts, there is no specific cutout for the M5 nuts.</p><p><i>This design forsakes some of the extra room that could be gained from removing the “L” shape of each half of the case, but this case was intentionally designed to support those who may have bed support arms underneath the bed which lowers the clearance ceiling of the part overall as a precaution.</i></p>
With this file you will be able to print Ender 5 Klipper Electronics Case with your 3D printer. Click on the button and save the file on your computer to work, edit or customize your design. You can also find more 3D designs for printers on Ender 5 Klipper Electronics Case.