Ender 5 plus silicone nozzle cleaner
thingiverse
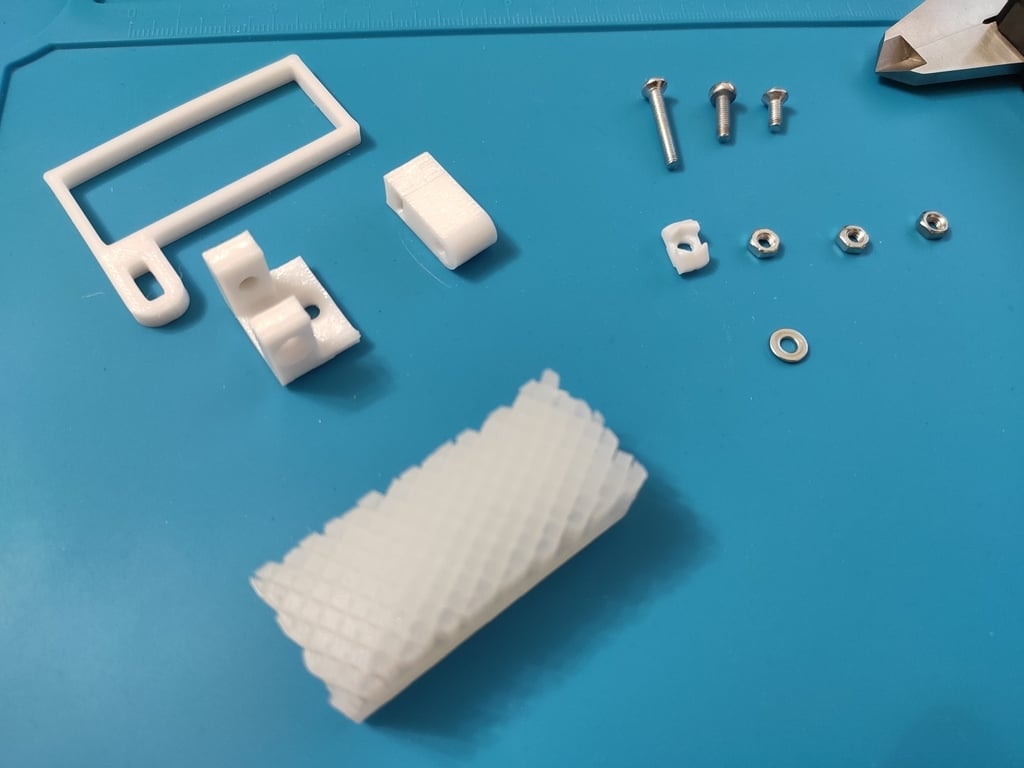
[Demo](https://youtu.be/RVPKp-yUJQA) ### Info I've tried brass brushes, but they're limited in size (if you use some common brushes available widely) and the melted filament stick too much to the wires so it's hard to remove it. This is a cleaner I came up with. Apart from printed parts you should cast a silicone brush using one-time mold (cast, destroy the mold, use your silicone part). Also this cleaner occupies only ~1cm of printing surface if you bend it and move outside of the print bed (see photos). ### BOM - M3 nut x2 - M3x8 bolt - M3x12 bolt with washer (M3x8 also works) - M3x22 or M3x24 bolt - M3 t-nut (I use M3 nut + [printed t-nut](https://www.thingiverse.com/thing:3050607)) - Some platinum cure 2-component silicone, around 30 shore A, better to buy transparent and color it when curing (important! don't use tin based silicone since it's not high temperature resistant) For this model you need not more than 30ml of silicone in total (15ml A + 15ml B), but if you buy 500ml or 1000ml tare, you'll have a lot of fun creating molds and casting cool things (socks for the heater blocks, socks for clips of your heated bed since bare metal clips can scratch the PCB on the bottom side of the bed, and a lot more stuff). ### Printing and casting the silicone brush First, print brush_holder.stl, brush_lever.stl and brush_mount.stl in PETG or ABS with your default settings and 50%+ infill. Next, print brush_mold.stl in PLA (it is important) with following settings: - Wall line count: 1 - Top layers: 0 - Bottom layers and Initial bottom layers: 1 - Infill line distance: 2.7 - Infill pattern: Grid - Infill line directions: [30] This config gives you a nice mold with thin walls between brush fibers. Make sure you don't have problems with infill in general, it should be even, with no holes in the walls. If it's not, lower your infill speed and/or increase infill flow. Cast the silicone in it. It is important to take out as much air as possible. To do this, you can use a vibrating platform or any other strong vibration motor, or vacuum camera if you have some. I used something like [this](https://www.chipmaker.ru/uploads/post/monthly_2007_04/post-1068-1177871187.jpg), but made of a half of plastic bottle and some strong rope (cast the silicone, place the mold into the bottle, rotate it fast, check for bubbles, repeat). Wait for 12-24 hours, warm the whole thing with hairdryer or something else to make the mold soft and gently destroy the mold using cutters, pliers or any other hardware you have. If it doesn't work well, put it into the fridge for 20-30 minutes, take it out and smash it with a hummer several times (PLA becomes more brittle when freezed). Then assemble everything, install it on the printer (brush_mount.stl should be as close to the bed as possible) and use this piece of Start gcode for your prints (this is my complete start gcode, but the important part is only between Begin/End of nozzle clean, also Z height can be different for your setup, experiment with it a bit): ```gcode M220 S100 ;Reset Feedrate M221 S100 ;Reset Flowrate G28 ;Home G34 ;Align z steppers (only if your setup supports DualZ) M420 S1 Z2 ;Enable ABL using saved Mesh and Fade Height ; Begin of nozzle cleaning G92 E0 ;Reset Extruder G1 Z30.0 F5000.0 G1 X350.0 Y30.0 G1 Z18.0 G1 E25 F100 G1 X350.0 Y50.0 F3000.0 G1 X342.0 Y55.0 G1 X358.0 Y65.0 G1 X342.0 Y75.0 G1 X358.0 Y85.0 G1 X350.0 Y95.0 G92 E0 ; End of nozzle cleaning ``` The whole thing works like 14 times out of 15 which is acceptable for me.
With this file you will be able to print Ender 5 plus silicone nozzle cleaner with your 3D printer. Click on the button and save the file on your computer to work, edit or customize your design. You can also find more 3D designs for printers on Ender 5 plus silicone nozzle cleaner.