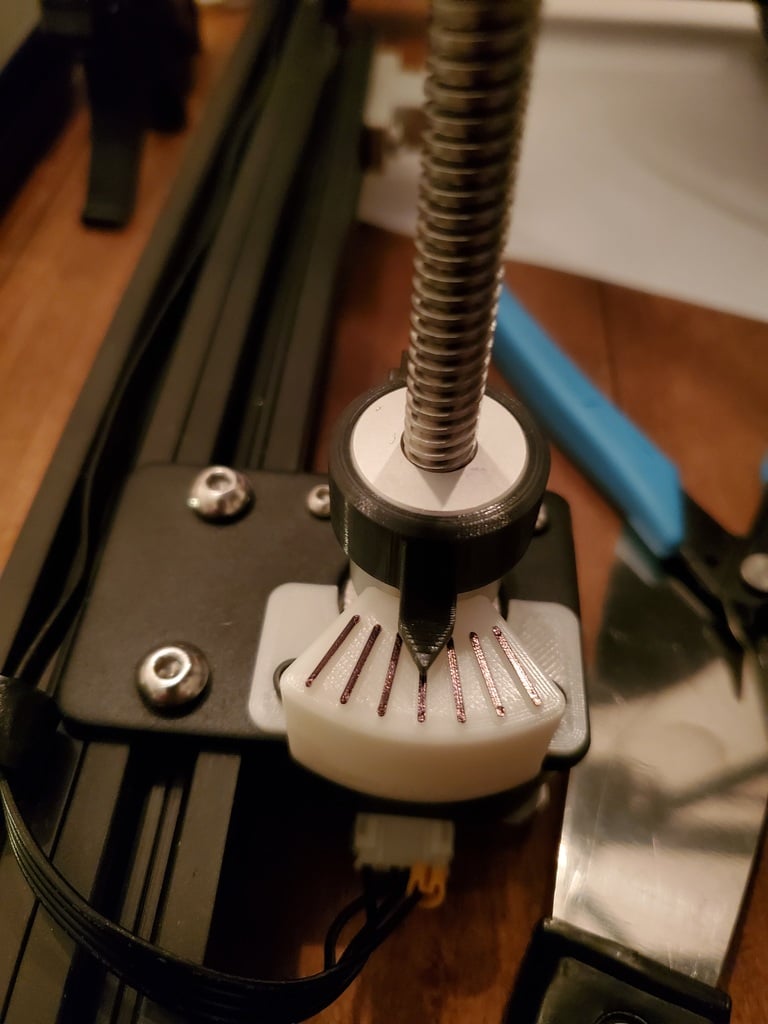
Ender 5 Plus Z screw sync indicator
thingiverse
Due to the Ender 5 Plus's independent Z screws, they can easily get out of sync, making it a challenge to maintain proper alignment. Removing any part can cause the bed to fall and become misaligned. If you're like me and don't run auto-bed leveling before every print, this often leads to crashes. These indicators will provide a quick visual cue to check if the Z screws are still in sync after installation. After installing, it's easy to synchronize them before powering on the printer. Included are four files: the base as a single unit and a pair, along with the pointer as a single piece and a pair. Print these at high quality for optimal results. The pointer that fits onto the coupler should have sturdy walls to ensure the band is solidly attached. I used PLA for my prints, and so far, everything has worked well. To install this upgrade, you'll need six M3 x 10 SHCS screws. You won't necessarily need to tap the holes in the pointer before installing, but it's a good idea to run the screw through first. To begin installation, manually level the bed and then perform an auto-leveling routine. Once you're satisfied with the results, home the printer. Next, install the base using the front two stepper bolts. You may be able to use the factory-provided bolts, but I found them to be slightly too short. Then, clip the pointer over the Z screw and snap it down over the coupler before installing your screw. If you prefer, you can install the base before leveling the bed. To do this, align the pointer with the printer after homing and powering on without rotating one of the screws. From now on, the pointers should always match each other until you perform another manual level, at which point you may need to make adjustments. Each tick mark on the base represents 9 degrees, which translates to 0.1mm of Z travel. There's a statement on the base indicating this measurement, but it can be difficult to read after printing.
With this file you will be able to print Ender 5 Plus Z screw sync indicator with your 3D printer. Click on the button and save the file on your computer to work, edit or customize your design. You can also find more 3D designs for printers on Ender 5 Plus Z screw sync indicator.