Ender-6 & BIQU H2 mod max print area
thingiverse
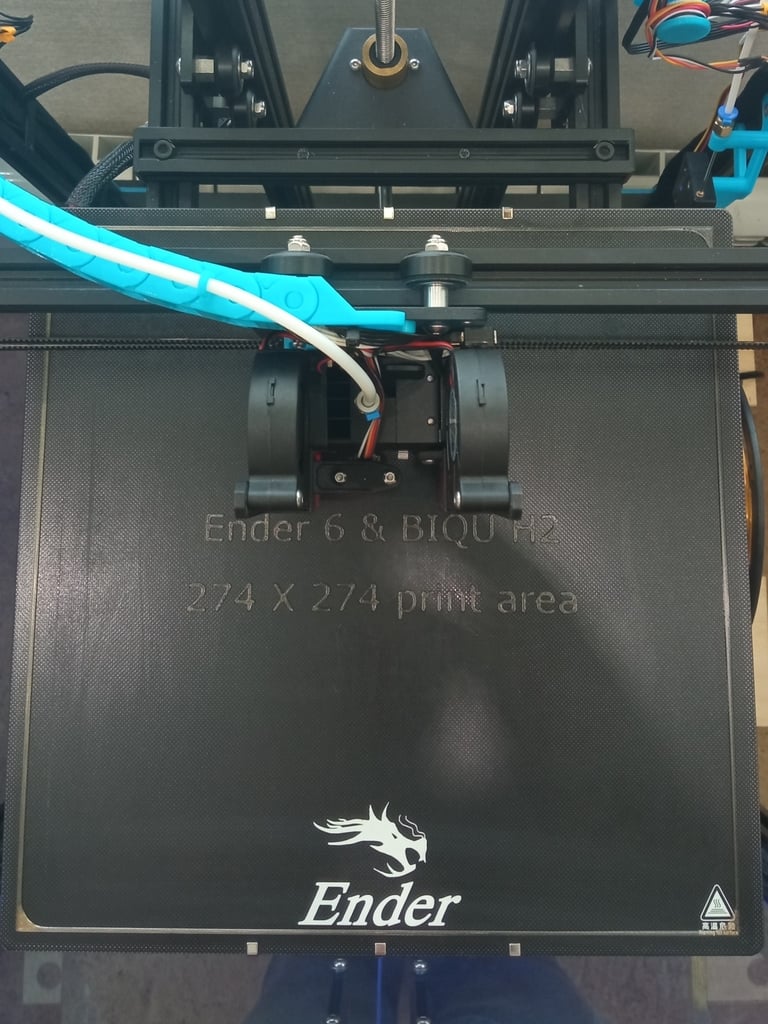
BIQU H2 4x4 points mount for Ender-6 --------------------------------------------------- Intended to achieve maximum print area. For this purpose, the nozzle located in the center of the carriage. **Attention**: X end switch must be [relocated](https://www.thingiverse.com/thing:5948318) first in order to reach 274 mm X span. The mod is not that easy and requires a bit of metal work. Comments on photos in order of assembly: 1. Area test print. 2. Mount & H2 assembly (M3x20 through the fan's bottom hole, M3x8 on mount's back sink in the H2 back top hole). 3. Front side mounting on carriage (2 x M3x8) 4. Top left screw & nut (M3x18) to the fan. 5. Back side mounting (M3x12 & shaft in the pre-inserted M3 nut, M3x16 & shaft in the H2 back bottom hole) 6. Gantry bracket cut allow carriage moving up to 274 mm by X. 7. Fan ducts mounted: right - by 2 x M3x6, left - by M3x20 through the fan's top hole in the H2 body, by M3x18 through the fan's bottom hole. Design remixed from [K3D EH2P project](https://k3d.tech/ehp/guide/). Air ducts designed for GDStime. If you have different cooler, check the exhaust dimensions. For example, Pengda is thicker, does not fit. 8. Left duct bottom screw & nut from back side of the fan. The air ducts are printed from ABS Carbon composite, the rest of the parts are from PETG. Combining my [sliding Y end switch](https://www.thingiverse.com/thing:5916801) & [sliding X end stop](https://www.thingiverse.com/thing:5948318)I got 274 x 274 mm print area. 04/12/2023 Cooling tests revealed asymmetry. In the original design, the left duct is 2 mm further from the nozzle. Added corrected version. Also, the depth of the fan in the ducts has been increased from 1 to 2 mm. Крепление BIQU H2 4x4 для Ender-6 --------------------------------------------------- Целился получить максимальную площадью печати. Для этого сопло расположено по центру каретки. **Внимание**: чтобы получить 274 мм пролет по X, сначала необходимо [переместить](https://www.thingiverse.com/thing:5948318) концевой выключатель X. Мод не простой и требует немного работы с металлом. Комментарии к фото по порядку сборки: 1. Тест получившейся площади печати. 2. Сбока крепления и H2 (M3x20 через нижнее отверстие вентилятора, M3x8 в заглубление сзади крепления и верхнее отверстиие H2). 3. Монтаж спереди на каретке (2 x M3x8). 4. Вeрхний левый винт через вентилятор (M3x18). 5. Закрепление с обратной стороны (M3x12 и втулка в предварительно вставленную гайку M3, M3x16 и втулка в заднее нижнее отверстие H2) 6. Вырез кронштейна портала, позволяет перемещать каретку до 274 мм по X. 7. Смонтированы воздуховоды: правый - на 2 х М3х6, левый - на М3х20 через верхнее отверстие вентилятора к корпусу H2, на M3x18 через нижнее отвестие к вентилятору. Дизайн - это ремикс из [проекта K3D EH2P](https://k3d.tech/ehp/guide/). Воздуховоды разаработы для GDStime. Если у вас другие кулеры, проверьте размеры выхлопа. Например, Pengda толще, не влезает. 8. Нижний винт левого сопла с обратной стороны вентилятора. Воздуховоды напечатаны из композита ABS Carbon, остальные детали из PETG. Вместе с [перемещением концевого выключателя Y](https://www.thingiverse.com/thing:5916801) и [перемещением концевого выключателя X](https://www.thingiverse.com/thing:5948318) получил область печати 274 x 274 мм. 12.04.2023 На тестах охлаждения обнаружена несимметричность. В оригинальном дизайне левый воздуховод остоит от сопла на 2 мм дальше. Добавлена исправленая версия. Также, увеличено заглубление вентилятора в воздуховоды с 1 до 2 мм.
With this file you will be able to print Ender-6 & BIQU H2 mod max print area with your 3D printer. Click on the button and save the file on your computer to work, edit or customize your design. You can also find more 3D designs for printers on Ender-6 & BIQU H2 mod max print area.