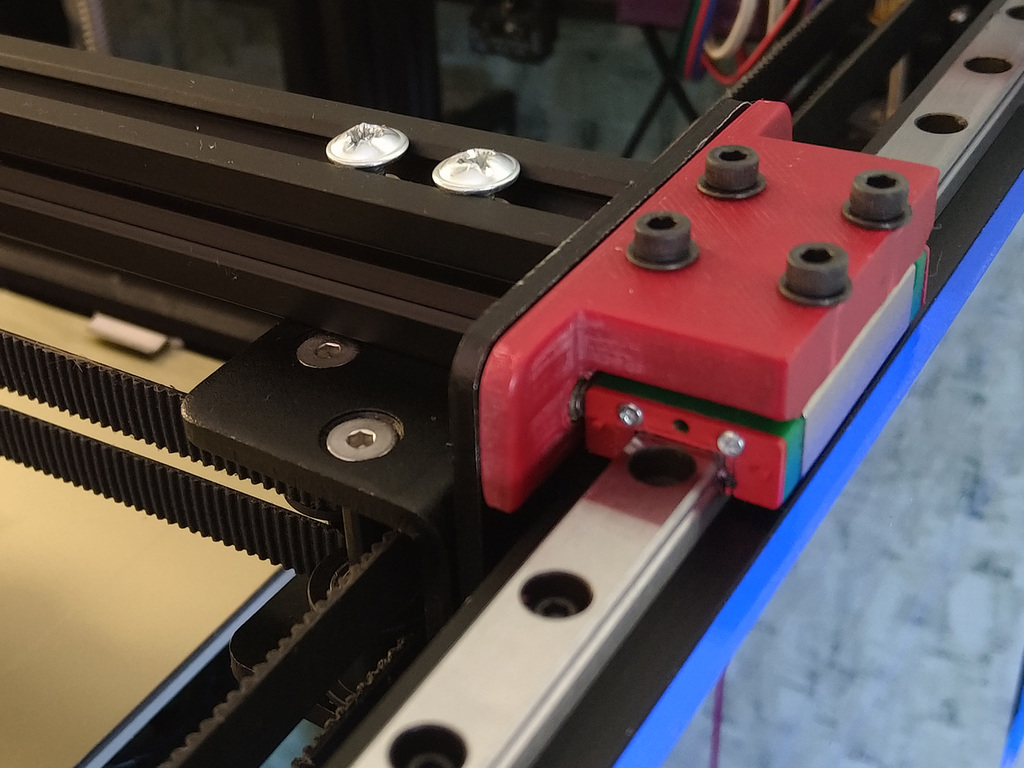
Ender-6 Linear Rail Y
thingiverse
This Y-axis linear rail mod uses 9 mm rails with MGN9H: the carets there are only 20 mm wide, which makes installing an enclosure easier. There is very little disassembly, so you can install it quick and easy. You will not even have to disassemble the belts. For the X-axis linear rail, pls see [for example the design under this link](https://www.thingiverse.com/thing:4800961) ### Required parts _Disclaimer: any AliExpress links are provided for reference only, I don't get any credits if you purchase the stuff using these links (I don't know how to create such links yet), and I don't guarantee the sellers to be reliable._ [Linear rails MGN9H, 350 mm](https://www.aliexpress.com/item/1005002721523331.html) _These are pretty decent quality rails, nice packaging and very smooth. Hopefully, the seller doesn't get spoiled over time._ [Hot melt inserts for linear rail guides, option "M3x3x5"](https://www.aliexpress.com/item/1005002631444577.html) 24 pieces of M3 5 mm outer diameter, 3 mm height M3 12 mm screws: 8 pieces, _you may also require thin M3 shims_ M3 8 mm screws: 24 pieces for M3 holder nuts M5 12 mm button head screws: 2 pieces [recommended] Thread locker: blue, removable, something like [Loctite 243](https://www.aliexpress.com/item/1005003128011880.html) ### Assembly instructions 0) Do one side at a time. 1) Melt the M3 hot melt inserts into the holders. Use a precision knife to carefully cut off any excess plastic that might stick out after the insertion. 2) Melt the M3 hot melt inserts into rail guides. Make sure they sit straight and don't look out of the plastic. Use a precision knife to cut off any plastic that sticks out after insertion. Screw the linear rail to the two printed rail guides using M3 8 mm screws, but leave about 3 mm gap between the rail and the guides. 3) Remove the acrylic side panel, unscrew and remove the wheels. The X axis extrusion will be held in place by belts tension. 4) Make sure there is a M5 screw that holds the metal plate to the 2020 extrusion from the side. Apply some thread locker to the screw. _*Important:* if you have socket head screws here, you need to replace it with button head screws, since socket heads are too thick and block the caret movement_ _I assume this screw is responsible for keeping the metal plate perpendicular to the X-axis extrusion, as the tension on the belts twists it. My printer didn't have these screws, and this is probably the reason why I had to do this linear rail mode in the first place._ 5) Remove the blue corner extrusion covers and unscrew the M5 screw that blocks the extrusion slot. Slide the rail guides with the rail on top all the way, so it touches the back blue corner cover. Re-apply the M5 screw that was holding the frame. 6) Tighten firmly the screws on the rail bit by bit. Do one revolution at a time on every screw before going back to the first screw to avoid horizontal tension on the rail. 7) Re-attach the blue corner extrusion cover and verify that the caret slides smoothly on the rail. Then slide the caret away, so it doesn't obstruct installing the holder. 8) Insert printed nuts into the holes from the upper wheels. The holes are 7.5mm in diameter, while the thinner part of the nuts is 7.2mm in diameter to compensate possible roughness of the printed surface. The nuts should sit tight in the holes: if not, try using a thin rubber shim or a drop of silicon adhesive. 9) Use M3 8 mm screws to screw the holder to the metal plate. Apply some thread locker to the screw. Use thin washers between the metal plate and the caret holder if necessary. 10) Finally, use M3 12 mm screws to screw the caret holder on to the caret. Apply a little thread locker to the tips of the screws. ### Some hints to consider **!!! Important !!! ** It seems Thingiverse has issues with "Download All Files" option: you might get outdated files. Use "Thing files" to download all the models manually instead. Print one rail guide first and make sure it slides inside the aluminum extrusion. Take measurements on the print and scale it in the slicer accordingly to compensate for material shrinkage, printing inaccuracy and anything. The rail guides should be 10.6 mm wide, 4.2 mm high and 170 mm long. Use a precision knife to remove any warts on the prints and smoothen the holes. Thread lockers may be aggressive to ABS plastic, so if you use it, make sure to wipe off any excesses after applying. PS. I would love to see photos and hear your experience, if you choose to do this mod as well!
With this file you will be able to print Ender-6 Linear Rail Y with your 3D printer. Click on the button and save the file on your computer to work, edit or customize your design. You can also find more 3D designs for printers on Ender-6 Linear Rail Y.
