Endoscope Mount for BIBO 2 Touch Dual Extruder X Laser
thingiverse
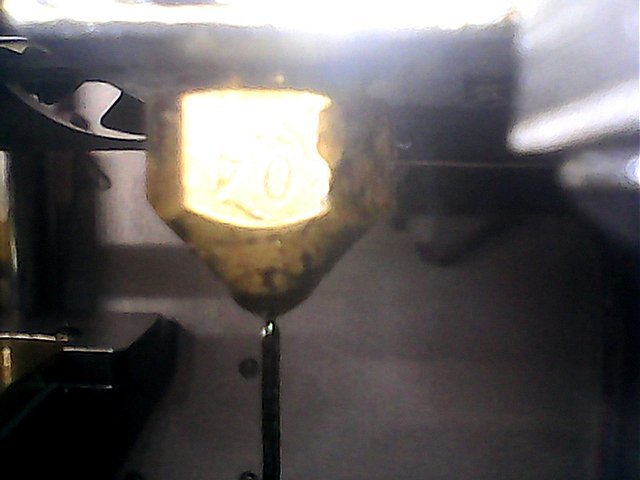
It's hard to see the print as it's being built so I decided to put a small camera close to the nozzles in hopes to watch the progress. During my search, I found this endoscope: http://www.amazon.com/?s=electronics&ie=UTF8&qid=1522958803&sr=8-3&keywords=USB+Endoscope%2C+Amicool&tag=tv-auto-20 It was only $10, so I figured what the heck. Turns out to be a pretty nice unit, especially for the price. The attached file "endoscope mount 5 degrees.stl" is the device that will hold 2 endoscopes, one for each nozzle, on the front of the extruder carriage. Printing the mount is the easy part of this project. The mount replaces the fan grill and positions the camera part of the endoscopes right where the bottom two fan mounting holes are. I could have mounted the scopes lower, but I didn't want to block the view with the naked eye. So, you will need to modify the front fan to remove the lower mounting holes. I have a small belt sander, so it was an easy task. If you don't have a belt sander, you can probably hack away most of the material then use a file or sanding block to finish the radius. See picture "modified fan.jpg". Be careful, these fans are delicate. The hard part is the endoscope. For those of you who don't know what it is, it's a camera mounted on the end of a semi-rigid cable. It's used to see into small or hidden areas like the bore of a rifle, inside a cylinder block or inside of walls. The rigid cable allows you to push the camera into pipes or bend it to look around corners. There are 2 issues with the endoscope. The first is just what was mentioned. The semi-rigid cable is a little too rigid (in my opinion) to mount on the extruder carriage. I'm sure the stepper motors will have no problem moving the carriage, but eventually, the rod inside the cable will work harden and break. The second problem is that the camera end of the scope is a bit too long. If you have a very large print, you may hit the front door with the camera. I haven't done a lot of printing where I needed the entire bed, and even if I did, I suppose I could print with the door open, but I really wanted to make this work without adversely affecting the printer capabilities.. So I decided to buy the $10 endoscope and see if I could modify it. Turns out, there's a small camera mounted on a printed circuit board inside a tube that is sealed with a molded grommet on the cable (see "molded grommet.jpg". If you carefully cut/work on the grommet, you can get it out. See "camera apart.jpg". This allowed me to 1) cut the tube to a little less than the length of the pc board and 2) replace the rigid cable with my own cable. I didn't have a 6-conductor cable, so I wound one with 6 #28 wires. This is very flexible so there is no issue with resistance. If you don't have a 6-conductor cable nor the wire to make one, you can strip the insulation off the endoscope cable, unwrap the shield and work the steel wire out of the bundle. If necessary, you can cut the wires to length. Bend the wires so they come off the board at a 90 degree angle so as to avoid hitting the door panel. Before you bend the wires, note which direction to bend them or your picture will be rotated 180 degrees. You'll need to glue the camera into the tube or it will rotate. I simply used a couple dabs of model car glue, but you can use epoxy, if you like. I would avoid CA because the fumes may fog up the inside of the lens. The finished part is shown in "modified camera.jpg". I just checked Amazon, and found that I purchased the last 2 of these endoscopes. Not sure if or when they will be available, but I found this one: http://www.amazon.com/Endoscope-Pancellent-Waterproof-Borescope-Inspection/dp/B01MR8EONS/ref=sr_1_2_sspa?ie=UTF8&qid=1522673250&sr=8-2-spons&keywords=amicool+usb+endoscope&psc=1 It looks identical to the one I purchased, but the camera diameter is only 5.5mm, rather than the original that has a diameter of 7mm. You can either modify the mount, or simply print a sleeve and use the mount as is. The important thing is to find an endoscope that you can take apart. Look for one that has a molded grommet where the cable fits into the camera tube. If you can get it out without destroying it, there's a good chance you can make this work. UPDATE 4/8/18 I broke one of the endoscopes so I went back to Amazon and found another one. I can't seem to get the links to work, so go to amazon and search for ASIN "B074KXB3JM. This unit is 7mm diameter and is the exact same unit as the first units I purchased, except that it does not have a rigid cable. This is better because all you have to do is dig out the grommet and keep the wire. Just bend the wire 90 degrees and you can use it as is without having to remove the rigid steel wire.
With this file you will be able to print Endoscope Mount for BIBO 2 Touch Dual Extruder X Laser with your 3D printer. Click on the button and save the file on your computer to work, edit or customize your design. You can also find more 3D designs for printers on Endoscope Mount for BIBO 2 Touch Dual Extruder X Laser.