Equatorial mount for DSLR
thingiverse
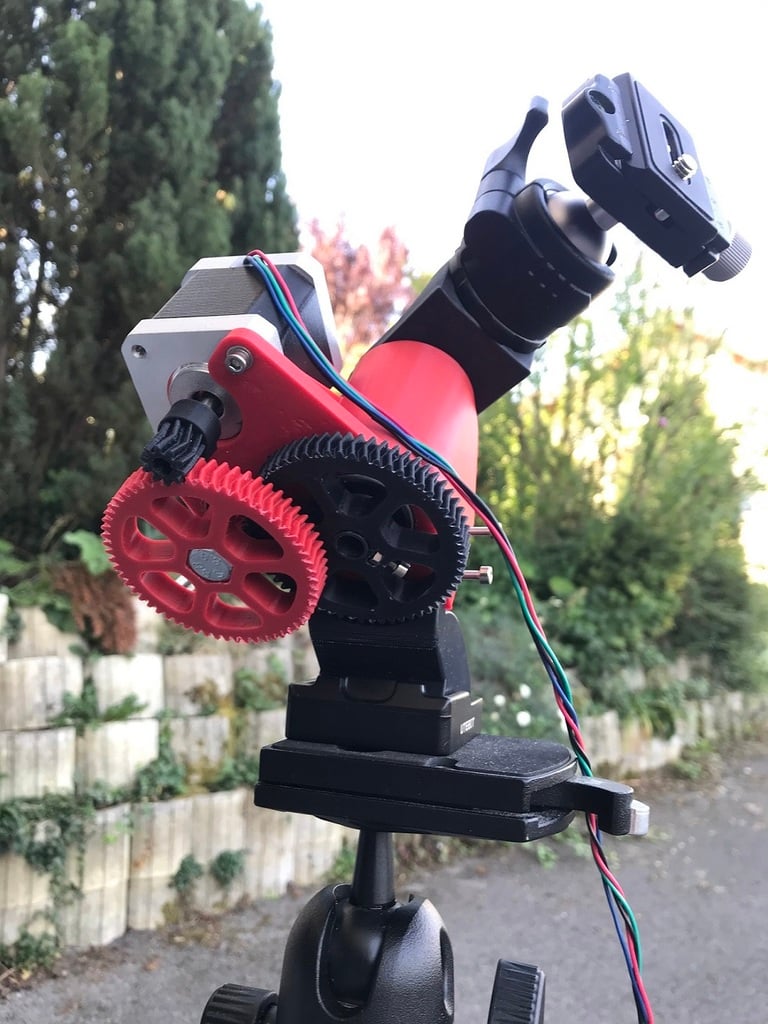
This is a remix of the equatorial mount of SimonRob. Check out his instructables for more details on how to assemble https://www.instructables.com/id/Equatorial-Mount-for-DSLR/ Changes: -Changed motor to nema 17 -Added another reduction (4:1) -Changed to chevron gears -Replaced all screws with M3 (was M2.5) The reductions are 6:1 then 4:1 so with a standard 1.8deg stepper you get 4800 steps per revolution 76800 steps per revolution with 16 microsteps 1228800 steps per revolution with 256 microsteps (close to 1 arc-second) I have assembled the mechanics but I have not yet done the electronics or tested it yet, I will use an Arduino with a TMC2208 driver. I will make the following changes someday: -Add clutch mechanism to “support”. Now the only way balance the support/camera assembly is to loosen the setscrew witch is not ideal. -Change the endstop from the manfrotto mount to the “body” to the large pinion does not need to be removed to separate the two. -Change the main axis to diameter 20x10 aluminum tube with 6804 bearings (20x32x7). It’s a pity the pinion/motor assembly is so rigid without play but there is a ton of torsion in the 10mm tube. Edit: Only two motor screws can be used. You will need a ball tip allen key for the large pinion set screw. Edit 22/09/2020:Addes schematic from https://www.thingiverse.com/andrew14/ using two 18650s and a TMC2208 his code is here https://drive.google.com/file/d/1KimSNu2GnHwaGV6QbWR6xXsA_qy4-2Uu/view?usp=sharing
With this file you will be able to print Equatorial mount for DSLR with your 3D printer. Click on the button and save the file on your computer to work, edit or customize your design. You can also find more 3D designs for printers on Equatorial mount for DSLR.