Ergodox Case
thingiverse
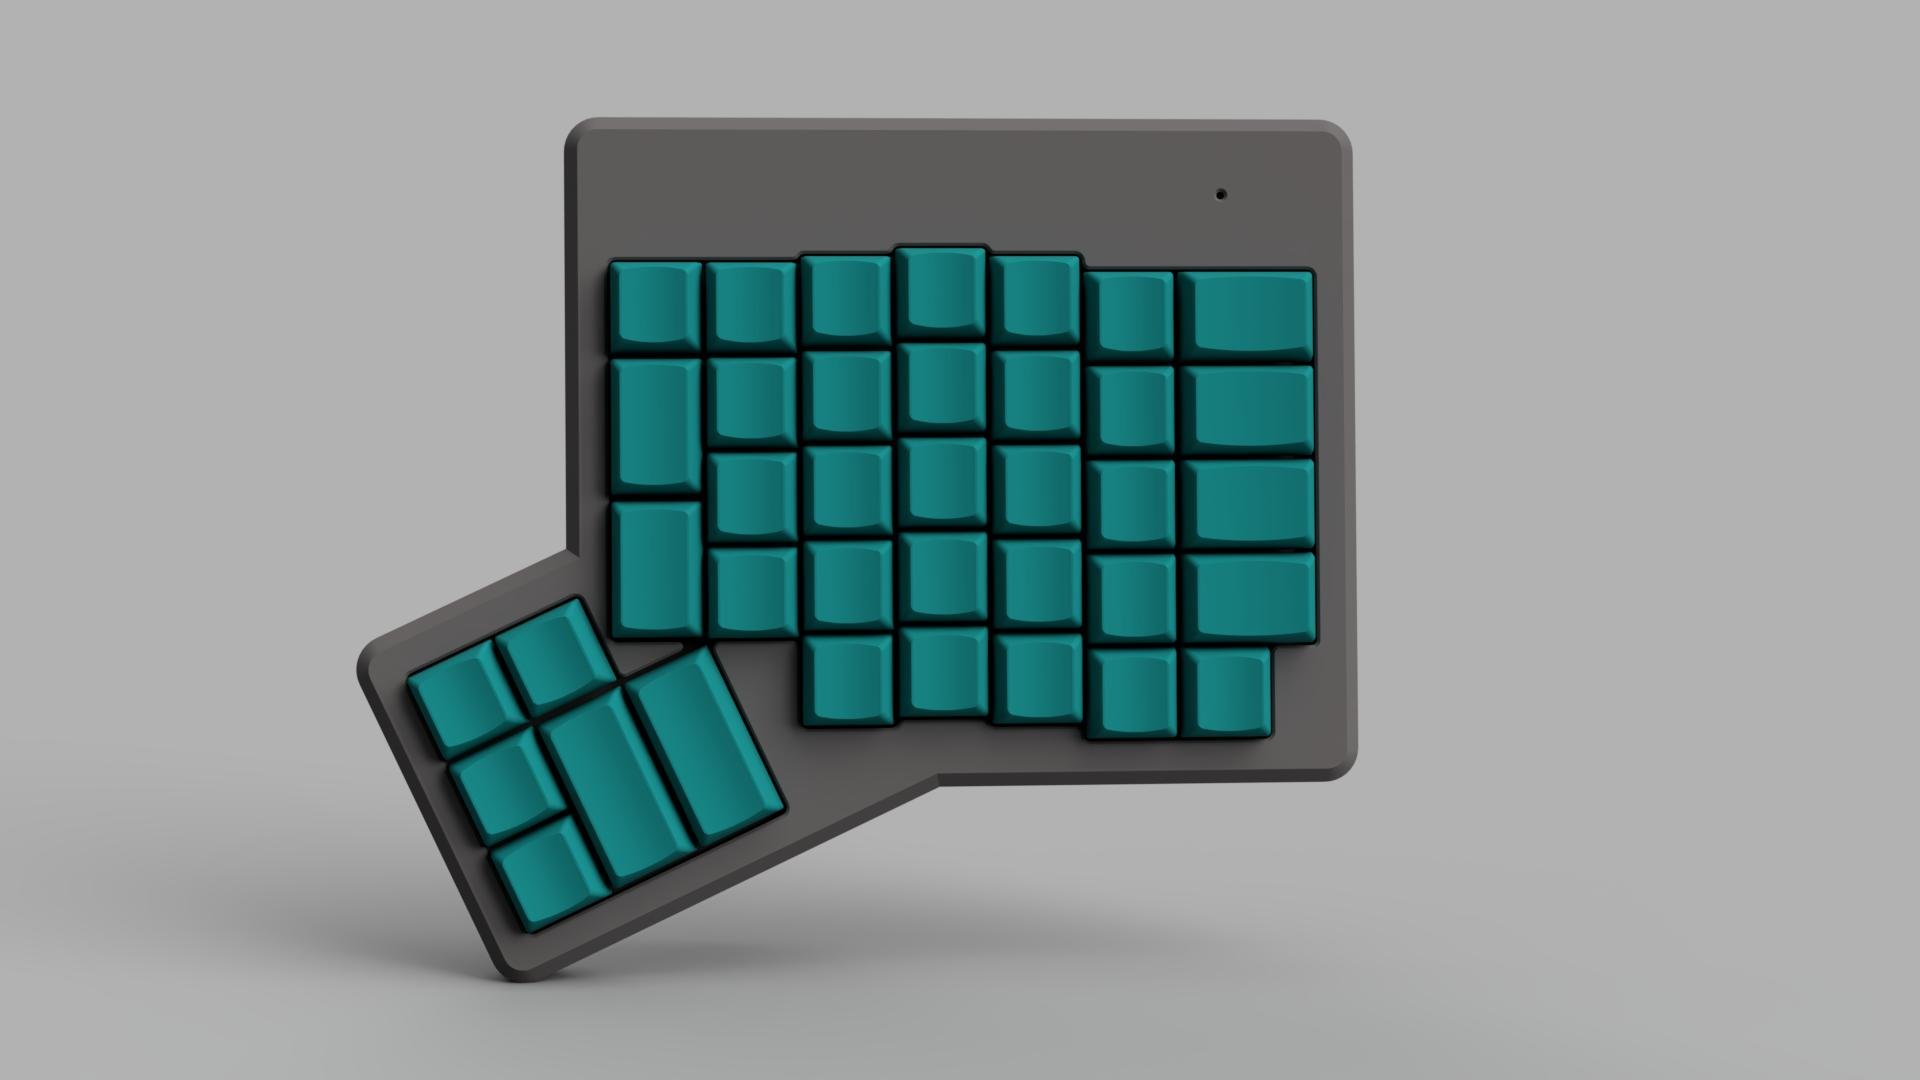
Big thanks to AGuyFromOhio for actually doing the hard work and designing the case I remixed this from. I'm using it since a few months and I'm super happy with it but wanted to make a few small adjustments. I ended up re-designing the case in Fusion360 and added a few things like a tent kit and printable key caps. Note: This is still a work in progress (small details might change) but I verified that the case fits the PCBs I linked below and that top and bottom parts fit together well. All information on the original Ergodox project is available here. ### Features 1. Adjustable to your needs/preferences with Fusion360 2. Try colors before printing 3. Fits the official Ergodox PCB design 4. Tent Kit with adjustable angles 5. Printable Key Caps ### Design Process and Templates Case - I simply measured on the STL files shared by AGuyFromOhio and replicated the case bit by bit in Fusion360. Plate - No history available yet. I only converted the STL in Fusion360, got rid of the triangles and fixed things that broke, here and there. If you want a different layout, you can simply extrude the current cutouts that you don't want and then add a new sketch on the top surface to add your own adjustments. Tent Kit - The angles are adjustable, simply change the "angle" parameter in Fusion360. I'm using 15 degrees on the renders published here. Key Caps - I designed those without any template, just measured the Cherry MX profile on one of the switches I had and optimized until they fit. The design itself does not follow any official widely available key type. ### Post Processing/Assembly 1. Make sure the case did not warp during the print. If the top surfaces come out a bit rough, you might want to file them a little so the top and bottom part close properly. Also verify that the ports of your PCB are accessible by the mini USB and the 3.5mm TRRS plugs. 2. Add 8 brass inserts each to the top parts of the case. Make sure the ones you use work with 3.8mm holes. Be very careful inserting them as any excess melting will prevent top and bottom parts to fit together well. 3. If you use the tent kit, add 4 feet each to the tents. If you choose to use the keyboard without the tent kit, add 5 feet each to the designated cutouts on the bottom parts. ### Hardware List ##### PCB and Electronics I bought my PCB and electronics through Falbatech in Poland (great service!) and soldered it all together to save some money (it also was a lot of fun). You can also add the cables needed to the PCBs on their shop: PCB Set Electronics Pre-soldered PCBs The instructions on how to solder everything together and how to configure the firmware can be found here. ##### Other Hardware Rubber Feet x10 (12mm max. diameter, 5mm height) M3 brass inserts x16 M3x6mm socket head screws x16 M3x14mm socket head screws x6 (if the tent kit is used, will replace x6 M3x6mm screws)
With this file you will be able to print Ergodox Case with your 3D printer. Click on the button and save the file on your computer to work, edit or customize your design. You can also find more 3D designs for printers on Ergodox Case.