Ergonomic Cranked Peppermill
prusaprinters
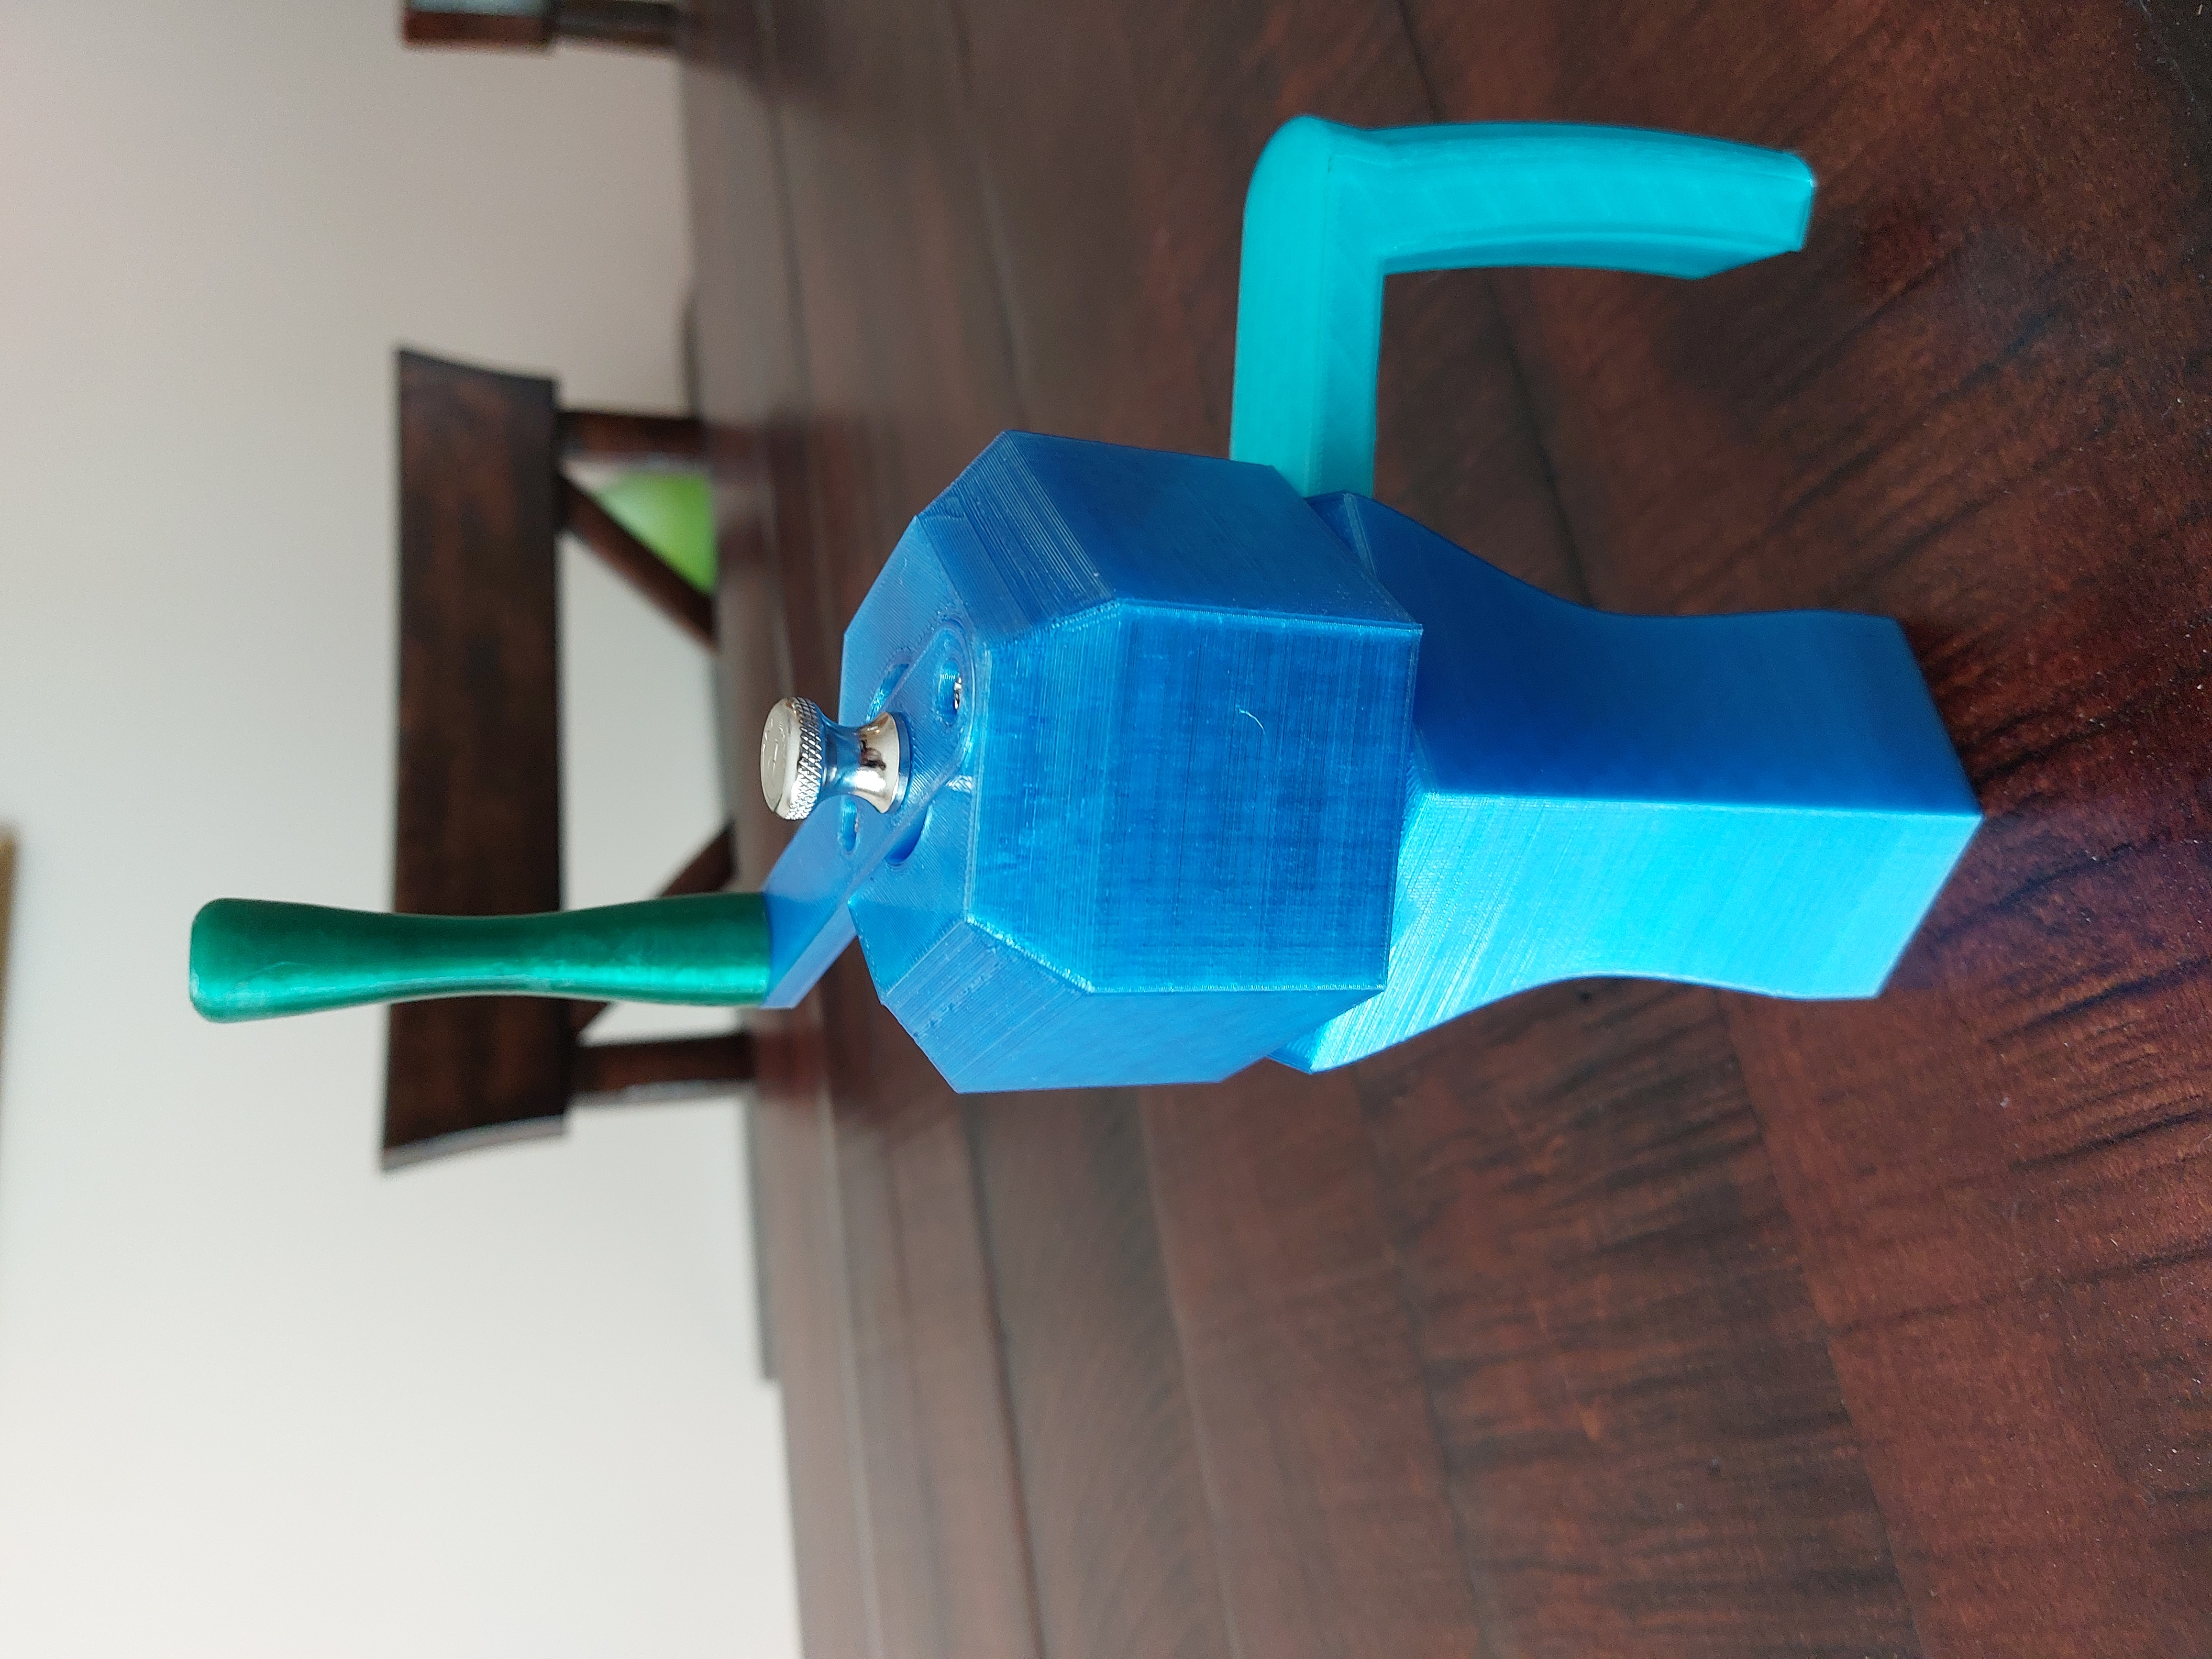
<p><strong>Background</strong></p><p>This is an easy-to-use, ergonomic peppermill that I designed for my dad, who has dexterity problems with his hands. He's tried multiple different peppermills, but the ergonomics either make them unusable for him, or the mill grinds too slowly. Hence, I took it upon myself to design this mill, using a Chef's Specialties peppermill hardware kit as the basis!</p><p><strong>Hardware</strong></p><p>To make this, you'll need the following:</p><ul><li>4x 9/64 inch diameter, ½ inch length wood screws </li><li>1x #6-32 screw (the one I used was 2½ inches long, but you could get away with a shorter one)</li><li>1x 6 inch peppermill hardware kit from Chef's Specialties: <a href="https://chefspecialties.com/collections/pepper-mechanisms/products/copy-of-chef-specialties-10-professional-series-pepper-mill-mechanism?variant=32956025667664">https://chefspecialties.com/collections/pepper-mechanisms/products/copy-of-chef-specialties-10-professional-series-pepper-mill-mechanism?variant=32956025667664</a> or <a href="https://www.amazon.com/dp/B0798BGBHF/">https://www.amazon.com/dp/B0798BGBHF/</a></li></ul><p><strong>Material</strong></p><p>I would recommend using a durable and food-safe filament for this print. I used Taulman3D's T-glase filament (PETG) for my own build. </p><p> </p><p><strong>Print Settings</strong></p><ul><li><strong>Supports</strong><ul><li>For the <strong>mill body</strong>, I used zig zag supports for overhangs touching the buildplate. This part won't print properly otherwise!</li><li>For the <strong>mill top</strong>, I used zig zag supports for the large overhang on the bottom portion of the part.</li><li>For the <strong>mill handle</strong>, I used tree supports, although you can probably get away without them in the orientation I used (shown in pictures)</li></ul></li><li><strong>Layer Height/Resolution</strong><ul><li>I printed all of the parts using a layer height of <strong>0.26mm </strong>using a <strong>0.4mm </strong>nozzle, but there's no reason you can't go higher or lower using a finer or coarser nozzle to suit your needs.</li></ul></li><li><strong>Infill</strong><ul><li>I'd suggest using at least <strong>25% infill </strong>for this. I used 35% octet.</li></ul></li><li><strong>Perimeters and Top/Bottom Layers</strong><ul><li>I printed this using <strong>3-4 perimeters</strong> out of a 0.4mm nozzle for each part. This can come in handy if you need to clean up or modify the screw holes up with a drill.</li><li>In order to mitigate pillowing, I used <strong>6 bottom layers</strong>, and <strong>6 top layers</strong></li></ul></li></ul><p><strong>Assembly</strong></p><ol><li>Start by removing the<strong> top knob</strong> and <strong>turnplate</strong> from the grinder assembly, and insert the hardware into the <strong>body of the peppermill</strong> from the bottom.<ul><li> Make sure everything is flush and fits in: if not, you may need to gently take a file to the mouth of the <strong>mill body</strong>, or gently and slightly bend the <strong>spring bar </strong>to make it fit in properly.</li></ul></li><li>Place the <strong>retaining bar</strong> over the <strong>spring bar</strong>, making sure that the holes of the two bars align with each other, as well as with the holes in the mill body. Insert <strong>two</strong> of the <strong>7/64"</strong> <strong>screws</strong> that came with the peppermill hardware, and tighten them with a screwdriver.<ul><li>If everything doesn't align, you may need to <i>slightly</i> bend one or both of the bars into shape. </li><li>I got around this by pushing the two screws into the holes of the two bars at an angle, and then screwing them into the holes of the mill body. This can be tricky to get right, so upon request I'll include the .step files in case you want to modify the screw holes yourself.</li></ul></li><li>Line up the screw holes of the <strong>turnplate</strong> with those in deepest recess on top of the <strong>mill top</strong>, and then insert and tighten the 2 remaining <strong>7/64" screws</strong> that came packaged with the grinder hardware. </li><li>Take the<strong> mill handle</strong>, and insert it into the recess on the top of the <strong>mill body</strong>. Fasten it using two <strong>9/64"</strong> screws.</li><li>Thread a <strong>#6-32 screw</strong> through the <strong>crank lever</strong>. Make sure that the screw can move and turn freely within the hole: if it doesn't, widen it a little using a small drill bit or a thin rat-tail file.</li><li>Turn the <strong>#6-32 screw</strong> into the <strong>crank handle </strong>using a screwdriver. If the tolerances are correct on your print, the screw should thread its way into the hole securely (possibly with some elbow grease. Alternatively, if you have long enough nails, you could peen a nail into a rivet for a freely-turning, yet sufficiently-tight fit.</li><li>Press the <strong>crank lever </strong>portion of the newly-assembled <strong>crank</strong> into the recess on the <strong>mill top</strong>, and fasten using two <strong>9/64" </strong>screws.</li><li>Fill the mill with some peppercorns ;)</li><li>Slide the <strong>mill top </strong>onto the <strong>drive shaft</strong>, fasten the <strong>top knob</strong>, and get grinding!<strong> </strong></li></ol><p> </p>
With this file you will be able to print Ergonomic Cranked Peppermill with your 3D printer. Click on the button and save the file on your computer to work, edit or customize your design. You can also find more 3D designs for printers on Ergonomic Cranked Peppermill.