Eryone ER-20 Z-Axis stabilizer
thingiverse
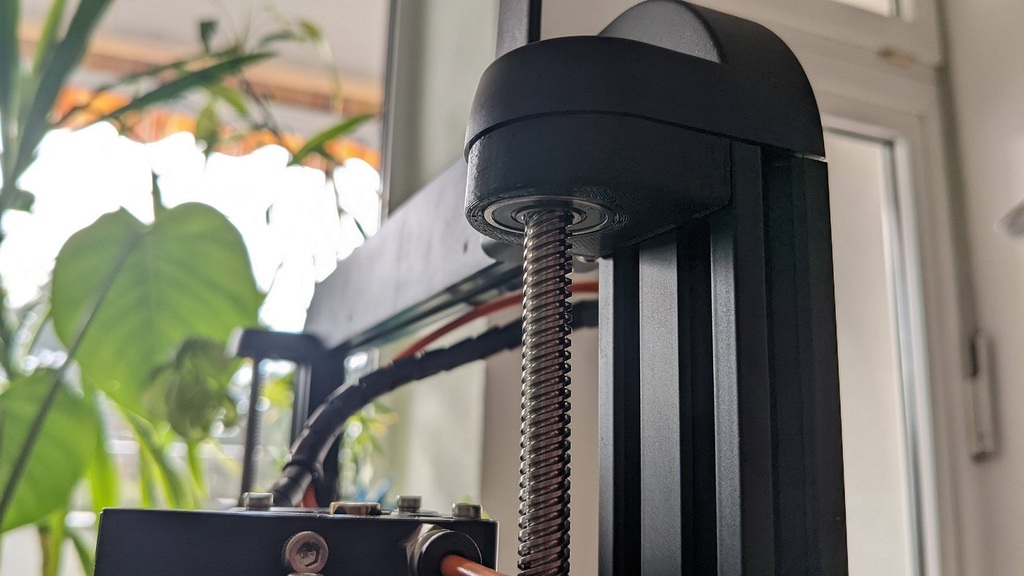
Adds a 608 bearing to the top of the z-axis, while fitting under the factory cover. It's a tight press fit for the bearing, a clamp is required to install it. The T-nuts are intentionally very tight, some filing is required to make them fit and ensure no play. Installation instructions: 1. Remove the cover which is connected with 3 screws to the traverse 2. Remove the top traverse aluminium profile (15x15mm) with is held in place by 2 screws at each Z-axis 3. Make sure all 3 T-nuts fit into the profiles (filing required) 4. Install the 608 bearings (press fit!) - keep then straight! 5. install the stabilizers into the 15x15 traverse 6. Slide them into the 20x20 profiles left and right at the same time 7. Install the 4 screws of the traverse back in 8. Install the plastic cover and screw back in with the 3 screws (should be a slight press fit)
With this file you will be able to print Eryone ER-20 Z-Axis stabilizer with your 3D printer. Click on the button and save the file on your computer to work, edit or customize your design. You can also find more 3D designs for printers on Eryone ER-20 Z-Axis stabilizer.