ESK8-V2
prusaprinters
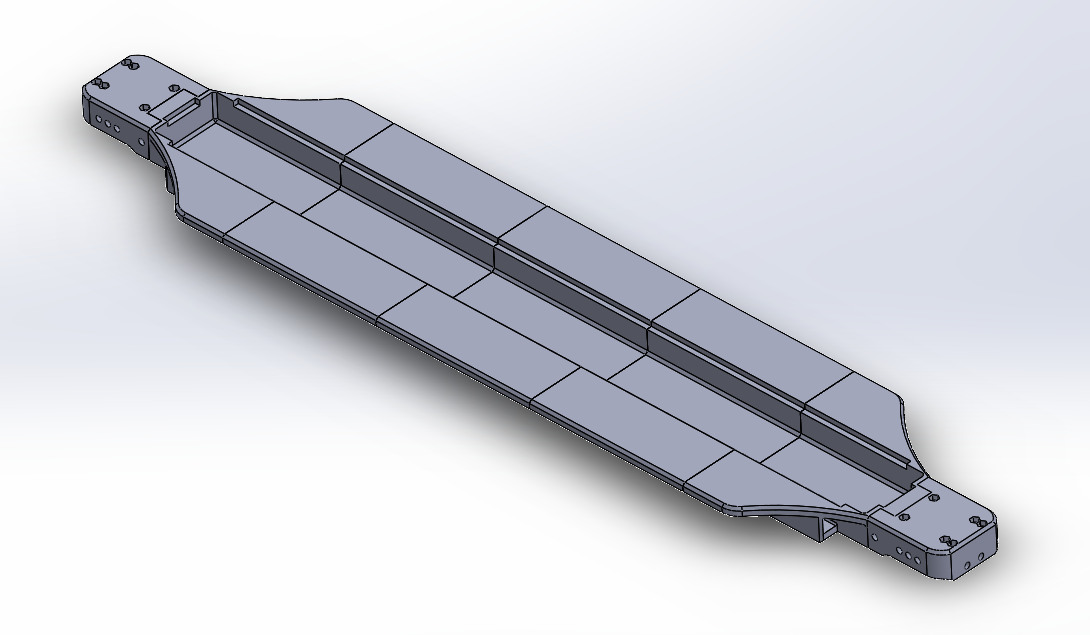
<p><strong>NOTE</strong>: I'll include photos of the board once its done, currently I just have parts so think of the current instructions as my plans. Ill update them and remove this note once everything is together!</p><p><strong>Story</strong>: I've been skating between classes and my dorm this past year on my longboard and wanted to upgrade to an electric longboard. But I also wanted to keep my current board for exercise, etc. A longboard deck usually costs about $100 for a decent one and the battery enclosures that bolt underneath another $50 or so. </p><p>This is my second design. The first one was almost identical except the enclosure opened from the bottom. This was a fart weaker design and after printing one of the middle sections to test it. I wasn't confident it would keep the electronics safe. If anyone is interested in that, I can send the files. But this design is much sturdier in my opinion. Although it does require a section without grip-tape in the middle of your board or at least for you to remove the tape to access the electronics.</p><p><strong>Pros/Cons</strong>: Following all of that, I realized a 3d printed board with a built built-in enclosure would be far cheaper, customizable, and potentially thinner. Here's the comparison:</p><ul><li><strong>Cost</strong>: I spent $60 on 3 spools of Amazon Basics PETG (Used about 2.5kg total) and I spent $25 on steel tubes from home depot as well as another $10 ish on hardware. So overall this option is a little over half the price.</li><li><strong>Thickness</strong>: about 1.5" while the enclosure I would have gotten (https://www.mboards.co/collections/enclosures/products/mboards-xl-battery-and-esc-enclosure) is 40mm (1.57") thick not including the gasket and the ½-¾" thickness of the board. So this board is definitely much thinner.</li><li><strong>Weight</strong>: The board uses 2.5kg of filament and the steel tubes weigh about a pound total. The whole thing is just under 7lbs when you include the hardware. A deck from mBoards and an enclosure will weigh a bit over 5 pounds with the hardware from what I see online. So this option weights more (1.7lbs) but not enough more to deter me.</li><li><strong>Deck Flex</strong>: As I'm sure you can imagine from the steel bars… this board has zero flex in it. Which can be good and bad. Part of the reason boosted boards are so smooth to ride is the flexible bamboo deck. It acts like a shock absorber and doesn't transfer every little bump straight to your feet. On the other hand. As you go faster it can be better to hand a rigid and more stable deck. This is why downhill longboarders will use carbon fiber or fiberglass boards wrapped over a foam form. This gives a light and very rigid board. Personally I'm going to use soft wheels (maybe pneumatic) and hope for the best.</li><li><strong>Time</strong>: With over 12 days of print time alone, this is far more time consuming than buying a deck and enclosure. I had free time to print in the background while working so it wasn't a concern but keep that in mind all the same.</li></ul><p><strong>Printing Instructions</strong>: I am 6'3" and weigh 230lbs, 250 lbs with my backpack so I designed this board to be as sturdy as possible. I used the default profile for 0.15 quality layer height in Prusaslicer. Then bumped the perimeters up to 5 and made sure the infill was 15% gyroid.</p><ul><li>Lighter people could probably print at the normal 2 or 3 perimeters and 10-15% infill.</li><li>Heavier people could add another perimeter or two but I'd wager that my print setting are solid enough for anyone.</li><li>Keep in mind that the shell thickness of a part gives it a lot of its strength not the infill and that dropping below 10% infill can lead to weaker prints as there isn't much to support the shell when compressed.</li><li>I strongly recommend using 0.15 to get better layer bonds and gyroid infill to provide good strength in every direction. This video by CNC Kitchen is great for anyone trying to make strong prints <a href="https://www.youtube.com/watch?v=AmEaNAwFSfI&list=PLEOQTmIWJ_rmoqdFUCgKrNu_BsMVB7e1V&index=16">https://www.youtube.com/watch?v=AmEaNAwFSfI&list=PLEOQTmIWJ_rmoqdFUCgKrNu_BsMVB7e1V&index=16</a></li><li>I also recommend only printing one part at a time so that if it fails you lose less at once.</li><li><strong>What to print</strong>: You'll need to print 2 - truck mounts, 3 - midDecks, 1 - StartDeck, 1 - EndDeck, and 16 deck pins. The start and end decks are the same but the end deck includes two holes for motor wires to pass though. Last you need to print the panels that cover the top. They seem to be strong enough unless you put your weight on them directly but you could also substitute them for ¼" poly-carbonate plate from McMaster-Carr or you could make some fiberglass covers.<ul><li><strong>Orientation</strong>: Print all parts standing up so that layers go along the length of the board and print the deck pins laying down so that layer lines go from bottom to top as they sit in the board. Otherwise they would just shear at the layer lines.</li></ul></li></ul><p><strong>Other Materials Needed</strong>:</p><ul><li>The prints all slide onto ¾" square tube stock from home depot. I bought 2 of their 6' bars and cut each down to 43.66" (I'll include .step files and .SLDPRT files for those who want to get clearer measurements that way.</li><li>The board uses standard skate hardware (#10-24 x 1.75" bolts) to hold the trucks on</li><li>All other bolts are ¼-20 size, 4 4" bolts for each truck mount attaching it to the steel tube and 2 3" bolts that help stabilize the truck mounts internally.</li><li>Message me if you need any clarifications or have any questions!</li><li><strong>E-skate specific parts</strong>: If you're also turning the deck into an electric longboard…<ul><li><strong>40 - 18650 Cells</strong>: I arranged them into a 10s4p battery pack with 4 cells side by side extending down the center of the board end to end. Basically a long skinny 4x10 grid. If you don't want to make a battery (understandable) you can also fit a few lipo packs inside as well. The internal cavity is about 1.125" tall, 3.5" wide, and 30" of the length isn't filled by the ESC.</li><li><strong>Other Battery related items</strong>: You'll also need a BMS, Spot welder, nickle strips, kapton tape, heat-shrink, etc. I would recommend watching a few YouTube videos on how to do this. Its a lot to type here. Keep in mind that making a battery can be dangerous and proper research should be done before deciding to make one.</li><li><strong>Motor/Pulley/Truck</strong>: I bought this as a kit from mBoards (https://www.mboards.co/products/kit-builder) to keep thing simple. You can also piece these parts together separately as you want. The board has standard truck mounts but you may have trouble fitting motors under the board because of its thickness.</li><li><strong>ESC and Controller</strong>: In addition to the 40 batteries there is enough space to fit a Focbox ESC and I bought a VX1 remote all form mboards. There is a roughly 1.25"x3.5"x7" space reserved for all electronics and wires other than the battery so other parts can be used.</li></ul></li></ul><p><strong>Other Files</strong>:</p><ul><li>I used the 4plipoHolder file to hold 4 18650 cells in the right place while spot welding them and gluing them</li></ul>
With this file you will be able to print ESK8-V2 with your 3D printer. Click on the button and save the file on your computer to work, edit or customize your design. You can also find more 3D designs for printers on ESK8-V2.