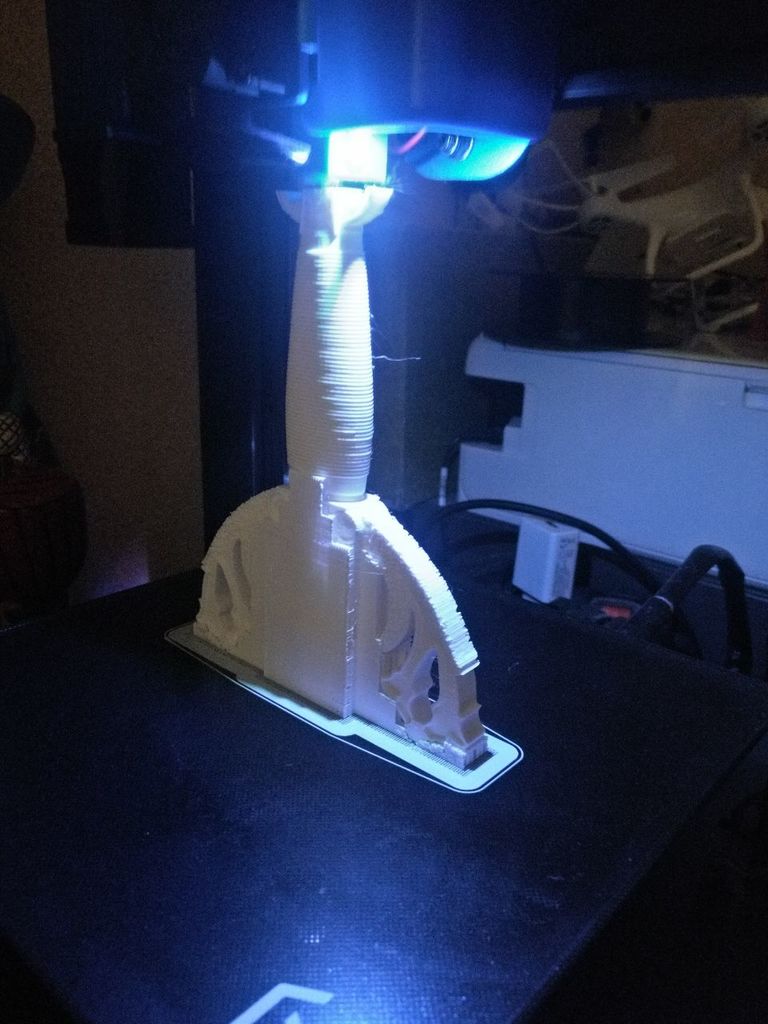
Espada Tizona del Cid extensible - Print in place El Cid's Tizona sword (collapsible
prusaprinters
<p>La espada Tizona es una d las espadas portadas por Rodrigo Díaz de Vivar, El Cid Campeador, según reza el Cantar de Mio Cid. Su segunda espada era la Colada.</p> <p>El fichero de fusion360 está disponible para quien lo necesite. No lo subo debido al tamaño que tiene.</p> <p>He usado filamento PLA 870 y aplicado un tratamiento térmico para aumentar la resistencia y que soporte los golpes de un niño.</p> <h3> La empuñadura se ha adaptado de los diseños de <a href="https://www.thingiverse.com/thing:2990911">txus360</a> and <a href="https://www.thingiverse.com/thing:4576147">riojaonly</a>, la hoja es un diseño extensible en fusion360.</h3> <p>Tizona (also Tizón) is the name of one of the swords carried by Rodrigo Díaz de Vivar, El Cid, according to the Cantar de Mio Cid. The name of the second sword of El Cid is Colada.</p> <p>Fusion360 project is available for anyone who needs it, I cannot upload it due to the huge size.</p> <p>It's been printed in PLA 870 and applied thermal curing in order to make it stronger, as it has been printed for a 4yo kid.</p> <p>the grip is an adaptation of <a href="https://www.thingiverse.com/thing:2990911">txus360</a> and <a href="https://www.thingiverse.com/thing:4576147">riojaonly</a> designs, the sheet has been designed in fusion360.</p> <h3> Print Settings</h3> <p><strong>Printer:</strong></p> <p>Artillery Genius</p> <p><p class="detail-setting rafts"><strong>Rafts: </strong> <div><p>Yes</p></div><strong>Supports:</strong></p> <p>Yes</p> <p><p class="detail-setting resolution"><strong>Resolution: </strong> <div><p>0.2</p></div><strong>Infill:</strong></p> <p>20%</p> <h3> <strong>Filament:</strong> Sakata PLA 870 White Post-Printing</h3> <p><strong>PROCESO DE TEMPLADO - TEMPERING PROCESS</strong></p> <p><div><p><em>Metodo con horno - Oven process</em><br/> Estos son los puntos principales para poder utilizar nuestro horno de</p> <p>casa.</p> <p>Recordemonos que, a menos que sea un horno de altísima calidad, los hornos tradicionales tienen</p> <p>una variación de temperatura entre 20 y 40 grados en las fases de encendido y apagado, así que</p> <p>SIEMPRE usaremos la temperatura mas baja que tengamos a disposición porque es la mas estable</p> <p>(50-60 grados Celsius)</p> <p>JAMAS utilizaremos el sistema de ventilación ( o horno con convección ), SIEMPRE el horno</p> <p>tradicional con resistencias superior e inferior.</p> <p>Pondremos la pieza con el cristal de la impresora a horno apagado y dejaremos que el horno se</p> <p>caliente. Empezaremos a contar los minutos en el momento que el horno haya llegado a la</p> <p>temperatura deseada.</p> <p>Una vez se haya acabado el tiempo de templado, dejaremos que la pieza se enfríe durante unos</p> <p>minutos abriendo un poco la puerta del horno (cuanto mas dejemos la pieza, cuanto mas seguros</p> <p>estaremos de que la pieza se vaya enfriando progresivamente y que la parte mas interna de la</p> <p>pieza este fría, y así evitaremos dejar huellas o deformar nuestro proyecto).</p> <p>Una vez fria, podremos separar los soportes y la pieza de la base de cristal.</p> <p>These are the main points to use the oven of our kitchen.</p> <p>Remember that, unless it is a very high quality oven, traditional ovens have a temperature variation</p> <p>between 20 and 40 degrees between the on and of phases, so ALWAYS use the lowest</p> <p>temperature available because it is the most stable (50-60 degrees Celsius)</p> <p>NEVER use the ventilation system (or oven with convection), ALWAYS the traditional oven with</p> <p>upper and lower heating elements.</p> <p>We will put the piece with the glass of the printer inside the oven still of and we will let the oven</p> <p>warm up. We will start counting the minutes when the oven has reached the desired temperature.</p> <p>Once the tempering time is over, let the piece cool down for a few minutes by opening the oven</p> <p>door a bit (the more we leave the piece, the more sure we will be that the piece will gradually cool</p> <p>down and that the inner part of the piece is cold, and thus avoid leaving traces or deform our</p> <p>project).</p> <p>Once cool, we can separate the supports and the piece from the glass base.</p> <p>Metodo con agua</p> <p>Water process</p> <p>El método con agua suele ser el mas fácil y el mas seguro visto que tenemos un mejor control de la</p> <p>temperatura de templado.</p> <p>Llenaremos nuestro recipiente de agua midiendo con cuidado la temperatura.</p> <p>En este caso utilizaremos un termómetro de casa parta poder medir la temperatura del agua</p> <p>alrededor de los 70 grados.</p> <p>Procedemos a sumergir la pieza con la base de cristal en nuestro recipiente, prestando atención a</p> <p>que la pieza esté totalmente sumergida ( si la pieza tiene un porcentaje de relleno muy bajo,</p> <p>tenderá a flotar. Por esto, utilizaremos unos pesos para que nuestro proyecto se quede en el fondo</p> <p>del recipiente, prestando cuidado a que los pesos no toquen la pieza).</p> <p>Esperaremos a que el agua esté fría (menos de 20 grados) y procederemos a separar los soportes</p> <p>y la pieza de la base de cristal.</p> <p>The method with water is usually the easiest and the safest since we have a better control of the</p> <p>tempering temperature.</p> <p>We will fill our water container by carefully measuring the temperature.</p> <p>In this case we will use a home thermometer to measure the water temperature around 70 degrees.</p> <p>We proceed to submerge the piece with the glass bed in our container, paying attention that the</p> <p>piece is totally submerged (if the piece has a very low fill percentage, will tend to float. For this we</p> <p>will use some weights to help out project to stay at the bottom of the container, taking care that the</p> <p>weights do not touch the piece).</p> <p>Wait until the water is cool (less than 20 degrees) and proceed to separate the supports and the</p> <p>piece from the glass bed.</p> </div></p></p></p> Category: Costume
With this file you will be able to print Espada Tizona del Cid extensible - Print in place El Cid's Tizona sword (collapsible with your 3D printer. Click on the button and save the file on your computer to work, edit or customize your design. You can also find more 3D designs for printers on Espada Tizona del Cid extensible - Print in place El Cid's Tizona sword (collapsible.
