Espruino pico box
thingiverse
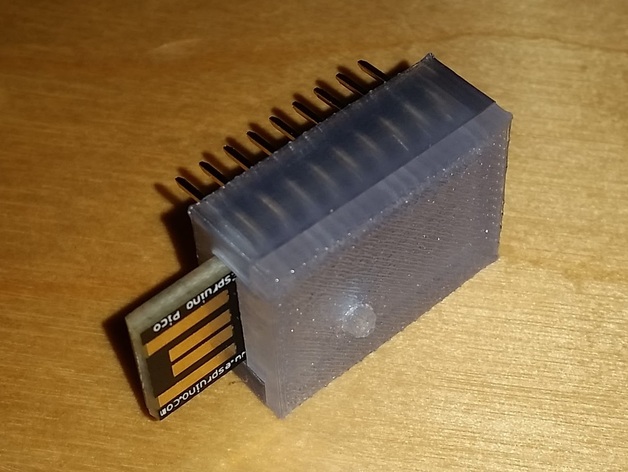
Box for Espruino Pico with pin and USB access and reset button is available. Included blender file contains all basic building blocks. Print Settings Printer Brand: MakerBot Printer: MakerBot Replicator 2 Rafts: Yes Supports: No Resolution: High Instructions to Generate a Box from the Blender File Install the 3D print plugin. Load the blender file into the software. For each element (box, lid, button), follow these steps: Make visible and copy item marked 1B (Base) to new name (e.g. box_outside_1B => box). Select the new object (e.g. box) and apply Boolean operations in order: U=union, D=difference. Apply modifier Boolean difference to main selected object (e.g. select box, add modifier, difference, box_inside_2D). In 3D printing tools select make manifold. Select main object and press export in 3D printing with STL format selected. Important Note A raft is required for the button. After pushing the button through the hole in the lid, work it around with pliers to loosen it up. Tested on a MakerBot Replicator 2.
With this file you will be able to print Espruino pico box with your 3D printer. Click on the button and save the file on your computer to work, edit or customize your design. You can also find more 3D designs for printers on Espruino pico box.