Eternal Rose
pinshape
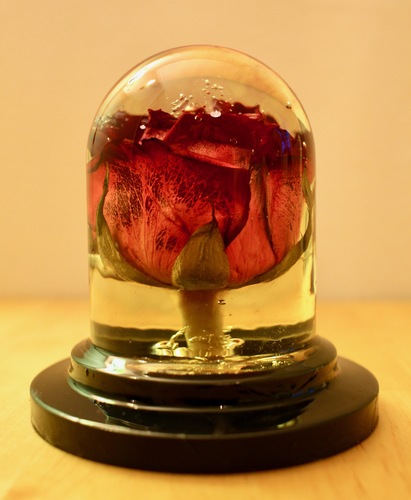
Hi Folks, This is my go at an eternal rose. I printed the parts on a Form 2 to get the most clear finish possible. The model consists of three parts: The "glass" and the stand (those should be obvious) and a glass-holder. The glass holder is meant for holding the glass steady in the curing process. How to: - Print all three of these and wet sand the glass part, it doesn't matter if it becomes dull in the process. - Put the glass upside down into the glass-holder and put a rose inside. - Fill the glass with resin and fix the rose with tape or similar so it doesn't float (I recommend not filling the glass to the top so the tape doesn't get encased too. - Cure the liquid resin - This may take a while, depending on your curing setup. - Take off the tape that held the rose in place, cut off access stem (the whole rose should be covered in resin, don't let the stem come out), fill the rest of the glass with resin and cure until it's completely hardened. - Finish the glass until it's as see through as possible. You can either follow this method of sanding and buffing: Formlabs Support - Achieving a transparent finish or you can do it the way I did: by resin dipping like it is explained in this article. - Glue the glass and stand models together (I used resin to do that) - Admire the result Have fun!
With this file you will be able to print Eternal Rose with your 3D printer. Click on the button and save the file on your computer to work, edit or customize your design. You can also find more 3D designs for printers on Eternal Rose.