Ethernet jack extension for Lack enclosure
prusaprinters
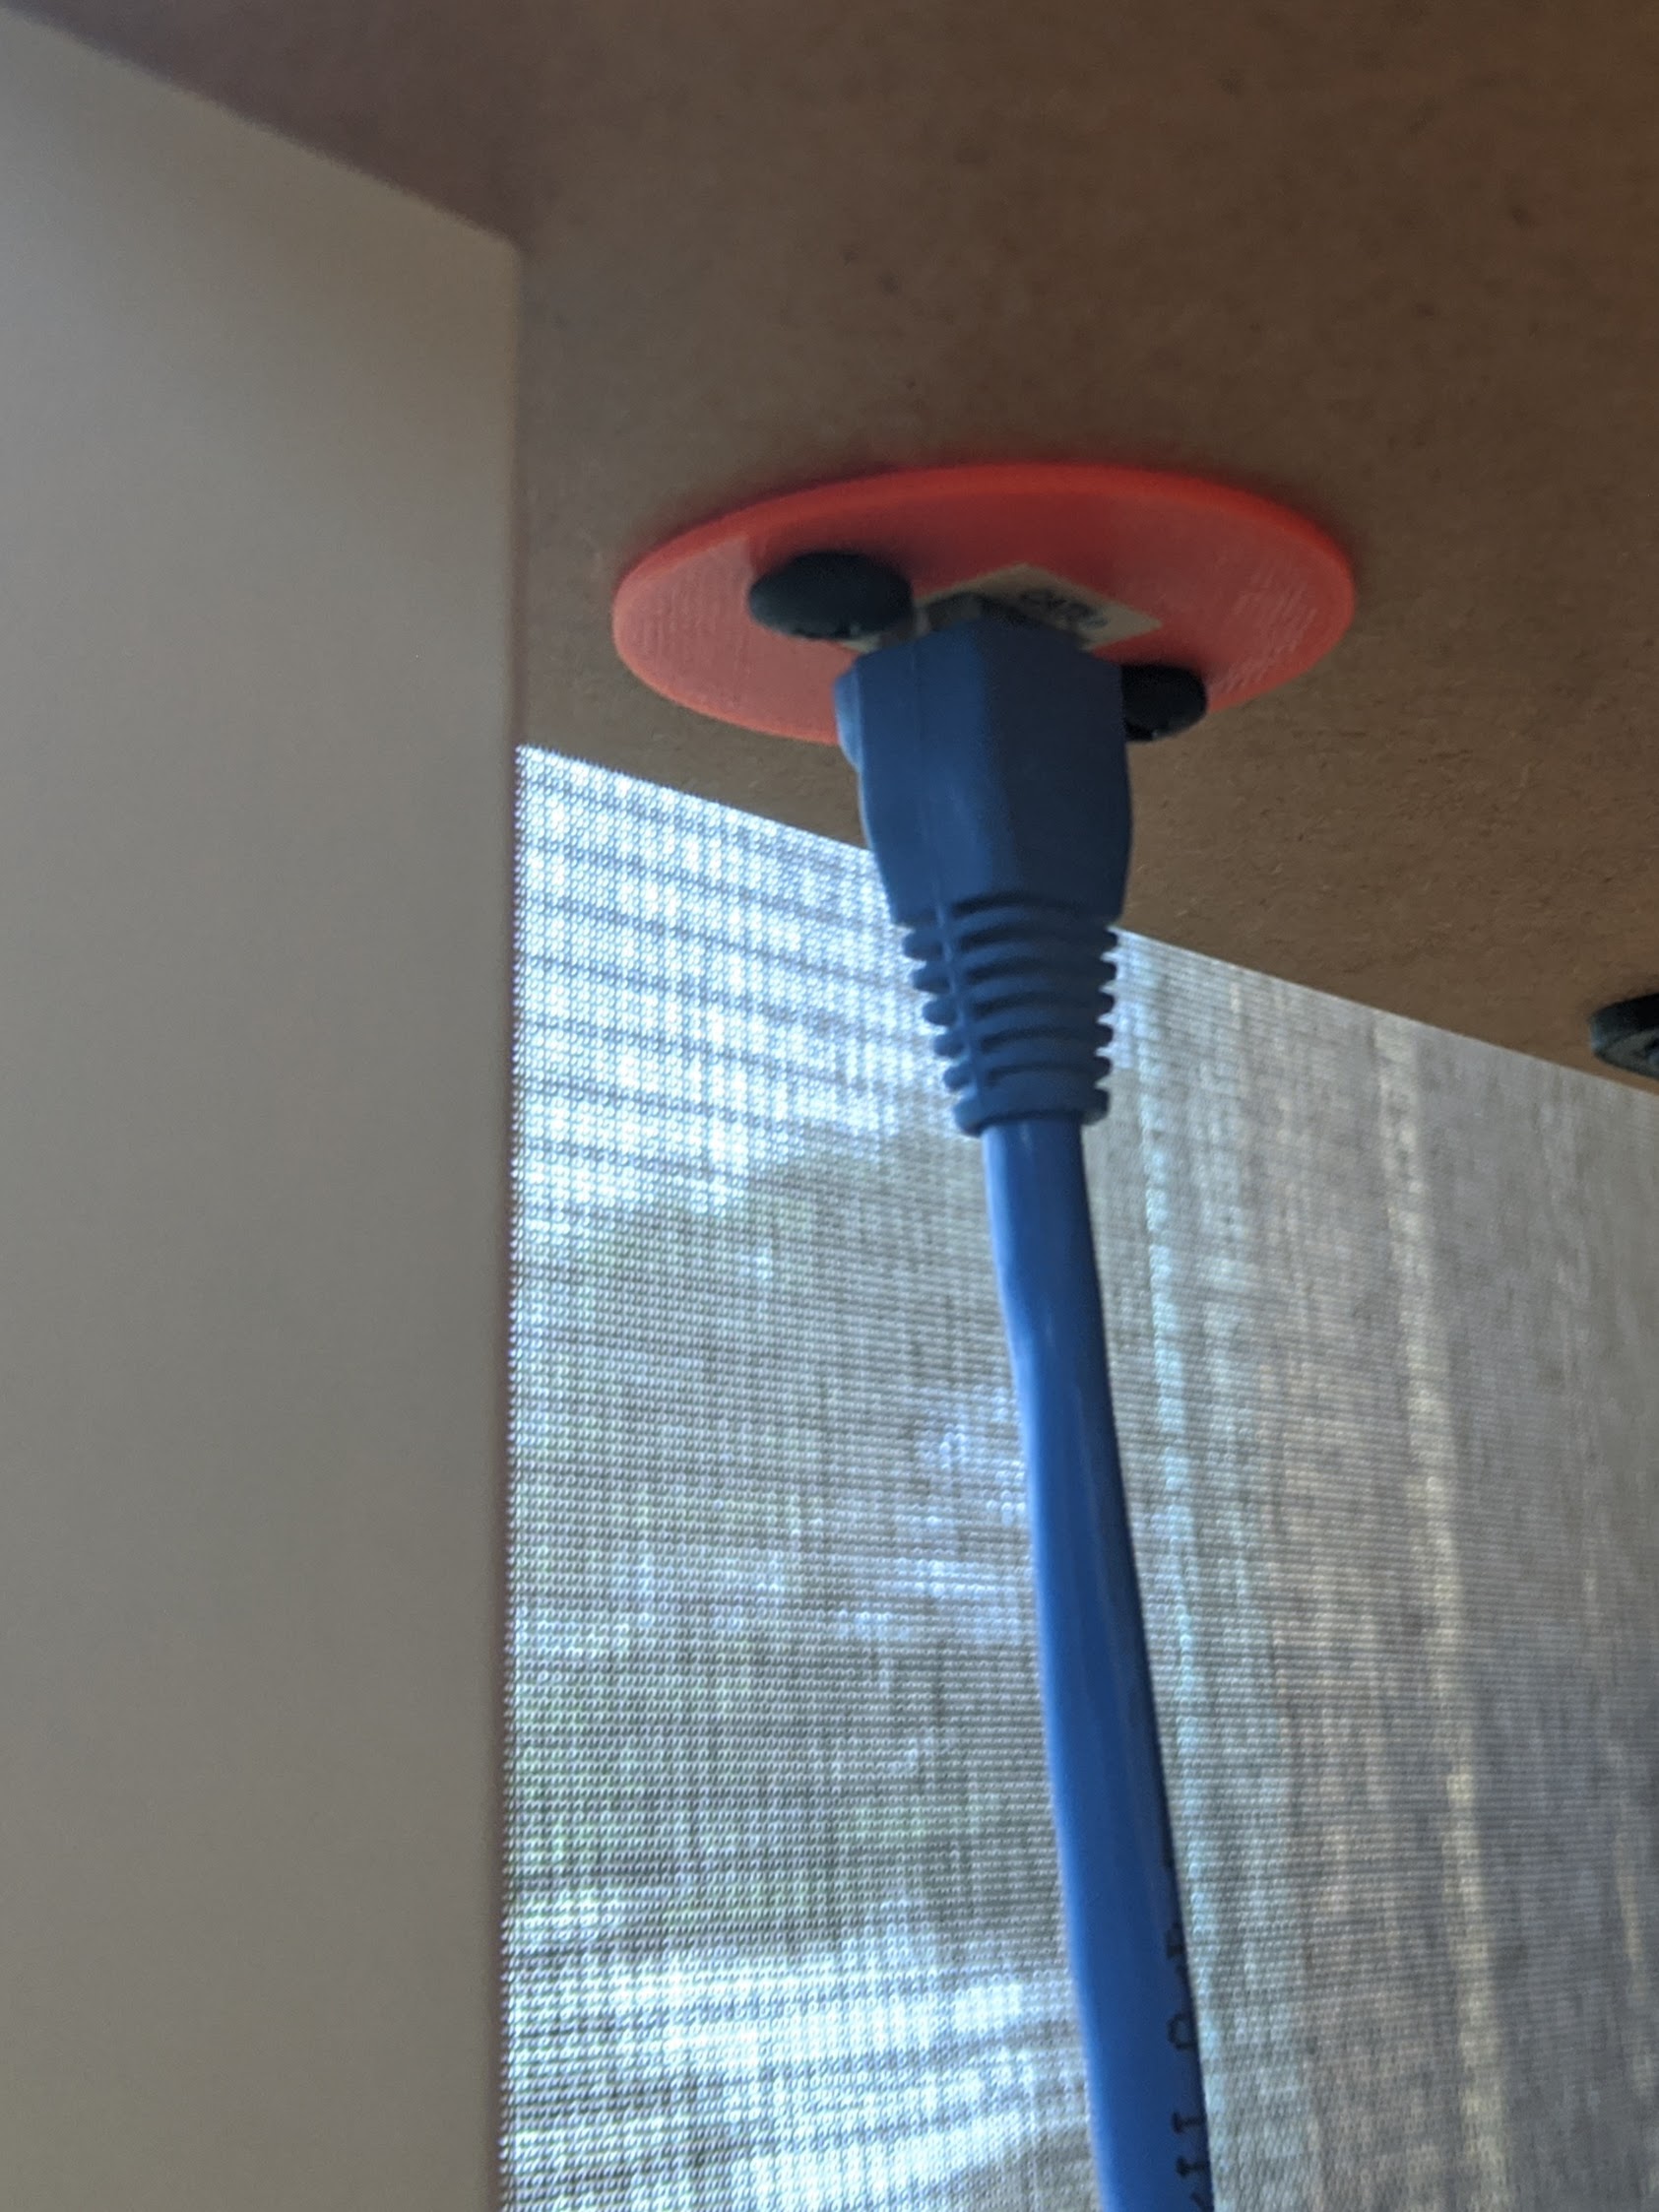
<p>Raspberry Pi's are notoriously finicky with their WiFi connection. It's much better to use hardwired networking, if possible.</p> <h3>Print instructions</h3><p>Raspberry Pi's are notoriously finicky with their WiFi connection. It's much better to use hardwired networking, if possible. But when the Raspberry Pi running <a href="https://octoprint.org">OctoPrint</a> is <a href="https://www.prusaprinters.org/prints/30296">co-located with the printer</a> inside the <a href="https://blog.prusaprinters.org/mmu2s-printer-enclosure/">Lack enclosure</a>, cable management becomes difficult. There is no obvious place to put the Ethernet cable. This 3D printed part allows for a pigtail Ethernet cable to come out of the Lack table surface.</p> <p>You can make your own Ethernet cable, or you can cut one end off from a <a href="https://smile.amazon.com/Monoprice-Cat6-Ethernet-Patch-Cable/dp/B003L1AET2">short ready-made cable</a>. On the underside of the table is a standard <a href="https://smile.amazon.com/10-Pack-Cat6-Keystone-Jack-Compatible/dp/B07JRD69V6">"keystone" Ethernet jack</a> available from every hardware store. A <a href="https://smile.amazon.com/Maxmoral-Stripper-Portable-Crimping-Keystone/dp/B07MNBV9NN/ref=sr_1_13?crid=2X1ZFT8PYJSJ7">punchdown-tool</a> helps greatly with attaching the individual wires. Alternatively, an <a href="https://smile.amazon.com/VCE-Listed-5-Pack-Keystone-Coupler-Black/dp/B016O9SXCM">Ethernet coupler</a> might be a possible solution, although I haven't tested whether it fits.</p> <p>Space inside the table is tight, but sufficient. If using the punchdown block, I suggest removing the outer insulation from the ethernet cable for the entire length that is inside the table. It's much easier to work with the individual wire pairs. Do not untwist them, though. Leave about 6" of wires below the strain-relief. This gives enough slack to attach the keystone.</p> <p>A short M3 screw is needed to tighten the strain relief. Use one of the spares that come with the Prusa i3 MK3S printer. And you also need <a href="https://smile.amazon.com/gp/product/B01M03T9SM">#10 3/4" wood screws</a> to attach the parts to each other.</p>
With this file you will be able to print Ethernet jack extension for Lack enclosure with your 3D printer. Click on the button and save the file on your computer to work, edit or customize your design. You can also find more 3D designs for printers on Ethernet jack extension for Lack enclosure.