EU Wall socket LED lamp
thingiverse
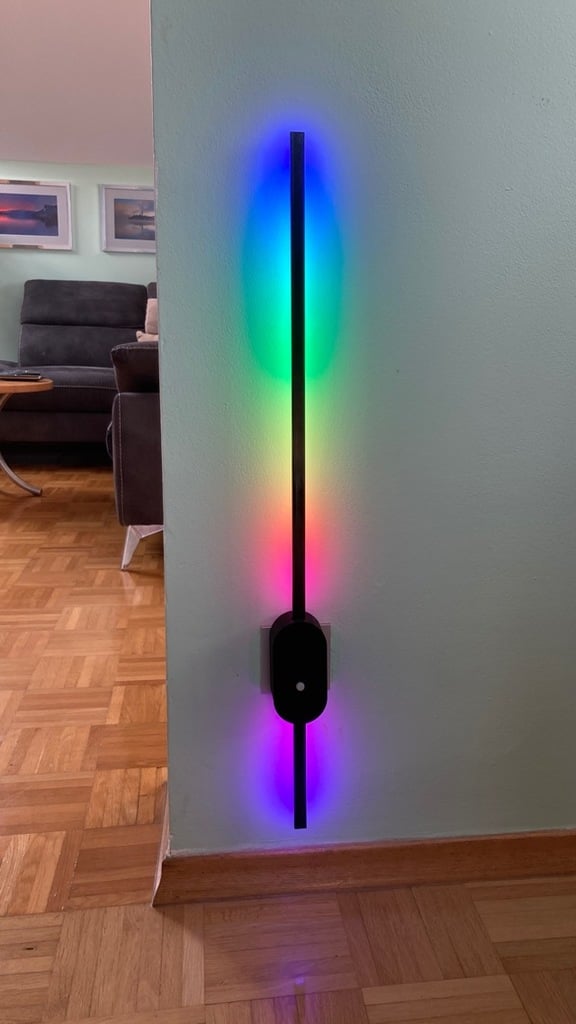
## **Please like, it helps tremendously.** --- Simple EU wall power socket pluggable LED lamp. Includes sockets for SR602 and IR sensors which can be coupled with excellent WLED software. You will require 14mm aluminium LED profile and screw it to the 3D printed case, LED strip (WS2812 or SK6812), WLED controller and 2A 220V to 5V buck converter and EU plug used for for making extension cordss. Parts - 3D printed case (top and plug) - 14mm x 7mm aluminium profile (like https://www.sylux.si/led-trakovi-in-pribor/profili-za-led-trak/nadometni-profili/1407-dl-alu-profil-line-mini-bel-brez-pokrova) - 4 screws for plastic 3mm x 8mm - ESP01 and ESP01 controller for WLED (https://www.tindie.com/products/serg74/esp-01-wled-shield/) - HC-SR602 PIR sensor (https://www.aliexpress.com/item/32953590328.html) - TSOP38238 IR sensor (https://www.aliexpress.com/item/32698091450.html) - 220V to 5V/2A PSU (https://www.aliexpress.com/item/1005001504354835.html or https://www.aliexpress.com/item/32668137321.html) - 220V EU plug for extension cords (like https://etrgovina.rexel.si/sl/shop/vtikac-za-kabel-suko-tritech-ravnist-termoplast-be-16a-250v-1000316) - a few wires How to make: - print the top and plug parts in the orientation supplied - disassemble EU plug, cut away cable holding plastic and outer case (you only need prongs) - connect two wires to the plug (and tighten them using embedded screws) - insert EU plug into 3D printed "plug" part (you can use some instant glue if the fit is on the loose side) - solder some cables/dupont wires to PIR and IR sensors (connect + and GND of both sensors) - cut aluminium channel into 2 pieces roughly 53cm and 13cm in length (you can get 3 lamps out of 1 channel) and drill 2 3mm holes 2cm apart at one end of the cuts - insert cut channels with the side of drilled holes into the "top" 3D printed part - use 3mm screw for plastic to attach channel to the "top" part (do not use too much force or too long screws) - flash WLED software to ESP01 and insert ESP01 into controller - insert controller into slot - solder cables to the PSU and insert it into larger slot - snap "top" and "plug" parts together - if you want permanent connection use some instant glue
With this file you will be able to print EU Wall socket LED lamp with your 3D printer. Click on the button and save the file on your computer to work, edit or customize your design. You can also find more 3D designs for printers on EU Wall socket LED lamp.