Eurorack M3 Rail System
thingiverse
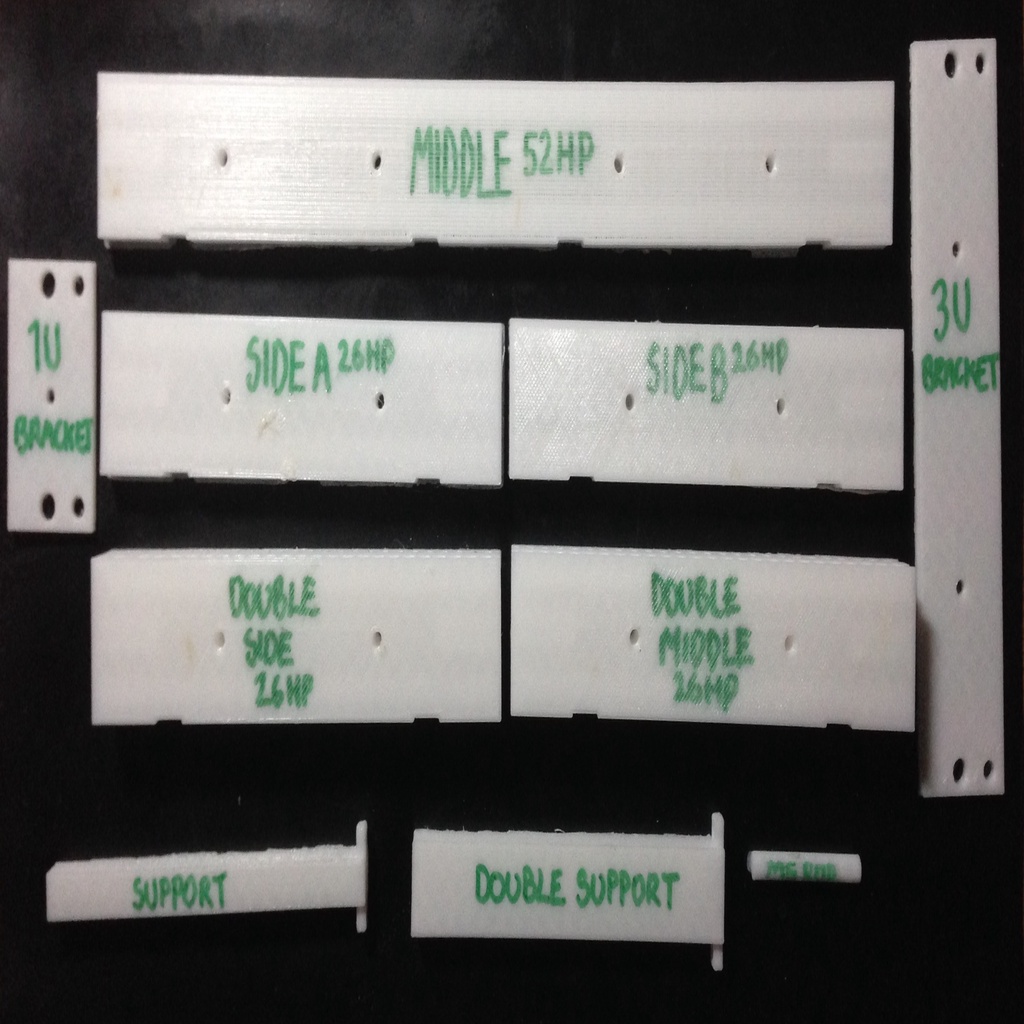
This is a work in progress - I must leave it for now. 104HP Version One Case will test the real-world ability of the rail system. Unfortunately, my resources are drained so ignore the warping on some of the printed elements, am unable to redo and need to move on. I have learned a lot along this process and will return with Version Two hopefully sometime in the future. Great for "Lunchbox" unique containers you want to modify for Eurorack enclosures as you can print any HP you desire. Eurorack M3 Rail. 3U Bracket. 1U Bracket. Supports. 3U Cheek. 21HP (106.68MM) 26HP (132.08MM) 30HP (152.4MM) Rails will allow typical lengths to be achieved. * 60HP 2x30HP (304.8MM) * 84HP 4x21HP (426.72MM) * 104HP 4x26HP (528.32MM) * 110HP 4x21HP 1x26HP (558.8MM) * 126HP 6x21HP (640.08MM) * 168HP 8x21HP (853.44MM) All parameters can be adjusted within FCStd files. To achieve 1HP - 30HP (x+) Rail lengths. * Body 30 HP Rails - Pad Length - change (1HP = 5.08MM) M3 Inserts are positioned 1HP (5.08MM) apart along Rail length. Note: Modular Screws on certain modules are positioned 1.5HP (7.62/7.5MM) in from edge. M3 Insert - Circle Radius adjust for M2.5 Inserts/Modular Screws. Support Pillar - Remove if not desired. Height defined by your container/case depth. Support Pillar (1R) for single Rail. Support Pillar (2R) for two joined Rails. M5 Rod connects two Rail pieces together. M3 Screw/Bolt Support - Remove if not desired. Secure Rail to container/case. Secure two separate Rails. To merge two Body elements: * Select Both (Body 30 HP Rail & Body 30 HP Rail Middle) * [File] * [Export] Generates a single .stl file for slicing application. Spacebar Activates/Deactivates Body Element for Single/Double stl. Left - Middle - Right - Single - Double. M4 Threaded Rod throughout for support and connection. Soldering Iron & Tweezers used to attach M3 Inserts for M3 Modular Panel Screws & M4 Inserts for M4 Container Rail Screws. You do not need to populate all M3 Holes with inserts - if you know your module layout in advance (https://www.modulargrid.net) or layover the panel - mark the related M3 Hole and add inserts for M3 Modular screws. I have tried to label everything in the FCStd files so you can easily find and adjust as desired (https://www.freecadweb.org). Some files will need to be selected within Freecad for Single - Double - Left - Right or Middle (use Spacebar then Mesh - Export). (-: Work In Progress :-) Disclaimer. I am not responsible for any damage to you or your modules. Download, amend and use at your own discretion.
With this file you will be able to print Eurorack M3 Rail System with your 3D printer. Click on the button and save the file on your computer to work, edit or customize your design. You can also find more 3D designs for printers on Eurorack M3 Rail System.