Eventorbot! Open source 3D printer.
thingiverse
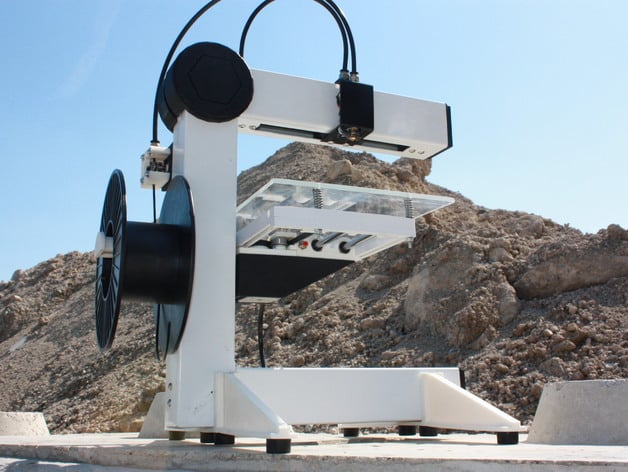
The open source 3D printer, Eventorbot, boasts a simple design with fewer materials and costs less than $20 for the frame. Its construction features less plastic parts, a stronger structure, hidden wires, and an appealing finish. The blueprint file provides detailed instructions on assembly, while downloadable files offer 3D views and measurements. Eventorbot was designed to resemble a robotic arm with hydraulic tubes for stability during printing. For those without access to a 3D printer, plastic parts and frames can be ordered through Kickstarter. After successfully meeting its funding goal, Eventorbot is now set to become a reality. Additional files include Google SketchUp/SKB files for viewing angles and measurements, video clips showcasing the printer in action, and STL files for printing specific parts. A hardware file outlines the screw locations, while tutorial videos guide users through assembly, from framing to extruder setup.
With this file you will be able to print Eventorbot! Open source 3D printer. with your 3D printer. Click on the button and save the file on your computer to work, edit or customize your design. You can also find more 3D designs for printers on Eventorbot! Open source 3D printer..