Eventorbot Printable Floating Motor Z-Axis
thingiverse
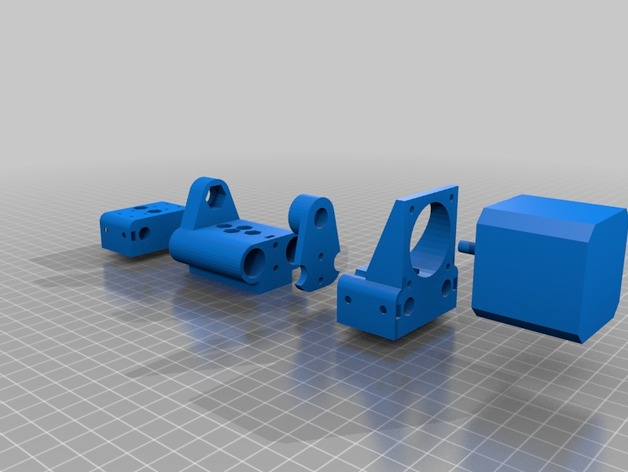
This Z-axis linear motion assembly upgrade is designed primarily for Eventorbot 3D printers with Kickstarter laser cut sheet metal frames, although it can still benefit users with tubular steel frames. It ensures motor shaft and lead screw alignment, allows the entire Z-axis to be removed as one piece, and provides an option to use a limit switch for the end stop. The Motor Mount part must be printed in heat-resistant plastic. Required parts include 2x M5 x 35 bolts, 3x M5 x 30 bolts, 5x M5 nuts, 2x M5 lock washers, 2x M5 flat washers, 6x M3 x 8mm screws, 6x M3 nuts, 2x 5/16-18 nuts, and 2x M2.2 x 13mm sheet metal screws (for limit switch). Optional parts include M3 x 8mm set screws, additional M3 nuts, a 1/4-18 Acme rod with hex nut, and a 5mm x 1/4" flexible motor coupler. If using US size hardware, substitute 10 M5 and 6 M3 screws as indicated. The Acme nuts and 5/16 nuts can be interchanged with glue or PTFE pipe tape for a tight fit.
With this file you will be able to print Eventorbot Printable Floating Motor Z-Axis with your 3D printer. Click on the button and save the file on your computer to work, edit or customize your design. You can also find more 3D designs for printers on Eventorbot Printable Floating Motor Z-Axis.