EVGA 1080ti FTW3 120mm fan shroud
thingiverse
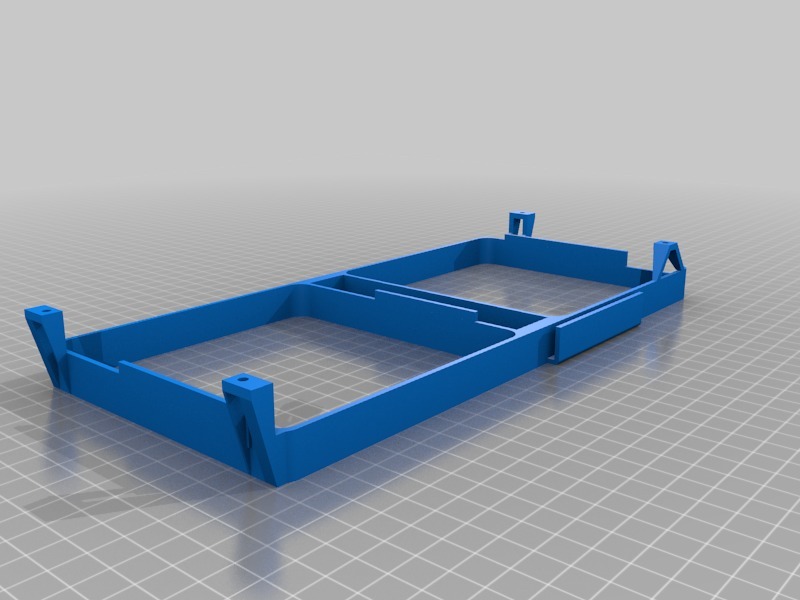
Got sick of the PWM noise from the original fans so I decided to put two 120mm Noctuas on it. To use this, you'll have to unscrew the original cooler to get rid of the original fan shroud, bend and break away some of the clips holding that shroud in place, reapply thermal paste and screw the heatsink back into place. This model uses the heatsink screws in the corners to stay firmly in place. When using 15mm fans, it should still be two slot. The fit of the fans is very snug, using a rigid material will likely require changing the model to be a bit more forgiving. No tools required for fan mounting and there are three clips in the middle part for zip ties to organise the cable mess should you simply use an mini pwm splitter cable. I used PETG, regular PLA will most likely melt, or be very close to melting under full load. Made with tinkercad, model can be found here: https://www.tinkercad.com/things/igNPfWF9ezM Final note: the RAM and power fan headers this card has are not powerfull enough to run a noctua nf-a12x15 at full speed, the GPU fan header can run two at full speed. I do not know the specs on these fan headers, how much power they can supply or how your fans might compare to the ones on the original card. They should cool better, but might draw more power so be aware of that before putting two 10watt tornadoes on there.
With this file you will be able to print EVGA 1080ti FTW3 120mm fan shroud with your 3D printer. Click on the button and save the file on your computer to work, edit or customize your design. You can also find more 3D designs for printers on EVGA 1080ti FTW3 120mm fan shroud.