Experiment - Improving Magnet Clamping Force - Pot Magnet/Mounting Magnet
prusaprinters
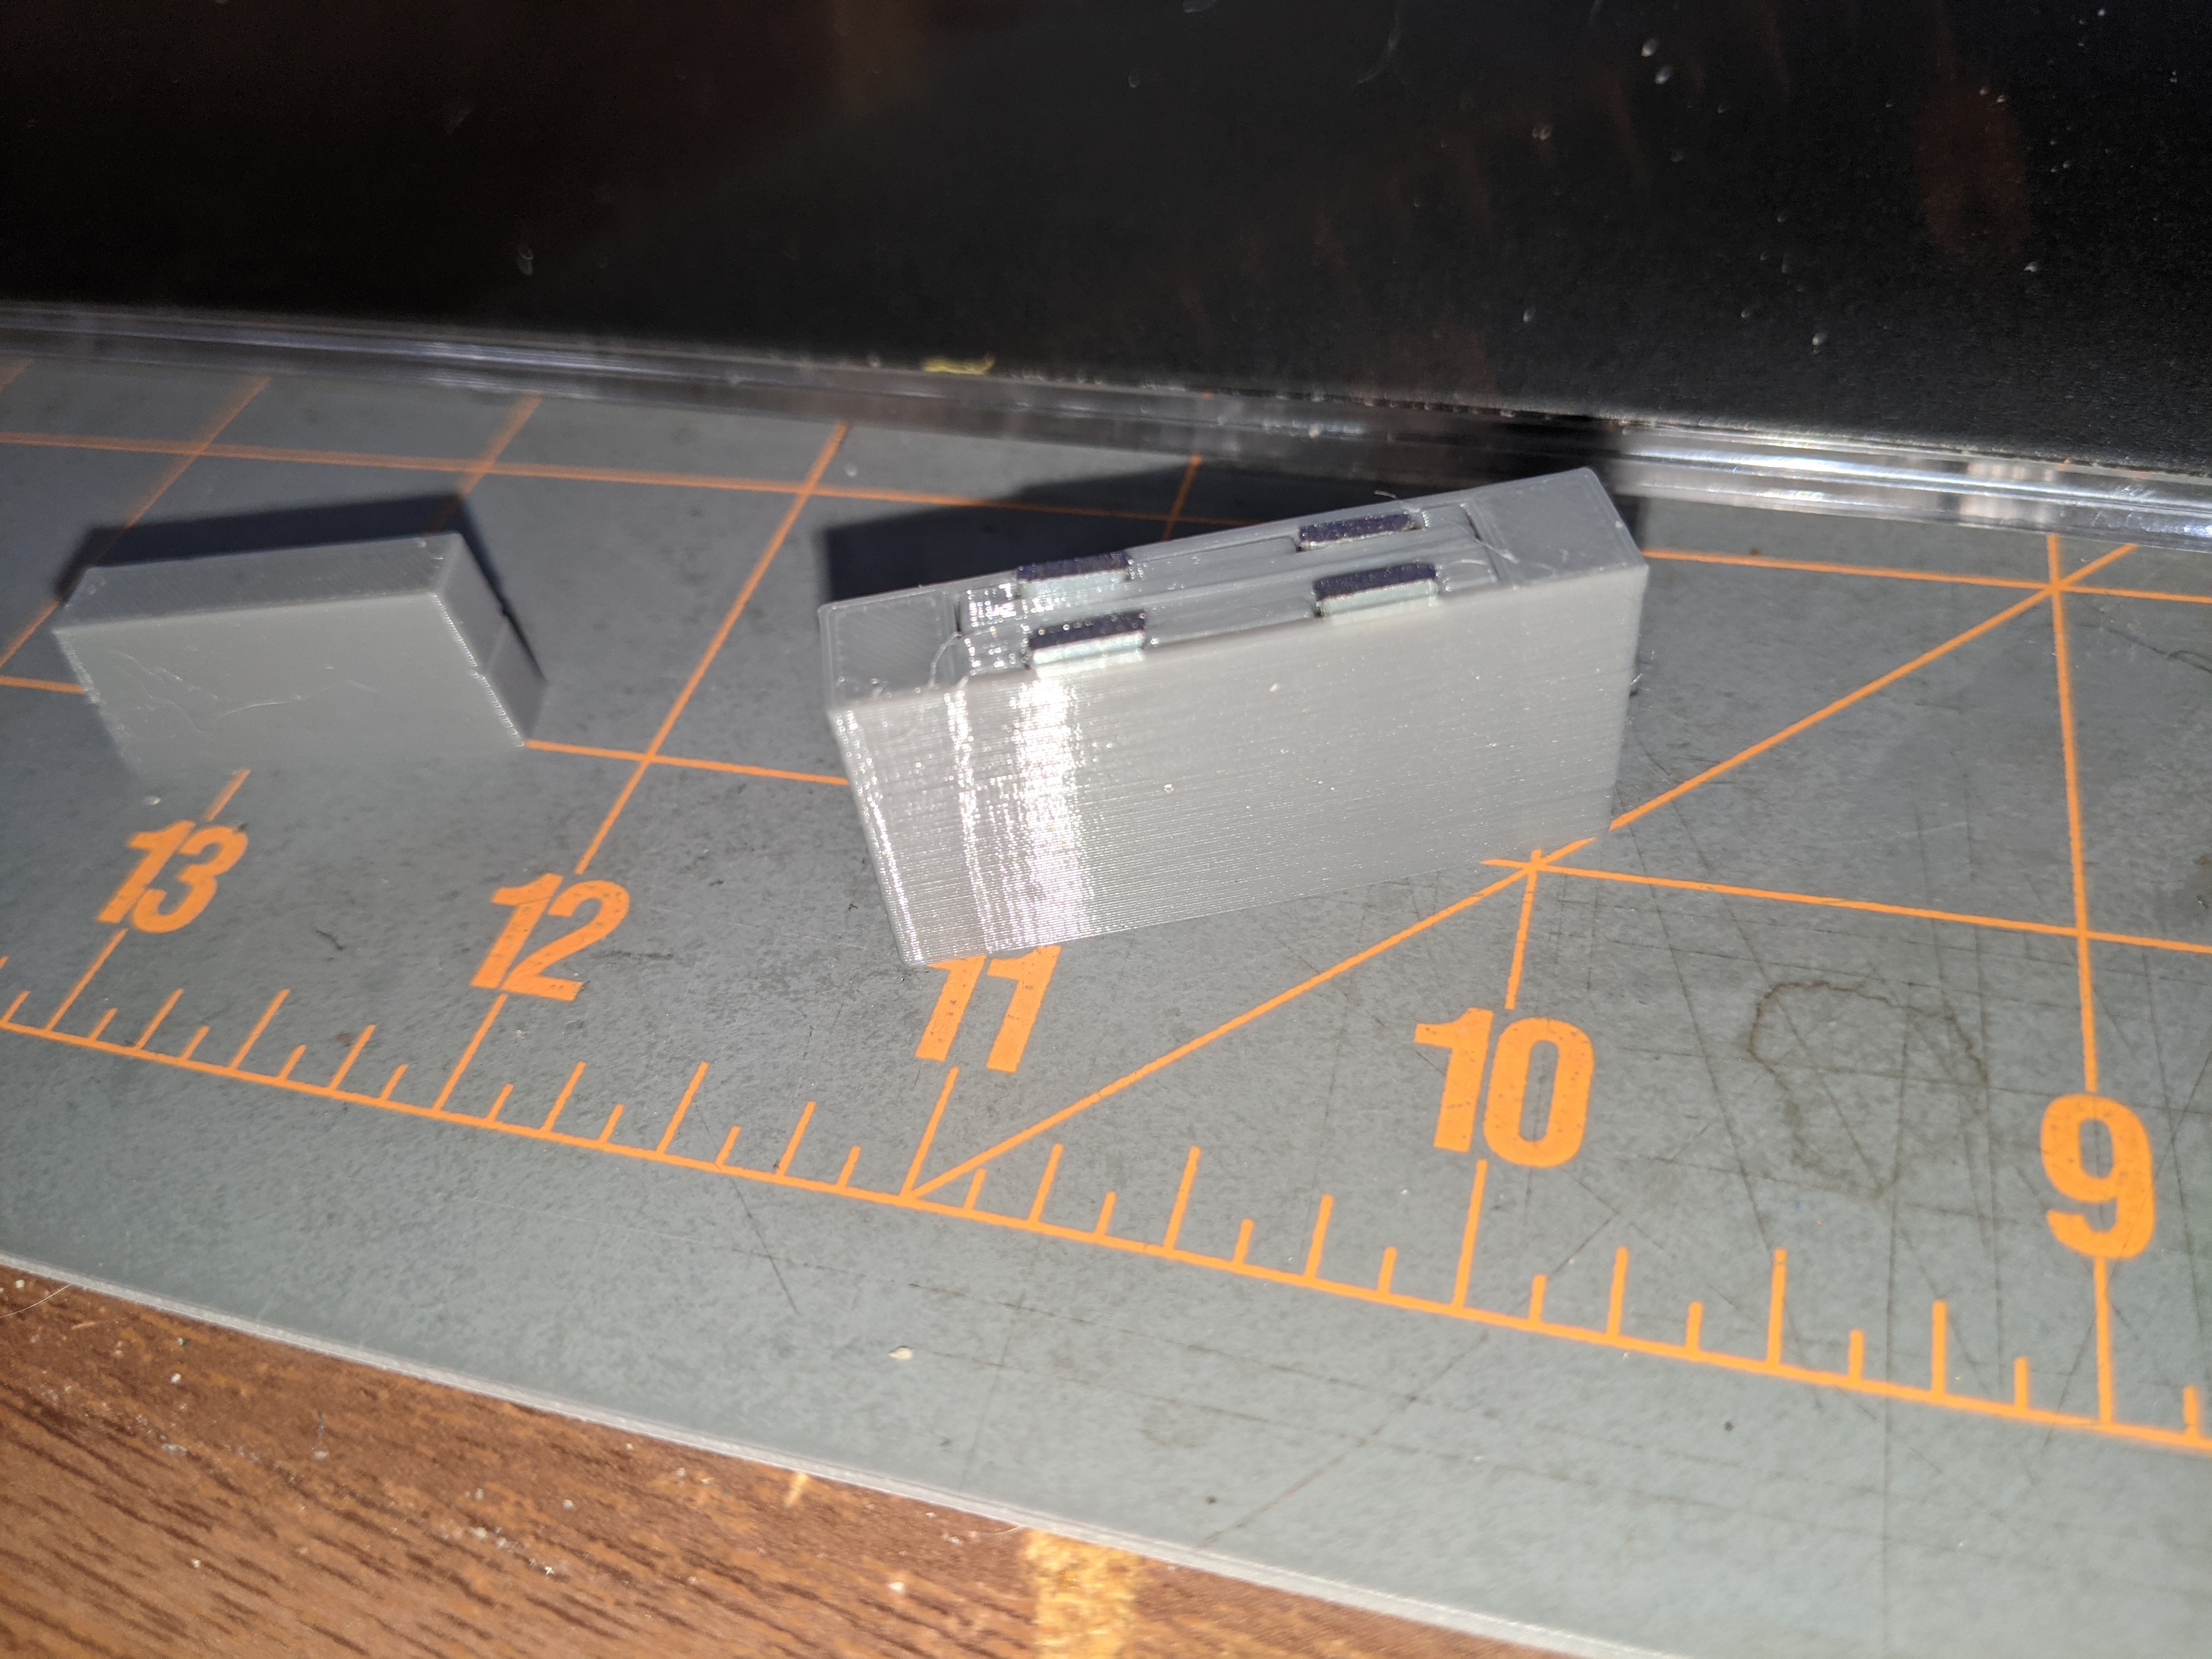
<p>The use of magnets to “stick” a print to metal surface is common; this is typically done by embedding a magnet in a print, or by providing a pocket where a magnet can be inserted after printing. This generally works, but it has two drawbacks:</p><ol><li>Even with strong neodymium magnets, the “grip” (clamping force) can be limited due to the space available</li><li>Neodymium magnets are typically plated, but this plating easily wears off from friction with the surface to which the magnet is stuck; this can result in corrosion of the magnet</li></ol><p>One way to address this problem is with the use of a “pot magnet” in which the magnet is held in a cup or between steel plates; this has the effect of concentrating the clamping force. In addition,because the metal plates contact the surface and not the magnet, wear to the magnet is eliminated.</p><p>My goals with this experimental project were as follows :</p><ol><li>Create a 3D printed mounting magnet assembly which can be used as a “standard part” for 3D prints in general</li><li>Use commonly available materials</li><li>Use only basic tools for the entire project</li></ol><p>Toward that end, the recommended materials and tools need for this project (in addition to a 3D printer) are the following :</p><ol><li>Standard ¼" steel washers (2 required)</li><li>Neodymium magnets, rectangular 9mm X 5mm X 3mm (2 required)</li><li>Hacksaw or Dremel type metal cutting tool</li><li>Hand file</li><li>Vise (optional)</li></ol><p>To make the assembly, two steel “plates” are manufactured by cutting standard steel washers into a “C” shape (the finished width of the “C” should be 10mm). I did this by clamping two steel washers in a vise, back to back (first marking one washer with the desired final width), and sawing off a section with a hacksaw. I then used a hand file to file the washers to my previously marked 10mm width line. This is the most difficult part of the project, but is actually not all that difficult and can be done in 5 or 10 minutes.</p><p>Here are the measurements for the washers I used:</p><ul><li>OD = 18.5mm</li><li>ID = 8.3mm</li><li>Thickness = 1.4mm</li></ul><p>The 3D printed parts consist of the following pieces :</p><ul><li>Holder (two required) - holds the magnets and plates</li><li>Carrier (optional) - holds the plate assembly</li><li>Blank (optional) - a test blank to test the fit of the plate assembly in the carrier</li></ul><h4>Assembly</h4><p>[See also included photos]</p><p>To assemble the pieces, start by placing one of the “C” plates in the printed holder. Next, insert two magnets into the rectangular pockets on the other side of the holder. </p><p><strong>IMPORTANT :</strong> Both magnets must be facing the same way in the holder. That is, both north poles (or south poles, it doesn't matter) must be contacting the plate. I strongly recommend marking the faces prior to assembly, because the magnets have a tendency to “flip” into the incorrect orientation.</p><p>With both magnets inserted, add the second holder over the magnets, and then add the second “C” plate. At this point the “plate assembly” should hold itself together magnetically. This is a good time to test the assembly by clamping it to a metal surface. If you do not get a strong clamping force with this simple test, then you probably have one of the magnet faces reversed.</p><p>If desired, the plate assembly can now be inserted into the Carrier. Note that the opening in the Carrier has a wide end and a narrow end. The plate assembly also has wide and narrow ends. Insert the narrow end of the plate assembly into the wide opening in the Carrier, and press it in until it snaps into position. This is intentionally a tight fit; it can be helpful to use a wide flat screwdriver or similar tool to press the assembly into place.</p><p>Be advised that mounting magnets of this type work best on bare metal surfaces. Paint, rust, dirt, or surface roughness will all reduce the clamping force.</p><p> </p><h4>Print Instructions</h4><p> </p><p>Print the parts in PLA using the 3mf or gcode files provided.</p><p> </p><h4>CAD</h4><p> </p><p>The OnShape 3D CAD files for this are here :</p><p><a href="https://cad.onshape.com/documents/4ca1d0c1f6ef06772aa88584/w/0c87af5c2e500911caa81f6f/e/fbae2809bb17b89673735743">https://cad.onshape.com/documents/4ca1d0c1f6ef06772aa88584/w/0c87af5c2e500911caa81f6f/e/fbae2809bb17b89673735743</a></p><p> </p>
With this file you will be able to print Experiment - Improving Magnet Clamping Force - Pot Magnet/Mounting Magnet with your 3D printer. Click on the button and save the file on your computer to work, edit or customize your design. You can also find more 3D designs for printers on Experiment - Improving Magnet Clamping Force - Pot Magnet/Mounting Magnet.