Exposure Tester
thingiverse
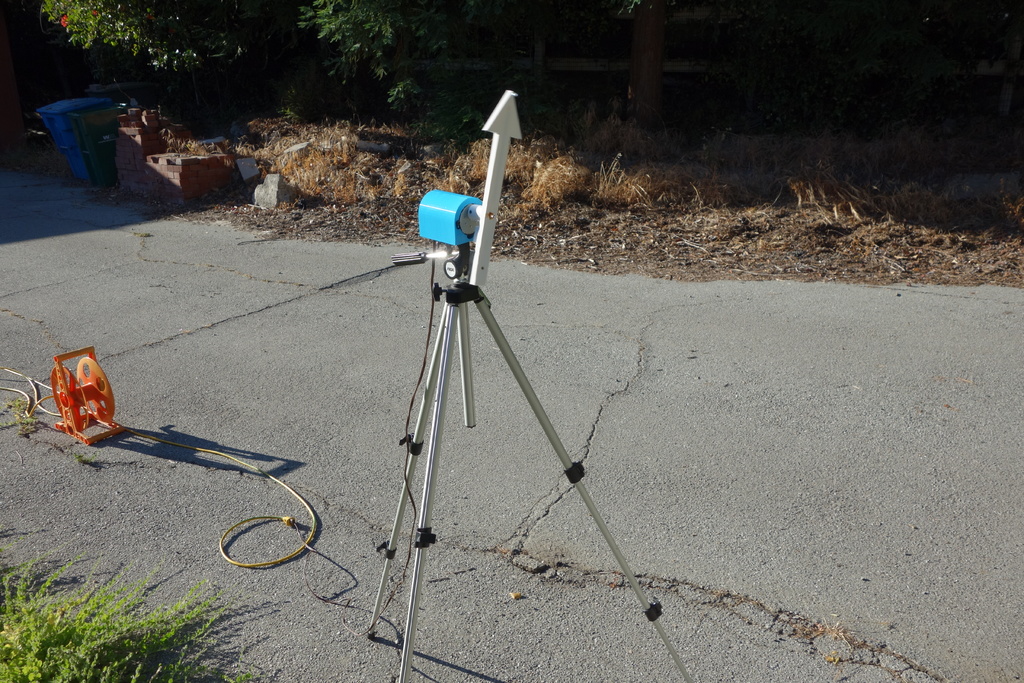
This tool is designed to test the exposure time of a camera. I have a trail camera that I suspect is taking longer exposures than claimed, so I built this device to verify its performance. The idea behind this project is to create a rotating pointer that the camera will capture in an image. By knowing exactly how fast the pointer rotates, you can calculate the exposure time by measuring the angle of the blurred pointer in the picture. To make measuring the angle easier, there are LEDs at the center and tip of the pointer. I designed the pointer using FreeCAD but created the mount in OpenSCAD because it was simpler to use a threaded hole in that software. The spiral_extrude function made creating threads much easier. To build this device, you will need to download the spiral_extrude script from Thingiverse and edit the mount.scad file to tell OpenSCAD where to find the spiral_extrude script. You do this by editing the "use" line in the file. The pointer has a AAA battery holder attached to its tail end, acting as a counterweight and powering the LEDs. I used 100 Ohm resistors in series with each LED and secured them with hot melt glue and a power switch. I printed the pointer twice, once with 1mm holes for the LED wires and again with 1.5 mm holes, but both times the printer filled the holes completely with plastic. To fix this issue, I changed the hole size to 2mm because that is what I eventually had to drill the holes to in order to fit solder joints through them (the LEDs on hand had very short leads). The motor used was the one from Amazon with a speed of 18 RPM at 60 Hz power. It is expected that few people will build this device due to its limited application. Update: A faster motor is needed as 18 RPM results in a small angle, making it hard to measure accurately late at night when the LEDs appear larger. Update 2: I rebuilt this with a 120 RPM motor, which resulted in a measured 55 degrees of rotation instead of the expected 60 degrees, confirming that the camera's exposure times were accurate. The new motor required re-designing the motor mount due to its size and wire placement. A corrected mount was printed along with a revised pointer featuring a switch mount.
With this file you will be able to print Exposure Tester with your 3D printer. Click on the button and save the file on your computer to work, edit or customize your design. You can also find more 3D designs for printers on Exposure Tester.