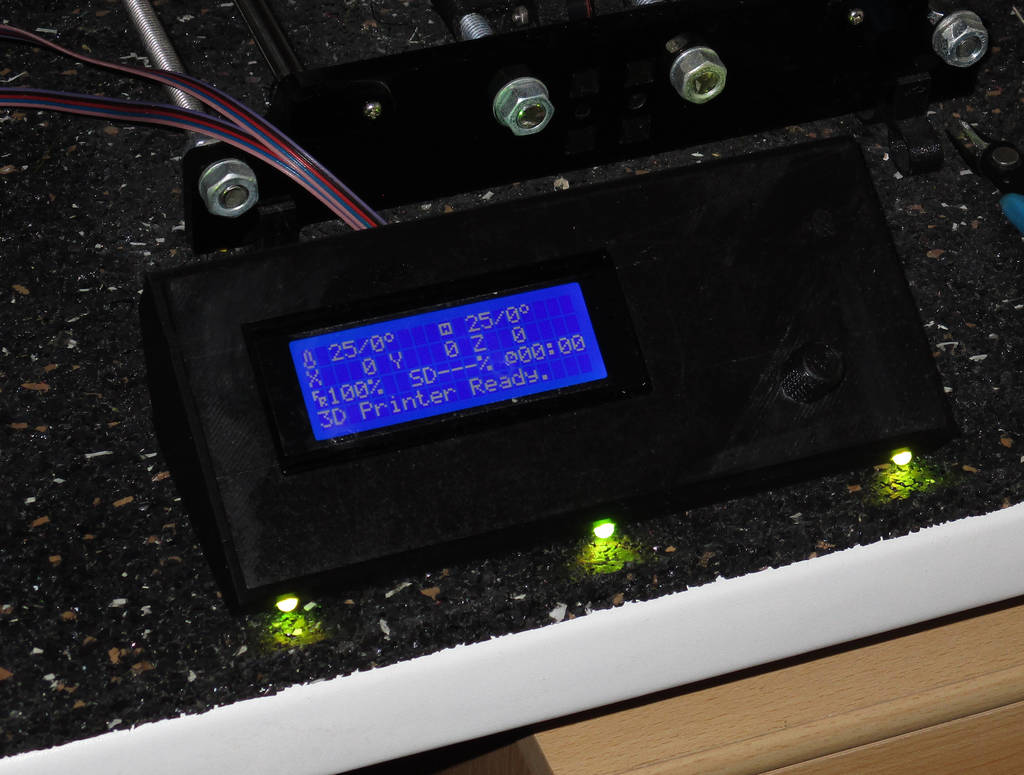
External display with rotary encoder, back and home button and LEDs
thingiverse
# External Display2004 with Rotary Encoder, Back and Home Button and LEDs Made specifically for the Anet A8 and Marlin firmware. ### Display By utilizing an I²C display, the number of required pins can be reduced to just 2 pins. It's a standard LCD2004 with a PCF8575 port expander, exactly like those sold for Arduino. ### Keys The Anet LCD2004 uses a resistor network to encode the buttons to one pin. I'm replicating that setup. The rotary encoder emulates the center button. Up and down are omitted on this pin since the encoder takes over their function. Left and right are emulated, mapped to back and home by Marlin firmware, which is a great feature. I'm using cheap TTP223 buttons, so I need a transistor to map the +5V signal to 0V and GND to N/C. If you use switches instead, you'd omit the resistors (470 Ohm) at J_HOME and J_BACK as well as the transistors and connect the switch directly to the collector and emitter (outer pins). ### Encoder On the encoder, make sure to remove the switch's pullup resistor if it exists. The pullups on the CLK, DT pins may remain. ### LED I'm using common anode RGB LEDs. Since one pin can drive one LED, I included a LED driver on the PCB: the lower three transistors and their resistors. I had no space to place the green resistor at the bottom, so I put it next to the 10-pin connector. The LED driver is connected by three jumper wires which I couldn't fit in Fritzing without hiding the PCB, so I marked the connection points in red, green and blue. ### PCB The yellow lines are wires on the underside, the orange lines are on the top side. Green circles connect both sides. The orange wires are insulated and only connect at the ends (I omitted changing the side in Fritzing right next to the connectors). Most resistors stand upright (circles), the black line marks the location of the other leg. At the right hand side, you see a yellow line hiding an orange line. ### Connectors On J_HOME and J_BACK, solder the TTP223 sensors to the underside of the PCB. Top is VCC, middle is sensor and bottom is GND. I added some wire to connect the TTP to the PCB. J_LCD is GND, VCC, I²C SDA, I²C SCL from top to bottom. J_ENCODER is CLK, DT, SW, VCC, GND. J_RGB_LED is Blue, Green, VCC, Red from left to right. J_IN is connected to the LCD connector on the Anet A8. The pins are: |Left |Right| |- |- | |GND |+5V | |Blue_LED (A4) |ENC_CLK (RX1)| |Green_LED (A3)| ENC_DT (TX1)| |Red_LED (A2) |I²C_SCL| |ADC_KEYPAD (A1) | I²C_SDA| ### Configuration You'll need Marlin bugfix-1.1.x since I had to fix some bugs in order to configure this LCD. I will update to 2.0.x soon. You could just apply my patches, too (ask for them), but you'd miss out on other fixes. Look at the sample Configuration.h.txt: It tells you to comment out the ZONESTAR_LCD which is used by the A8. Then search for the #define RGB_LED and edit the settings in your configuration accordingly. The section below "I²C-2004-Display and ADC key" goes to the end of your Configuration.h ### Encoder Button I recommend https://www.thingiverse.com/thing:2549137 It was a bit too deep for my encoder; I dropped some junk into the opening and it works well now. ### Version 1 The LCD screwholes in the cover are slightly off to the right hand side. Back button is too thin to be visible Backside was work in progress. ### Version 2 I moved the screw holes to the left and made them longer and enlarged the line of the back button. I did not re-print the front cover, though; if you do and if it fits (or doesn't), please comment. Back side and cable cover printed well. ### Credits The LCD dummy I used is https://www.thingiverse.com/thing:2849816 (I don't think using it as a dummy qualifies as a remix, please correct me if I'm wrong)
With this file you will be able to print External display with rotary encoder, back and home button and LEDs with your 3D printer. Click on the button and save the file on your computer to work, edit or customize your design. You can also find more 3D designs for printers on External display with rotary encoder, back and home button and LEDs.
