Extra Large Dragon Egg with Threads - (300 percent scaled version)
thingiverse
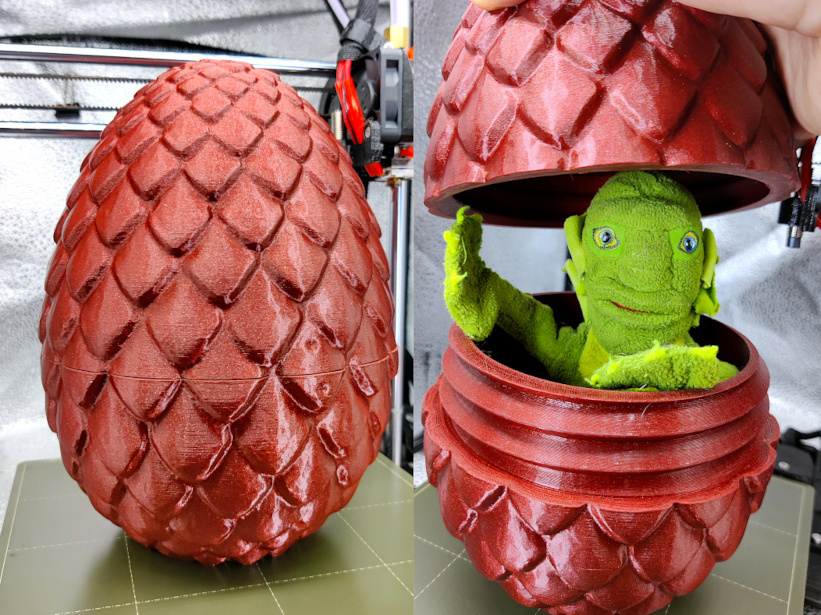
Less than 10 percent of people who download an item click the “like” button. Be the 10 percent. Click the “like” button and show your support. It means a lot, and us designers really appreciate it. The STL files are too large for Thingiverse, but you can download everything from my [Printables page](https://www.printables.com/model/173579-extra-large-dragon-egg-with-threads-300-percent-sc). After much trial and error, I present my threaded dragon egg at 300 percent scale. This was way more involved than simply enlarging it in the slicer. I went through SEVERAL iterations to get it right. At 300 percent, the egg is 132mm (5.2") wide by 190mm (7.5") tall. Here are the alterations: * Adjusted Seam, so the nubs align and the fit is not too loose and not too tight. * Thinner walls so it uses less plastic. * Adjusted thread tolerances for a better fit. * Modified threads – the original threads at this larger size would have caused overhangs * Modified inner dome in the top piece - the original dome at this larger size would have required supports. Directions: I recommend a layer height of 0.2mm or smaller, walls at least 0.8mm thick, and top/bottom layers at least 0.6mm thick. 15 percent Gyroid infill and no supports. The files are already scaled to 300 percent, so you don't need to adjust the scale in your slicer unless you want a different size. 1. I HIGHLY recommend you print *CalibrationTop* and *CalibrationBottom* first. These print much faster than the whole egg (although they still take a while), and you will very likely need to print the calibration pieces a few times before you get a good fit. Please don't leave a negative review about the pieces not fitting if you ignored Steps 1 through 3. 2. Check the pictures above to view the alignment nubs. After printing the calibration pieces, screw them together and apart repeatedly. This will lightly sand away the imperfections. Then try to align the nubs. If the fit is too tight, the nubs won't reach each other. If the fit is too loose, one nub will go past the other. If it's a perfect fit, congratulations, you can move on to step 4. 3. If too tight, in PrusaSlicer, set XYCompensation to a negative number. I recommend starting with -0.1mm (that's negative) and working from there. This setting is called Horizontal Expansion in Cura. If too loose, try starting with 0.1mm. Please be patient. Every printer/filament combination has a slightly different expansion rate. Prusa printers with Prusa filament stand the best chance of printing without modification. You can also just lightly sand the bottom of the top piece if just slightly too tight. 4. Now it's time to print the real deal, *ThreadedDragonEggExtraLargeTop* and *ThreadedDragonEggExtraLargeBottom*. Use the XY Compensation setting that worked best for the calibration pieces. If the fit is slightly tight, sand the bottom of the top piece until the nubs align. If you like this design and want to show your support, you can share your make, leave a review, or buy me a coffee via [Paypal](https://www.paypal.me/tonyyoungblood), [Venmo](https://www.venmo.com/u/Tony-Youngblood), or [CashApp](https://cash.app/$TonySYoungblood)). I appreciate your support. The original egg scales fine at 150 percent and 200 percent. At 225 percent and up, I recommend using this one. At the smaller scales (ex. 225 and 250 percent), you will need a lower number in XYCompensation. (Perhaps -0.15 or -0.2mm.) See my [original dragon egg](https://www.thingiverse.com/thing:5343146) for more info.
With this file you will be able to print Extra Large Dragon Egg with Threads - (300 percent scaled version) with your 3D printer. Click on the button and save the file on your computer to work, edit or customize your design. You can also find more 3D designs for printers on Extra Large Dragon Egg with Threads - (300 percent scaled version).