Extruder Upgrades
thingiverse
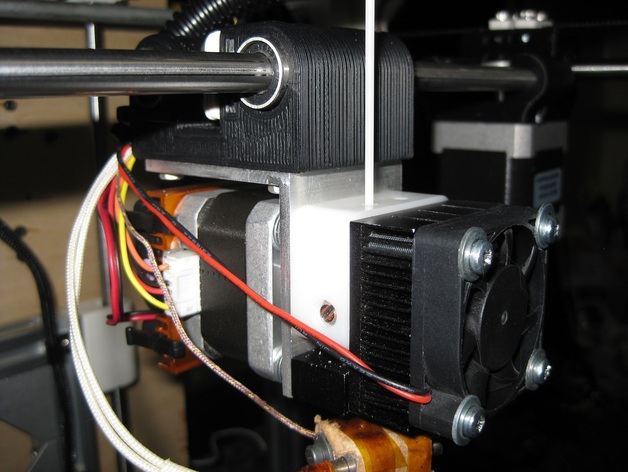
I purchased a QU-BD extruder and I have found a very useful combination of parts to make it work extremely reliably. This is an upgrade on my last design "Very compact MK7 Upgrade" (http://www.thingiverse.com/thing:34757) I am using the stock QU-BD extruder with the following changes. 1) I replaced the set screw that presses on the filament with a Ball-nose Spring Plunger from Mcmaster.com (3408A98) This allows a tight press on the filament with springloaded nose to compensate for inconsistencies in the plastic. This replaces the previous printed parts and allows the use of the stock UHMW piece.) 2) I replaced the gear tooth extruder that came with the extruder with a standard Makerbot version. They are hard to find at makerbot.com, but I have seen knockoffs elsewhere, but I can't remember where right now. 3) I glued a heatsink and fan to the extruder stepper to ensure that the stepper does not get overheated and start to skip steps 4) Most importantly I ensured that the thermocouple (or Thermister) is as close to the nozzle as possible . I bent it around the corner of the heater block and taped it directly next to the nozzle. This ensures that the temperature at the nozzle does not drop to low and clog the nozzle. 5) If you have trouble with the line of extruded plastic not being consistent (ie thick, then thin, then thick, then thin) I found that the cheaper servo motor I used was the problem. I upgraded to 32 step pololus and the problem still occured. Once I replaced the stepper with a hybrid motor the extrusion is smooth and ideal. With these few changes I have completed 4 hour prints without any issue. (I have not tried any longer yet)
With this file you will be able to print Extruder Upgrades with your 3D printer. Click on the button and save the file on your computer to work, edit or customize your design. You can also find more 3D designs for printers on Extruder Upgrades.