Extruder Visualizer
prusaprinters
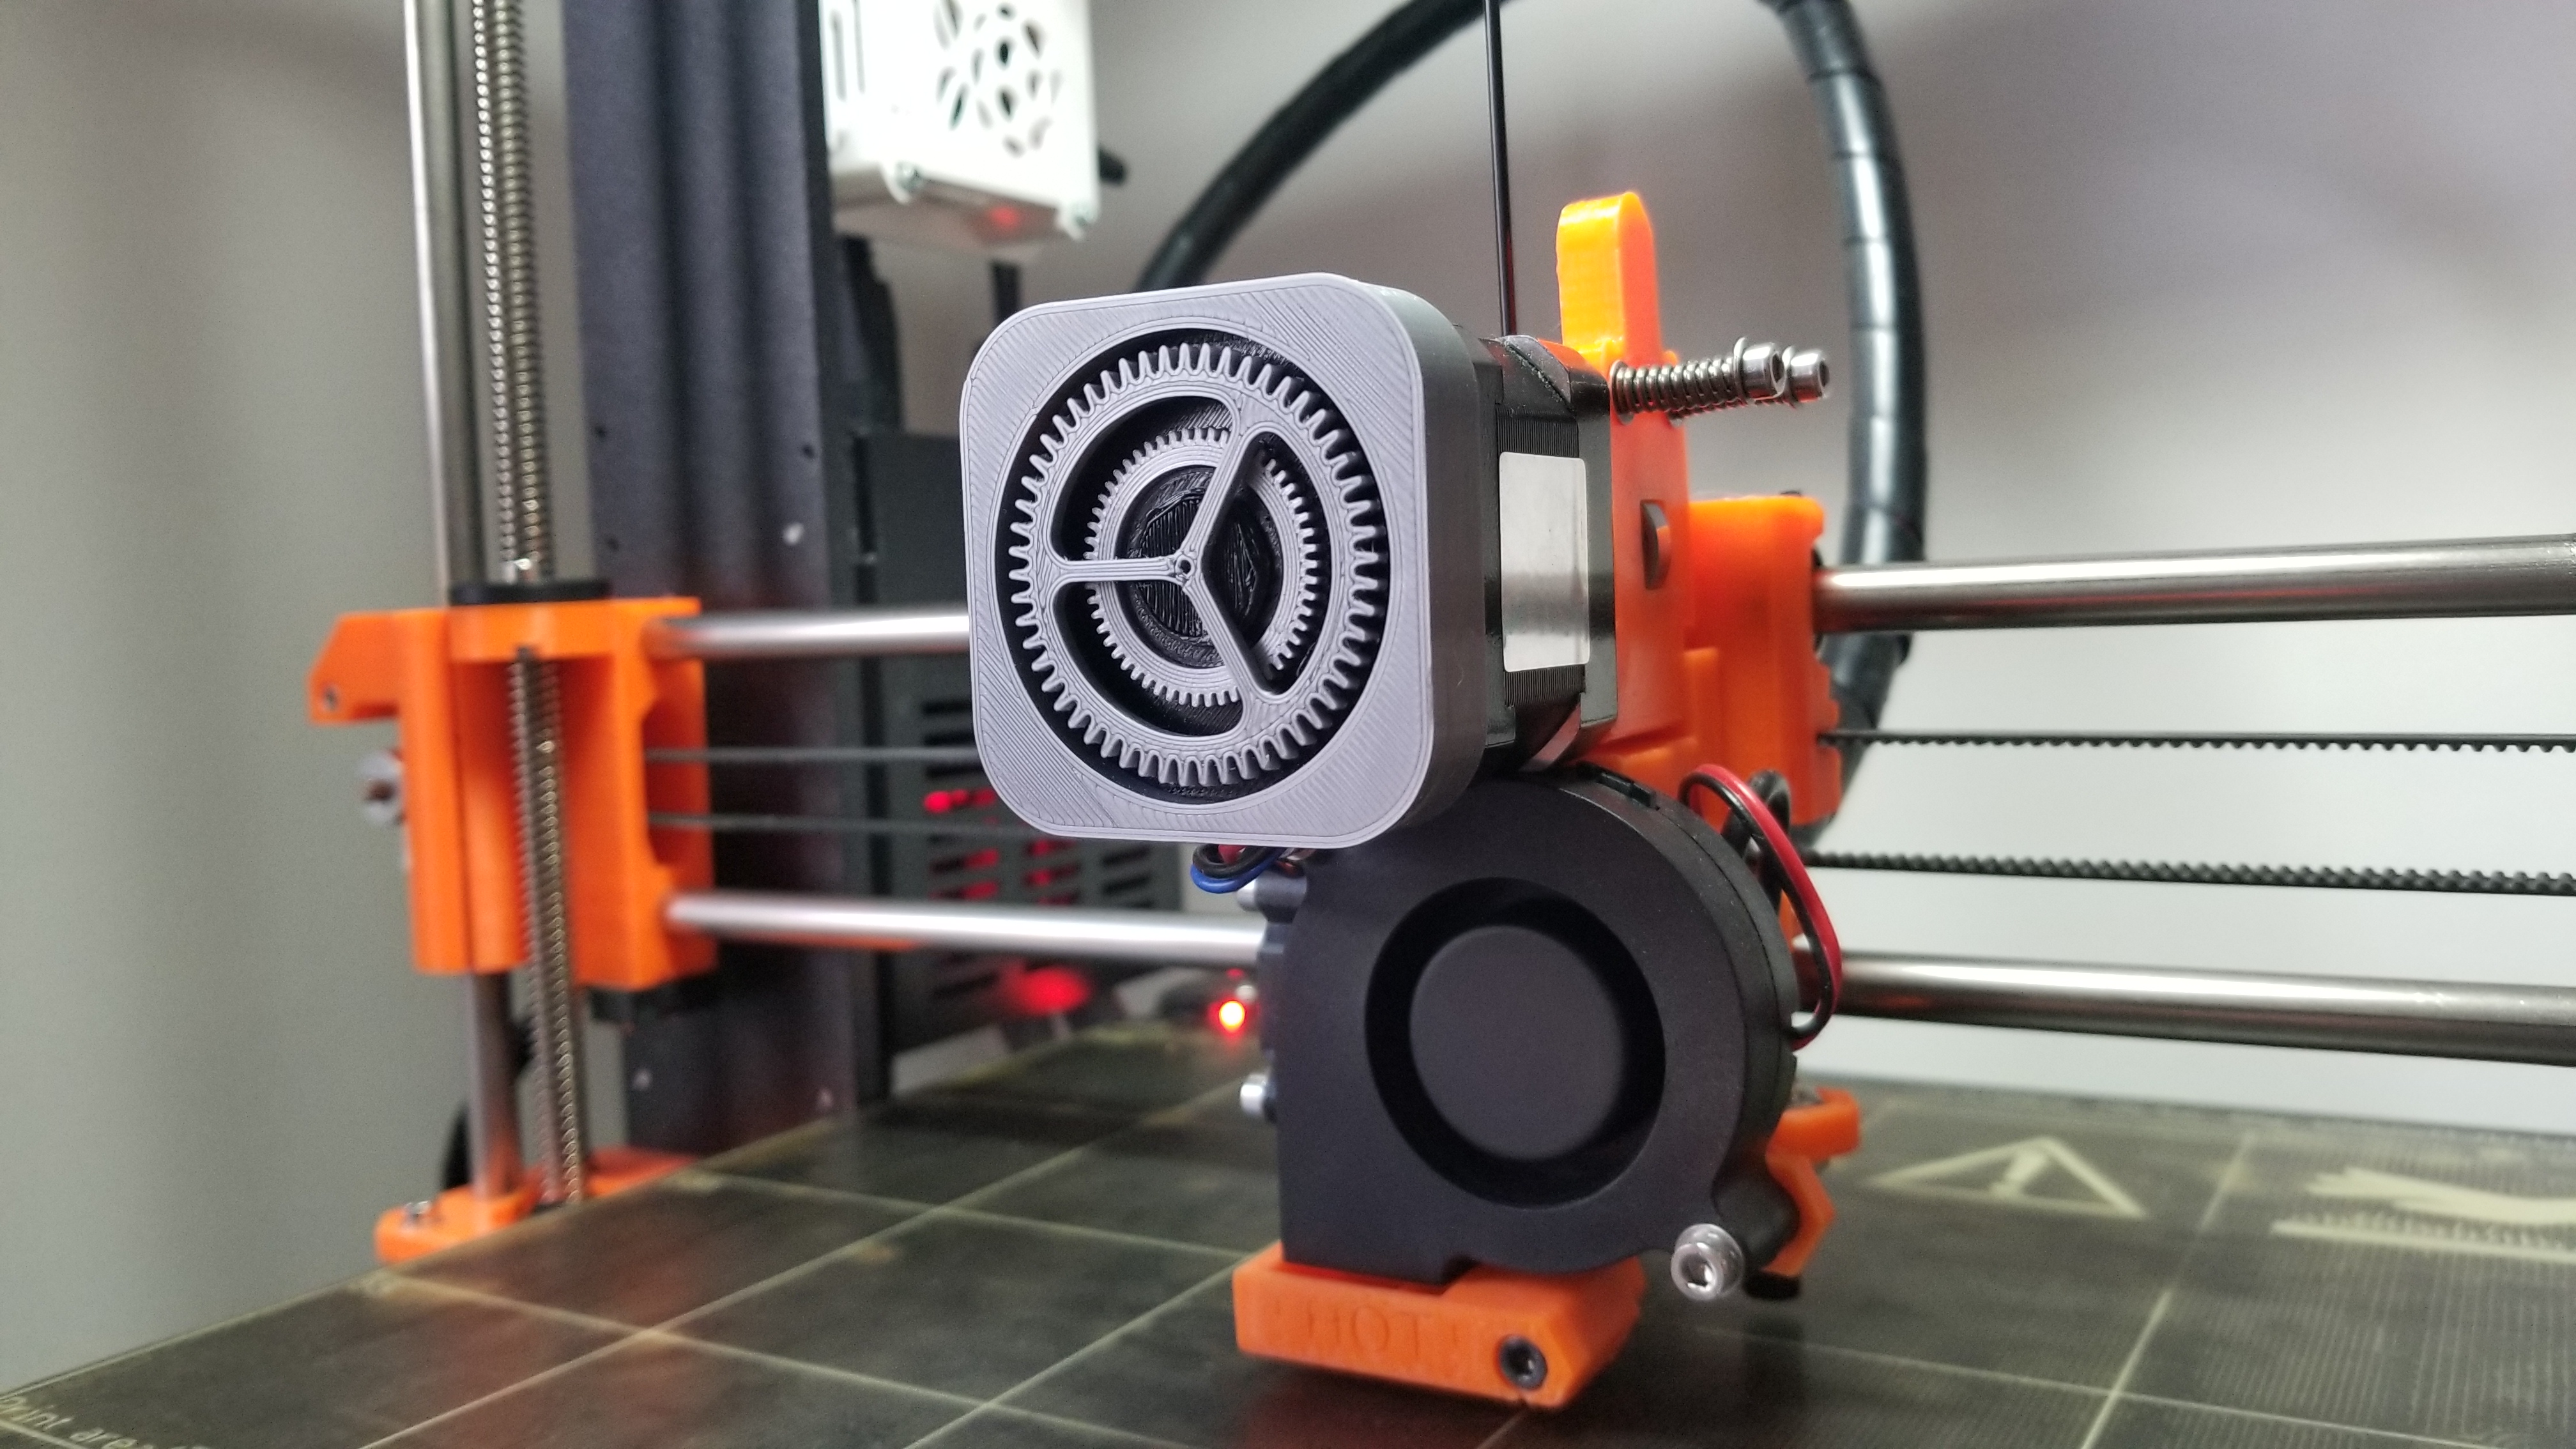
<p>This is an extruder visualizer designed for the Original Prusa to replicate the iPad settings/downloading icon. It would likely fit others as well. It is for use with 8mm rare earth magnets. I added a photo of the brand I used that was available from a local electronics supplier, RP Electronics.</p> <p>Prusa blog discussing extruder rotation indicators...<br/> <a href="https://blog.prusaprinters.org/visualize-extruder-motor-movements/">https://blog.prusaprinters.org/visualize-extruder-motor-movements/</a></p> <p> <figure class="media"> <oembed url="https://youtu.be/0ijzkWdSxE4"></oembed> </figure> </p> <p>A360 downloadable file<br/> <a href="https://a360.co/2Zb5EUd">https://a360.co/2Zb5EUd</a></p> <p>Dec. 30, 2019 update: I have added all new stl and gcode files. The depth of the BackPlate has been tweaked to make the front gear flush to the Trim front. Also, holes for magnets have been added to the back of the BackPlate to allow magnetic attachment rather than double sided tape.</p> <h3>Print instructions</h3><h3>Category: 3D Printer Accessories Print Settings</h3> <p><strong>Notes:</strong></p> <p>The gears should be at the highest resolution you can. Gears and trim part are silver, back is black. You will have to flip some parts for the common sense side to the printer bed. The front gear is silver then change the colour to black mid print for the background of the front gear.</p> <p>You may want to try a 0.25mm nozzle and 0.06 layer height, or with 0.4mm nozzle a 0.10 layer height</p> <h3> Post-Printing</h3> <p>The parts are glued together sparingly with CA. I found it best to first glue the magnets into the “BackPlate” and if necessary use a vice or pliers to press them in flush. The back gear is then glued to the “BackPlate”. The “BackPlate” is then glued to the front trim. The first of the stack of 3 magnets is glued to the back of the front gear. You can temporarily add magnets to the front of the gear to hold the magnet while the glue dries. The back assembly is attached to the extruder and held in place by the 8x3mm magnets. You may need to play with the spacing of the back assembly depending on your exact magnet thickness. In the parameters of the Fusion 360 file I have made the magnet size and BackPlate depth easily adjustable.</p>
With this file you will be able to print Extruder Visualizer with your 3D printer. Click on the button and save the file on your computer to work, edit or customize your design. You can also find more 3D designs for printers on Extruder Visualizer.