Extrusion and Temp Calibration by Nozzle Size with PrusaSlicer
prusaprinters
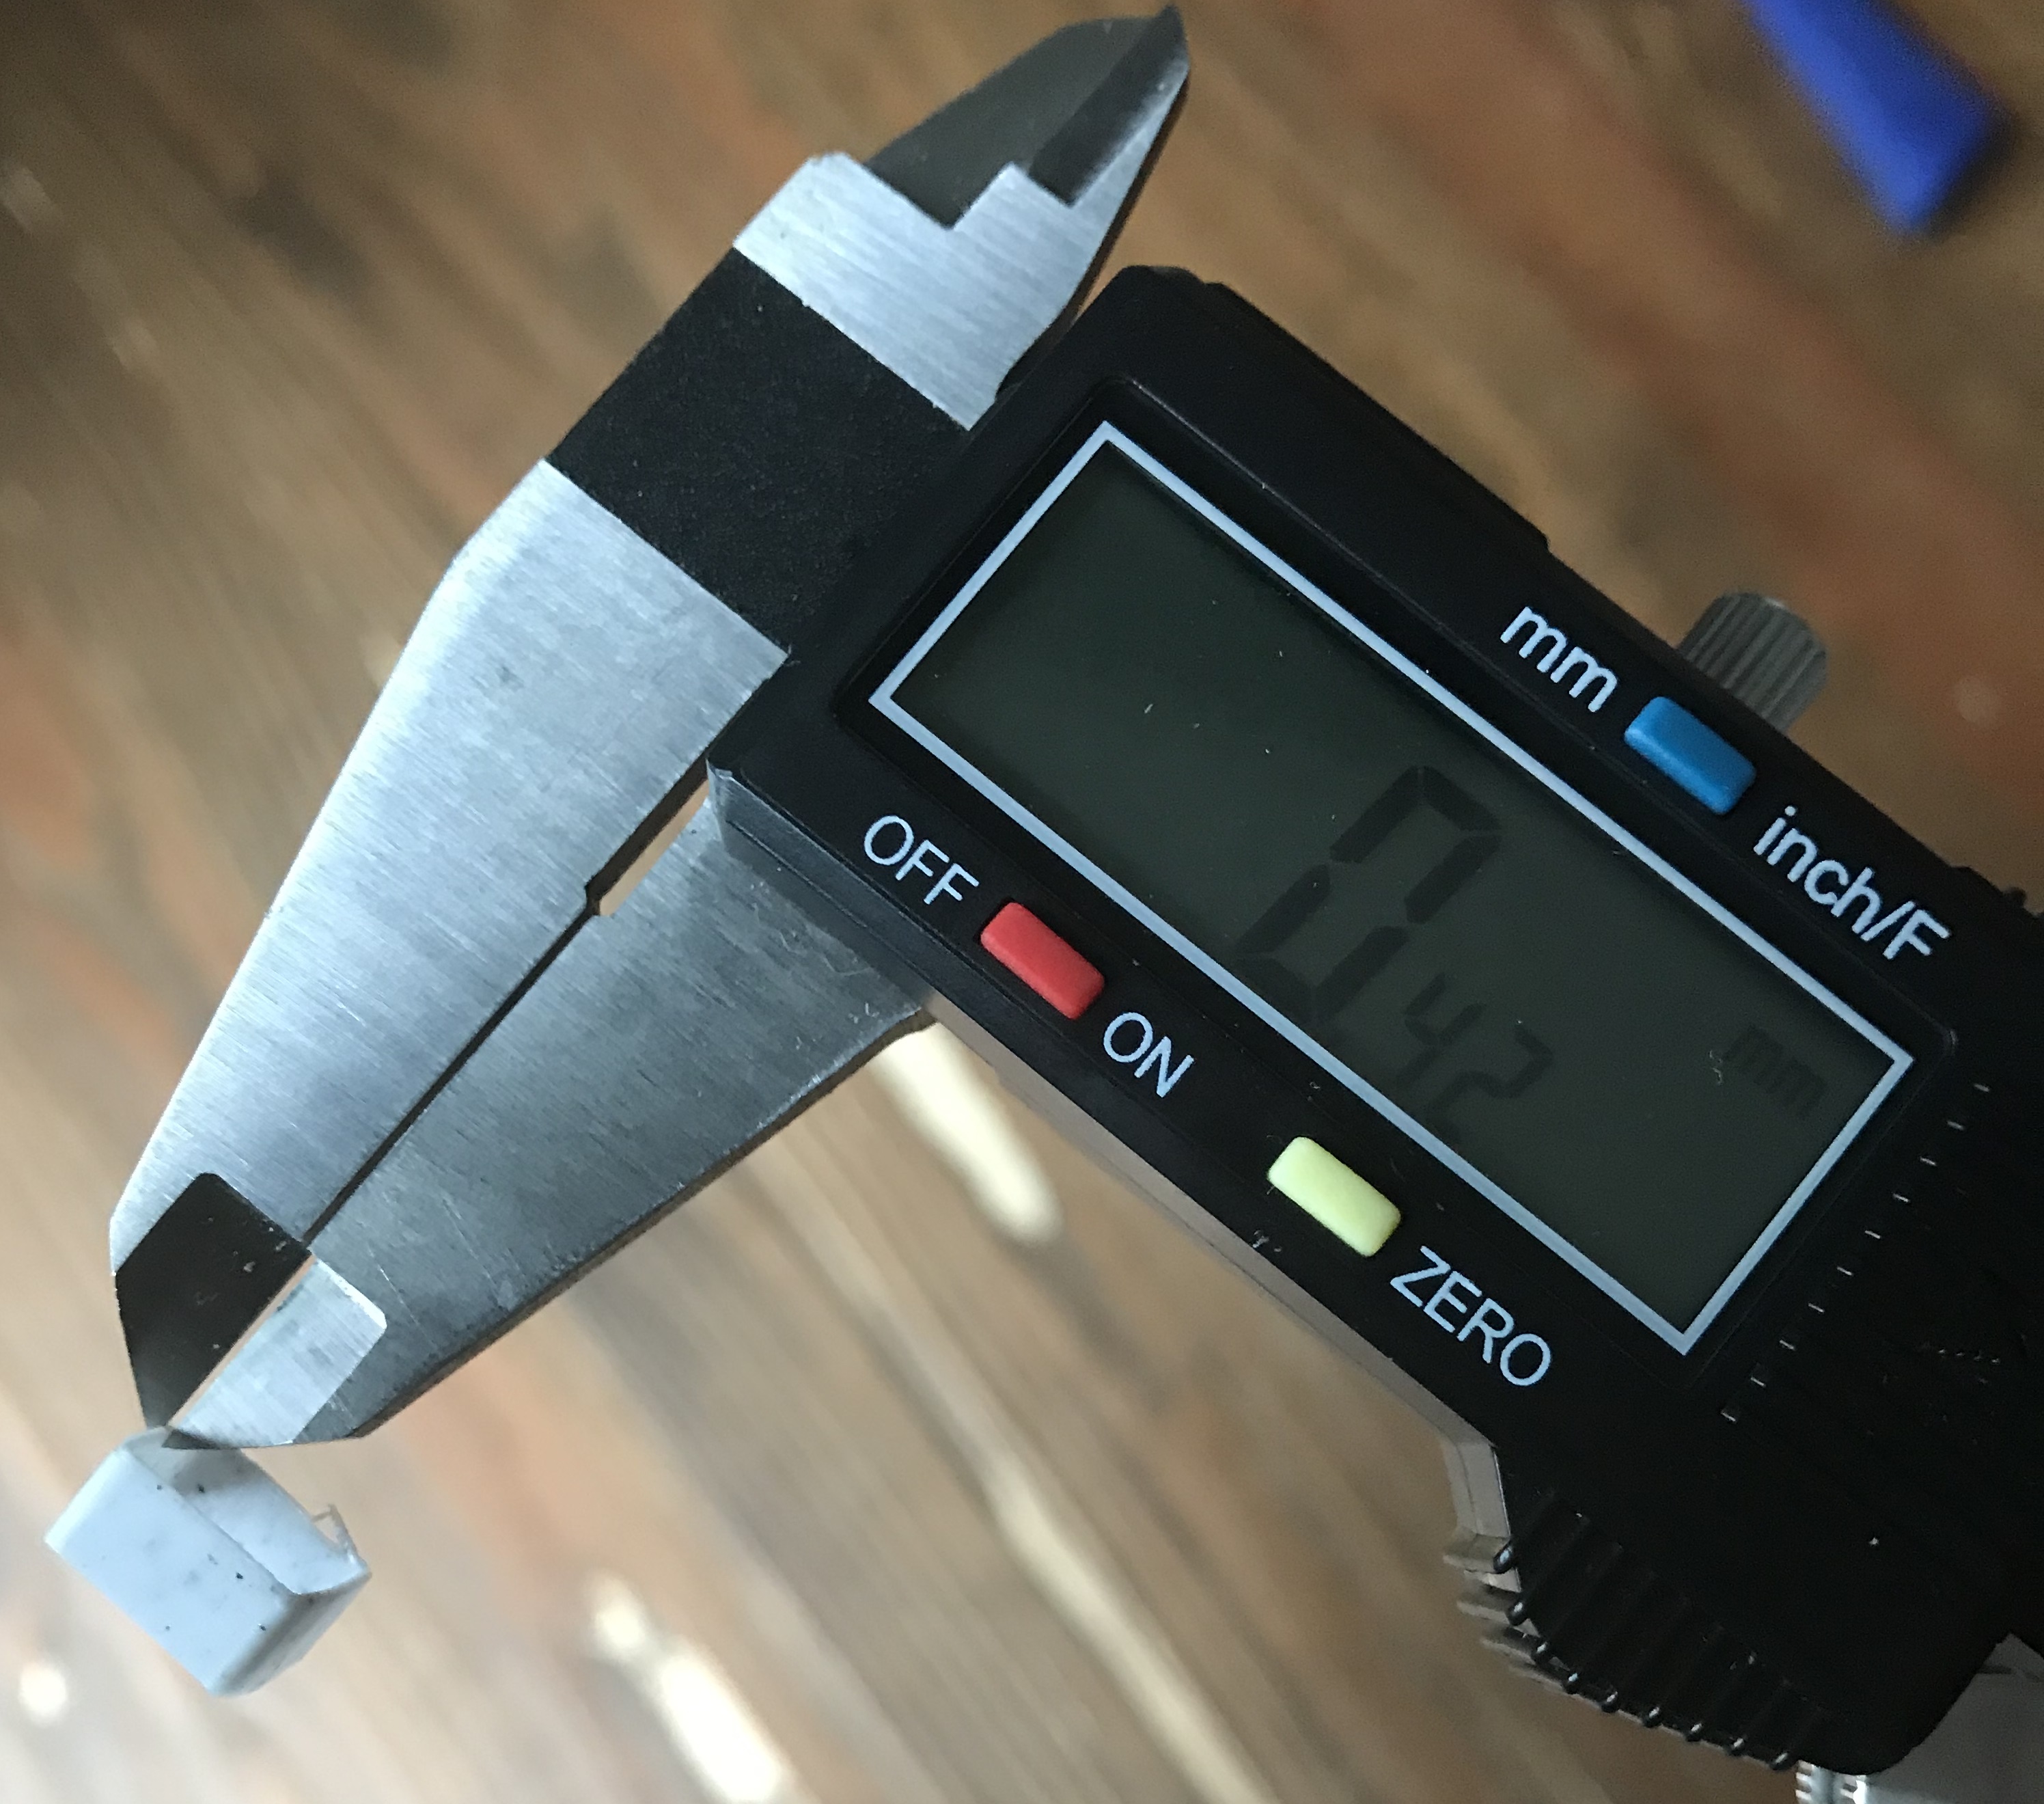
<p>These files and the instructions below are designed to help FDM printer operators calibrate two of the most important settings of their PrusaSlicer filament profile for whatever filament they're using.</p> <h3>Print instructions</h3><p>EDIT: New V2 temp tower files allow for proper bridging perimeters. Older files did not apply overhang detection to bridges due to thin wall detection (a PrusaSlicer problem). Also added pictures indicating where the tuning parameters are located in PrusaSlicer.</p> <hr/> <p><h3>General Notes</h3><br/> This should always be your first two steps when configuring a PrusaSlicer profile for a given filament, and it should ALWAYS be done for any new filament. Save your profiles based on filament type and manufacturer (and any other criteria you want) so you don't have to repeat this process for future rolls of the same filament.</p> <p>All files were designed for their respective nozzle sizes by adjusting wall thickness to the appropriate 105%-of-nozzle-size for single-width extrusion of all walls. Both of the 0.25mm nozzle file's walls are 0.27mm thick (0.263 is too hard to measure, so it's rounded up a bit), the 0.4mm nozzle file's walls are 0.42mm thick, the 0.6mm nozzle file's walls are 0.63mm thick, and the 0.8mm nozzle file's walls are 0.84mm thick. <strong>Be sure to activate thin wall detection or PrusaSlicer wont detect any of the perimeters.</strong></p> <p>You'll need a set of calipers for the extrusion multiplier calibration. I recommend <a href="https://www.amazon.com/gp/product/B000GSLKIW/ref=ppx_yo_dt_b_search_asin_title?ie=UTF8&psc=1">this relatively inexpensive option from Amazon</a>, or an equivalent precision instrument.</p> <p><h3>Tuning Extrusion Multiplier</h3><br/> The objective of this calibration is to make sure that you printer outputs exactly as much filament as your gcode is requesting. If you dont calibrate the slicer profile to your filament in this manner, it is likely that your printer will output slightly more or slightly less filament than the gcode is requesting, resulting in a number of possible problems with the printed part. Sometimes it can be off by 10% or more without proper calibration.</p> <p>Your first step is to configure your PrusaSlicer profile with an extrusion multiplier of 1 and external perimeter width equal to 105% of your nozzle diameter (see pictures for reference). If you run the first print and you are having trouble with adhesion, add a brim. After you've printed out your first EM square you'll need to measure the wall thickness of the top 3-5 layers with calipers (see pictures for reference). Next, you'll adjust the extrusion multiplier value in PrusaSlicer based on your findings. Your new EM value will be your expected wall thickness (external perimeter width setting) divided by measured wall thickness, multiplied by 100. Run the test again with your new EM value and see if the perimeter thickness comes out to exactly what you've configured for your external perimeter width setting. I usually run the EM calibration before the temp tower, and it usually takes 3-5 tries to get things dialed in perfectly. Pro tip: I like to reduce my EM by an additional 1-3% after I get the proper wall thickness from the EM test because it tends to improve overhang performance and the general surface finish of printed parts. After this final adjustment, I watch for perimeter gaps and top layer gaps in my first regular printed parts with the new filament to ensure I'm not underextruding too much. YMMV.</p> <p><h3>Tuning Extrusion Temperature</h3><br/> Just like with the EM calibration, if you are having adhesion problems consider adding a brim. With your calibrated extrusion multiplier already saved in your PrusaSlicer config, paste the following into the '[Printer Settings]>Custom G-Code>After layer change G-Code' section (see pictures for reference):</p> <p>;AFTER_LAYER_CHANGE<br/> ;[layer_z]<br/> {if layer_z >10.000 && layer_z < 20.000}M104 Sxxx; {endif}<br/> {if layer_z >20.000 && layer_z < 30.000}M104 Sxxx; {endif}<br/> {if layer_z >30.000 && layer_z < 40.000}M104 Sxxx; {endif}<br/> {if layer_z >40.000 && layer_z < 50.000}M104 Sxxx; {endif}<br/> {if layer_z >50.000 && layer_z < 60.000}M104 Sxxx; {endif}<br/> {if layer_z >60.000 && layer_z < 70.000}M104 Sxxx; {endif}<br/> {if layer_z >70.000 && layer_z < 80.000}M104 Sxxx; {endif}<br/> {if layer_z >80.000 && layer_z < 90.000}M104 Sxxx; {endif}<br/> {if layer_z >90.000 && layer_z < 100.000}M104 Sxxx; {endif}</p> <p>Make sure to change all 'M104 Sxxx' commands to reflect whatever temperature you want to try in that section, and make sure the first layer/other layers settings in PrusaSlicer are configured appropriately for the first 10mm of the print. For example, if you want to run a temp tower from 255 down to 210, set your extruder temperature to 255 (both 'first layer' and 'other layers') then change the first line of the above gcode commands to read {if layer_z >10.000 && layer_z < 20.000}M104 S250; {endif}, and then change each subsequent line to decrease the temperature by 5 degrees for every 10mm section of the print.</p>
With this file you will be able to print Extrusion and Temp Calibration by Nozzle Size with PrusaSlicer with your 3D printer. Click on the button and save the file on your computer to work, edit or customize your design. You can also find more 3D designs for printers on Extrusion and Temp Calibration by Nozzle Size with PrusaSlicer.