Extrusion Calibration nut and bolt
thingiverse
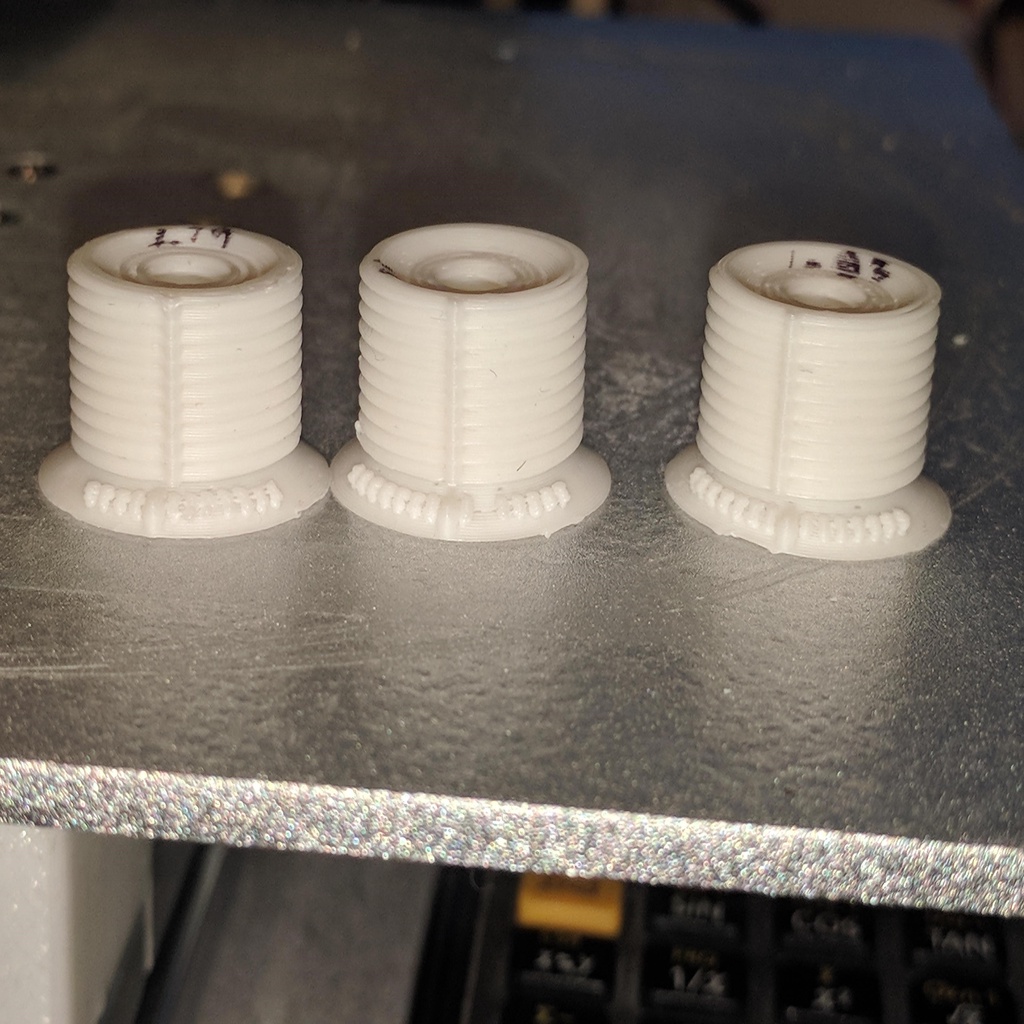
Dec 22 2019: Nut pointer version added to print faster. I have a very inconsistent Hobby King filament spool and have not been able to fully test. Update: tested with ABS and PC. It is great for quickly adjusting print and extruder settings for different filament brands and plastics. Dec 10 2019: Changed the bolt pointer to notches. This is faster if you require Z hop printing with PETG and other filaments. Also added a shorter bolt thread which is faster for iterating slicer adjustments. Once you have printed an accurate master nut in PLA you only need to print the bolt when using a different filament in order to make slicer extrusion adjustments. This is rev2C of my printer extrusion calibrator. It uses threads to measure filament over/under extrusion somewhat like a micrometer. The nut has one pointer while the bolt has one large notch and several small notches equally spaced at 25um to measure over/under extrusion as well as overhang sag. The large bolt notch and the nut pointer align if you have printed perfect geometry threads. The nut and bolt should be finger tight because you are not measuring the tensile strength of the filament and the difference between snug and hard to get off is 25um or so. I work the threaded surfaces together back and forth a few times to knock off any random raised printed surface artifacts that will effect the measurement. The measurement thread surfaces are M10x1. The other not measured calibrator surfaces also use 1mm pitch threads and this gives the sliced thread layers a constant cross section which is handy if you want to test slicing and printing options to improve the finished thread surface. My Fusion 360 CAD model has 0.09mm of axial clearance so the printed threads should effortlessly spin together. Extruding over 0.09mm will make it extremely difficult to twist the nut and bolt together using fingers so just reprint both parts with less extrusion and move on, they are under 1gr and 10 minutes to print. Print the nut and bolt with no supports on a raft then screw them together (the raft isolates bed leveling accuracy from the measurements). The nut bottom has a recessed reference surface that should not touch the raft and small raft attachment blemishes do not effect the measurement. When a perfect nut and bolt are fully screwed together the large notch and pointer align. Regardless of what you get make a note on the bolt base of the nut pointer position with a felt pen or estimate the over/under extrusion measurement using the bolt's small pointers. Next you flip the nut over, screw them together again, and remeasure. If the threads have no sag the nut pointer will twist on using the same twisting force to the previous measurement position. Typical overhanging surfaces sag and the correct extrusion factor is the average of the 2 clearance measurements or simply they should be an equal distance on opposite sides of the large bolt pointer. Spoiler alert the two clearance measurements will not match, gravity takes its total on overhanging surfaces. You can try to improve the part cooling, tweak the filament temperature, change brands, change filament or even try a different slicer. If the average for the 2 measurement indicates under extrusion I decreased the diameter of the filament at the printer. For over extrusion I increased the diameter of the filament. You can adjust the extrusion multiplier in several places but pick one and stick with it. After you have made the extrusion adjustments keep the final set with the printer. It helps to have known good parts to test against if you ever have a printer problem. In the pic 3 measurement sets are printed with different filament diameters from left to right 1.79, 1.81 ,and 1.83 The 1.83 set has the best pointer alignment (closest average) for both nut measurements, 1 pointer or +-50um Designed in Fusion 360 and printed on a Cetus mk2 extended with a few mods. Peter
With this file you will be able to print Extrusion Calibration nut and bolt with your 3D printer. Click on the button and save the file on your computer to work, edit or customize your design. You can also find more 3D designs for printers on Extrusion Calibration nut and bolt.