Extrusion
thingiverse
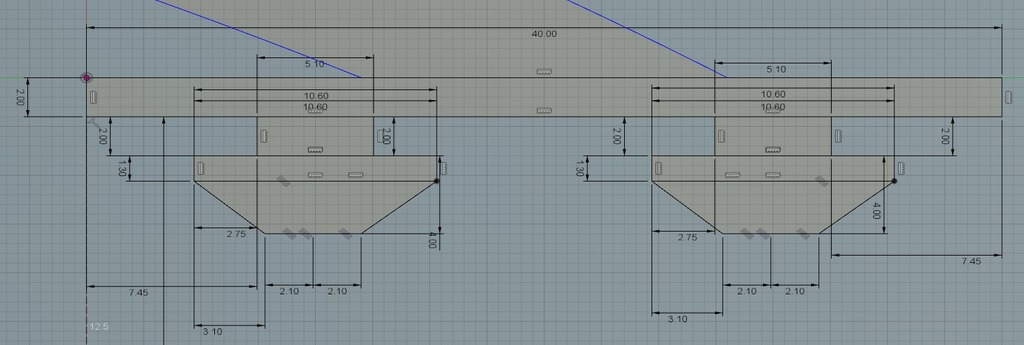
If you are trying to design parts that need to be rail mounted it can sometimes be a pain to get all the measurements from plans or with your trusty vernier calipers. So here is my technical drawing of the rail insert that I printed on my Creality Ender3. The part fits snugly into the extrusion with no slop. Obviously this is the full 4040 rail with the double extrusion on each face of the alluminium extrusion. If you want the 2020 or 4020 rail with just one slot then just cut the plan exactly in half at the 20mm mark as it is symetrical. Most Creality Ender3 are going to have very similar tollerance as long as you correctly maintain your printer so measurements should be sound. Once you have drawn this (Fusion 360 used to create this) I suggest you print a small section to test it before integrating it into part designs. I normally print around 4mm high sample to test fit. Hope this helps you make that upgrade for your printer. Check out my YouTube channel DonLabs for tips on electronics. https://www.youtube.com/watch?v=pS7E-TpymMc&t=1s
With this file you will be able to print Extrusion with your 3D printer. Click on the button and save the file on your computer to work, edit or customize your design. You can also find more 3D designs for printers on Extrusion.