EyeLight (Hat Attachment Headlamp)
cults3d
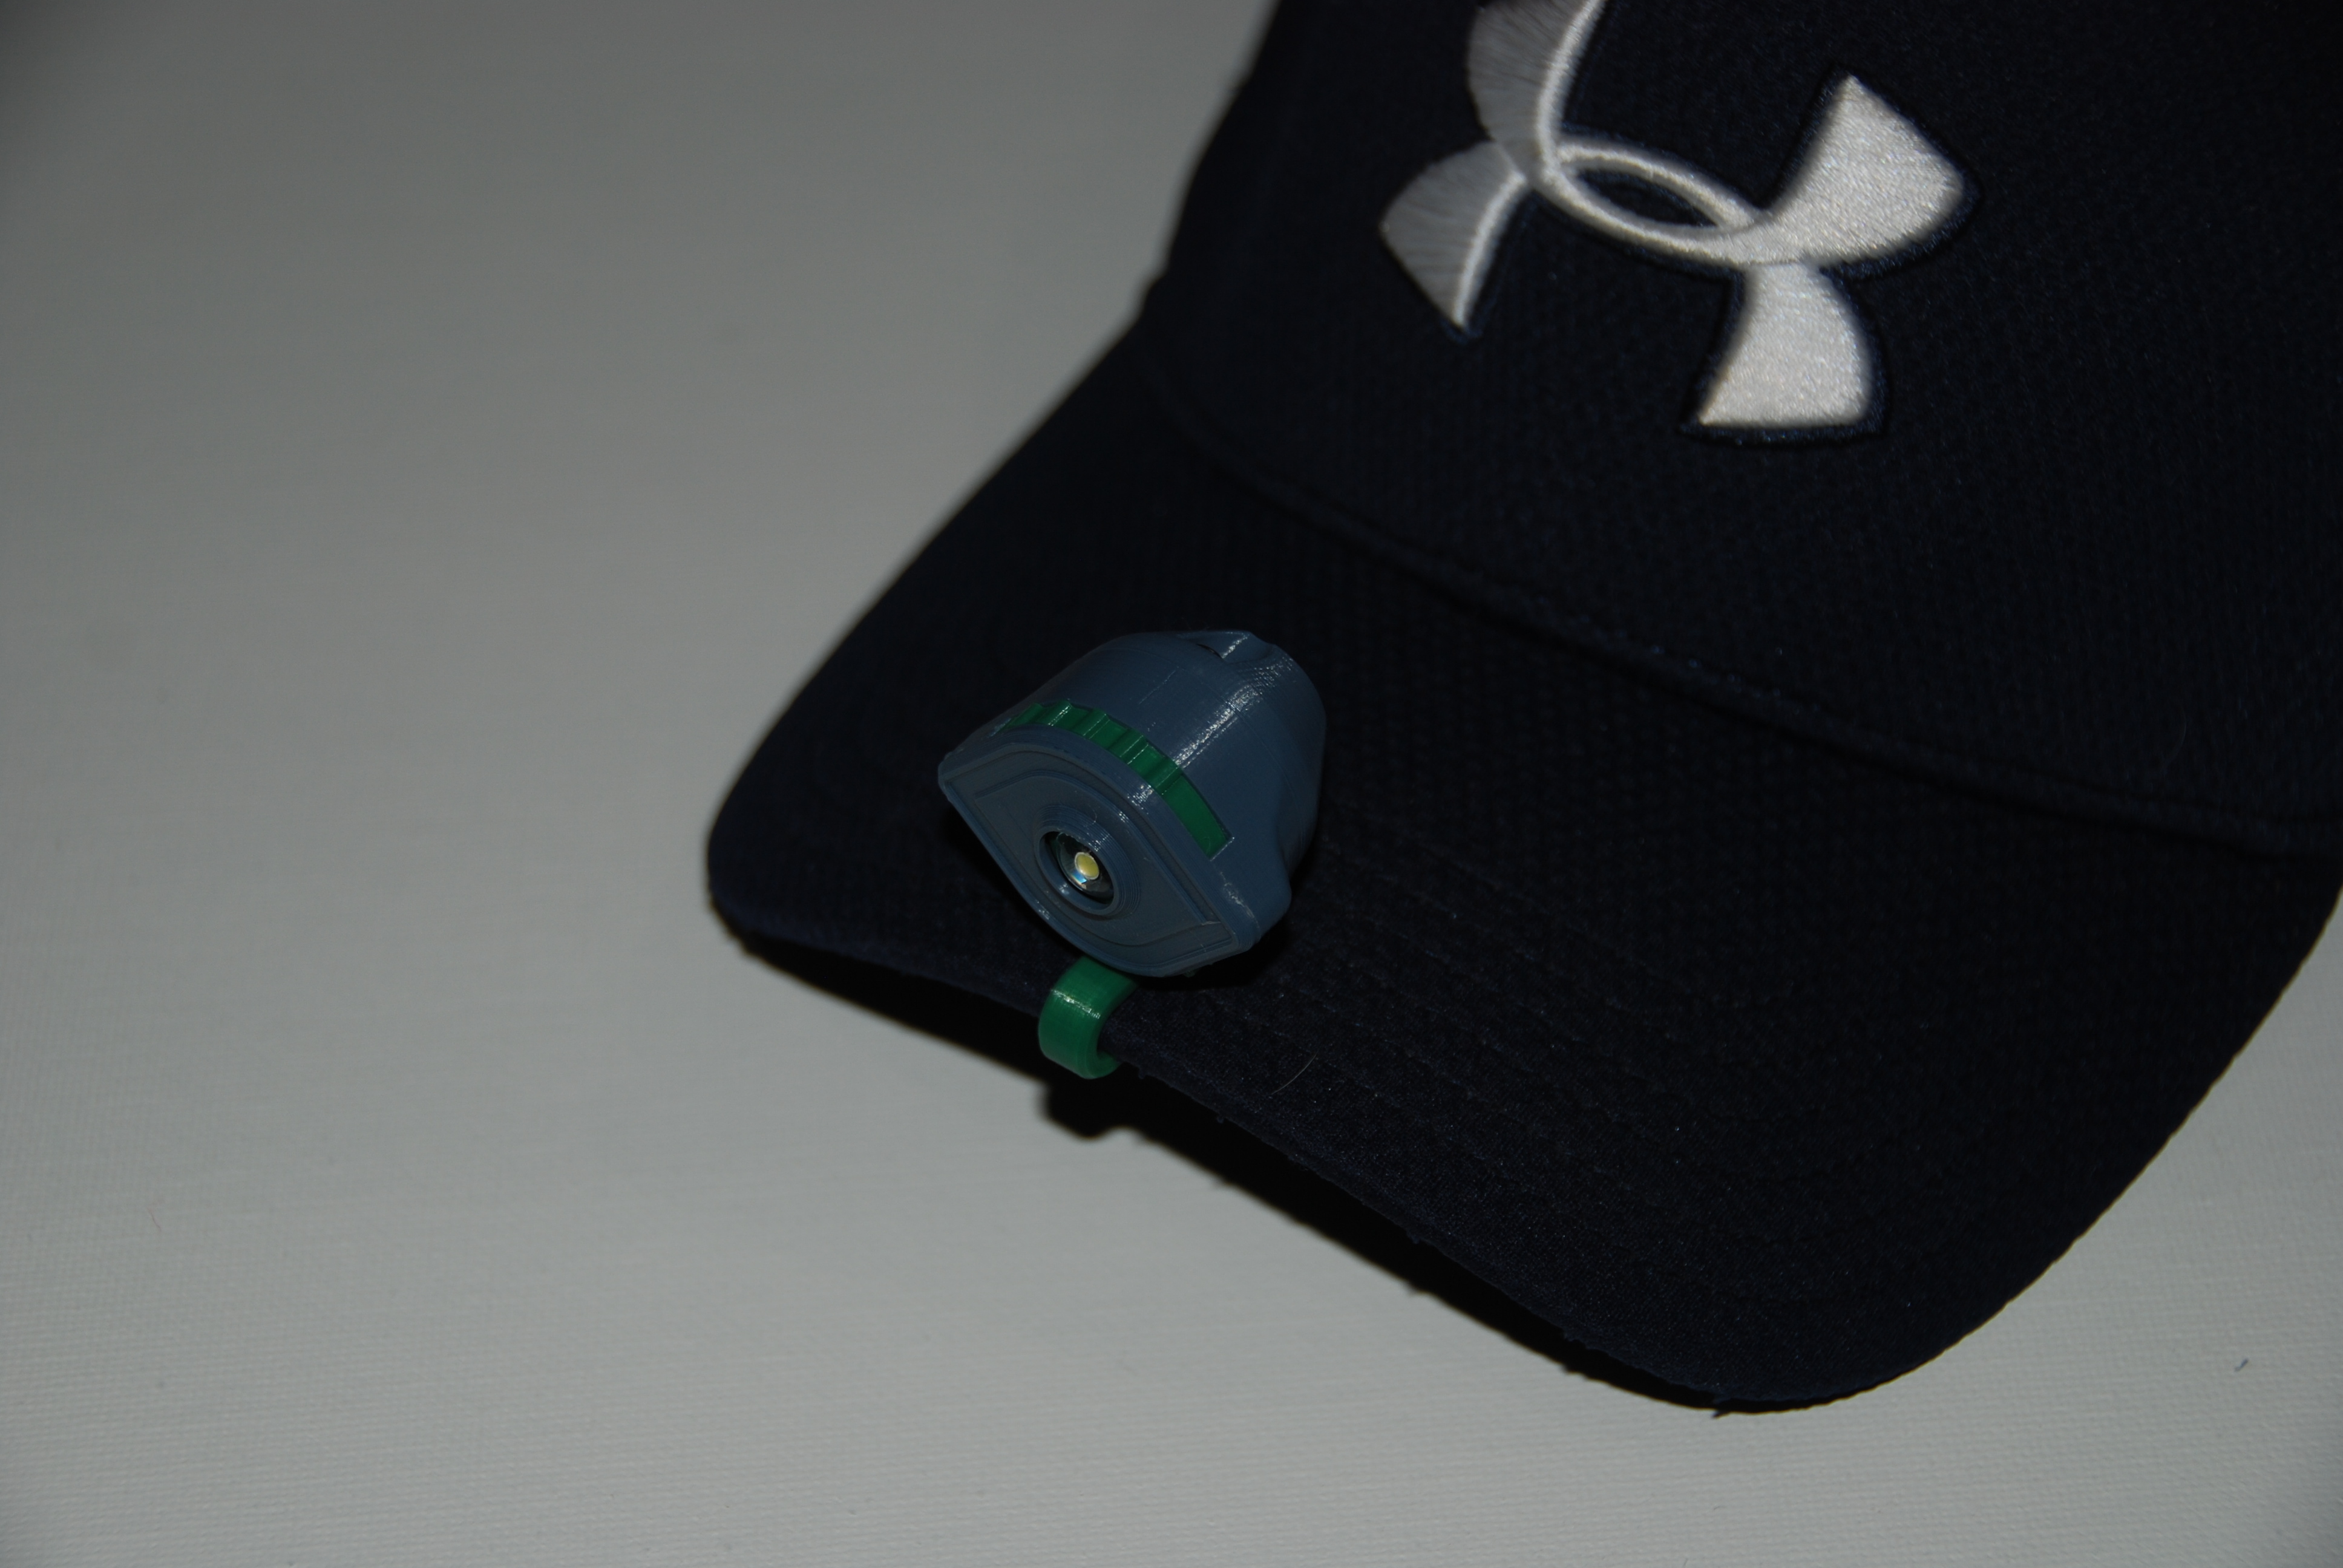
This cool eye-shaped, switch-operated LED light clips onto the brim of any regular hat/cap and functions as a headlamp. A headlamp is a necessity for anyone spending time in the wilderness—camping, overnight trips, night hikes, etc. Across-the-fire blindings are an unfortunate consequence of this necessary tool. Even the very cheapest ones, though, will set you back around $15 (USD), and the more expensive ones cost around $40 (USD). This EyeLight will only cost around $2.50 (USD) total, or less, in filament and hardware. All you need is one (1) each of the included files, printed (you'll have to make two choices: which attachment you want to use, either the HatAttachment or the ChainAttachment, and which size SwitchRing to use, which depends on the size of your LED); one (1) CR2032 battery; one (1) LED bulb (I used an 8mm one to ensure that it was bright enough for reliable use); two (2) M3 nuts and one (1) each of M3x12 and M3x16 bolts. Many makers will likely already have all this on hand. To assemble, place the battery in the slot in the BatteryHousing and the M3 nuts in their spaces in the Core. Fit the attachment you're using into one of the rounded spaces in the BatteryHousing (see images), align the BatteryHousing and the Core, and use the M3 bolts to bond them together. Removing these bolts will allow you to change the battery, but superglue works in their place if you don't have any—you simply won't be able to change the battery. Fit the led into the appropriately-sized SwitchRing and fit it onto the top of the BatteryHousing-Core Assembly. You'll notice that the 'eyelashes' on the SwitchRing allow it to rotate only within a specific range; adjust the position of the LED until the bulb is activated on one rotational extreme. Ensure that it won't turn on if the SwitchRing is rotated to the other extreme. Fasten the bulb in that position (I used hot glue, but other adhesives will work. If you use superglue, make sure it cures in a well-ventilated area so the fumes don't interfere with the electrical components). Finally, fasten the Iris to the top of the assembly (I used superglue), holding the SwitchRing in place. The assembly sounds a bit complicated, but it's actually pretty easy and should be relatively obvious when you see all the parts printed. One CR2032 battery should power an LED for about 10 hours.
With this file you will be able to print EyeLight (Hat Attachment Headlamp) with your 3D printer. Click on the button and save the file on your computer to work, edit or customize your design. You can also find more 3D designs for printers on EyeLight (Hat Attachment Headlamp).