EZ 18650 Charging Trays with Printed Spring
thingiverse
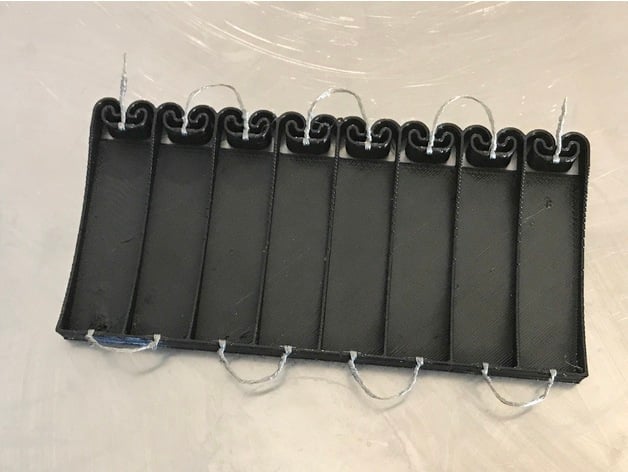
[Update: I had several request for 3-bay, so uploaded the odd 3-11 bay so all 1-12 are now included. Enjoy !] I love enif's printable spring design battery holders, but found them too tedious to assemble quickly, somewhat flimsy in PETG due to the wire channels, and took a long time to print due to all the asthetics and fully enclosed nature, so I optimized an 18650 version of them for easy battery install/removal, faster and easier wire installation, and to print far faster with less material with some simple changes: Removed all wire channels which allowed making the base 3 full print layers (@0.350mm) thinner (as such, all wiring must be routed externally) Removed the double slots for battery terminals, allowing the wire to simply fold over the top for much easier wire install, and allow for easy soldering of the spring side if desired (which was nearly impossible with the original design) Extended cylindrical bump designed to protrude wire for battery terminal to front-back of wall to allow one to wrap the wire around the top and twist around itself more easily Reduced overall height to just under mid-level but still tall enough to catch a button-top cell (giving up ability to stack - mine can be used only single-layer) Redesigned spring to remove double-width unsprung area (reducing width of each slot by 4 EWs) Removed side and bottom cell recess grooves Reduced walls between adjacent batteries to 2 shells (@0.45 EW) Removed non-functional text and battery markings (since I configure these with spring side as + or -, depending on configuration) Reduced wall height using a modified version of enif's "grip" recess feature To use these, get either desoldering braid, tinned braid, or manually strip some 18 or 16 AWG wire and thread through the slots, folding over the top and twisting around itself. You can take a long strand and thread each hole, wrap once or twice, then continue to next hole, allowing parallel configuration as well. I've printed 2 myself: one x8 that is configured 8S1P with each slot individual which I use with a set of 8S balance leads with aligator clips soldered on so I can quickly configure charging between x1 and 8x 18650 cells with my iCharger 308Duo. I also printed a x12 one and configured to 4S3P for use with an $8 Hobbyking LiPo charger and 4S balance lead with aligator clips to quickly charge up to 12 (or more if you have cells already tabbed together - see picture :) which is handy for charging up bulk 18650s that you may have reclaimed from laptop batteries. The OpenSCAD file isn't ready for prime time as I just hacked it up to get the results I wanted, but is included for you determined souls (no Customizer on this one as I'm sure it would just croak on changing many of the parameters). Results ? The x12 unit printed in just 1hr-35min and the 8x printed in just 1hr-5min using stock "Fast 0.35" setting on my Prusa Research i3 MK2. Enjoy ! -=dave Print Settings Printer Brand: Prusa Printer: Prusa Mk2 Rafts: No Supports: No Resolution: 350 microns Infill: 93% (but it doesn't matter) Notes: I printed in PETG. I have not tested in PLA but I highly recommend PETG if you plan to use these trays as daily items as I do, as I suspect PLA may degrade in springyness overtime if routinely flexed.
With this file you will be able to print EZ 18650 Charging Trays with Printed Spring with your 3D printer. Click on the button and save the file on your computer to work, edit or customize your design. You can also find more 3D designs for printers on EZ 18650 Charging Trays with Printed Spring.