FamiCoun - Famicom Front Expansion for NES & SNES Controller
thingiverse
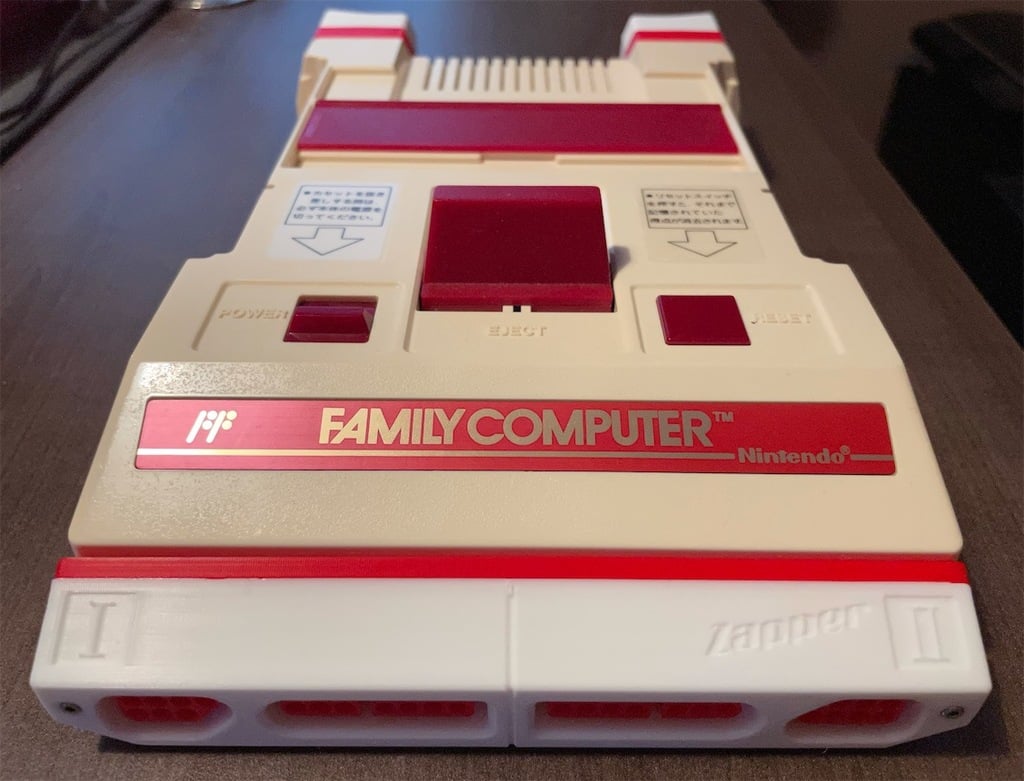
Here is my design of an expansion to connect NES and SNES controller to the front port of a Nintendo Famicom. It makes the Famicom look like a Countach in the front. Hence the name of this project. The player 2 NES port supports the Zapper, as shown on the shell. When you use a SNES controler, Y is B and B is A. ===Prints=== You need to print the front jacket, the plugs and the back. The orientation should be pretty self-explanatory when you put them into the slicer. Remember to set outer wall line width to 0.3mm for the plug at least. Otherwise you might not have round holes but instead have gaps for each of the pin (not really an issue, just bad looking). Support is required for the front jacket. After the print is done, make sure you enlarge the holes for the NES plugs with a 9/64 drill bit, so plugs can go in properlly. I suggest doing it manually since it's easy to overshoot and destroy the smaller holes at the bottom. All this is because if I made the holes any bigger, the slicers would refuse to generate a smooth wall and make the hole not round. A different version of the front jacket is provided with a holder design for the cover you take off from the Famicom, so you don't end up losing the original cover easily (however if you already lost yours, you can print a new one. I uploaded a design a while back.) ===PCB=== This design requires a PCB to be ordered: https://oshpark.com/shared_projects/L9FUXWiv You can also download the gerber file and take it to any provider you like and get it made. ===PARTS=== The pins used in the project can be purchased from Digikey. Pins on the front: Quantity: 22 or 28 Part No.: ED1183-ND Name: CONN PC PIN CIRC 0.040DIA GOLD by Mill-Max Manufacturing Corp. Pins on the back: Quantity: 9 or 15 Part No.:88SE-ND or 89SE-ND Name: CONN D-SUB SOCKET 20-26AWG CRIMP Required pins are: Male: 5 for all the SNES ones, 5 for 1P NES, 7 for 2P NES. Detailed pinout shown in one of the photos above. Female: 9 for pin 1, 4, 5, 7, 9, 12, 13, 14, 15 Note you don't have to populate all the pins, but it makes it look better. Screw and nut used is Hex M2 16mm (full length 17.8mm). This can be purchased from Amazon as a kit. ===Assembly=== Soldering is not too hard but requires attention. You may want to plug in a controller into the printed plug first, insert the pins in from the back of the printed piece, one port at a time, then fit the PCB over the stumps and solder. Use just enough amount of the solder. Make sure nothing protrudes too much up from the surface. DO NOT heat up the same pin for more than a few seconds or you risk melting the plastic around it. Repeat the same thing for the back female pins. Fit the 9 pins inside the back piece and then solder them in with small amount of solder. ===Misc=== Full project file can be found on GitHub: https://github.com/jeffqchen/famicoun ===Special Thanks=== Chris Kempson: http://chriskempson.com/posts/nes-controller-to-famicom-adapter/ NesDev Wiki: https://wiki.nesdev.com Mike Chi (creator of the very famous RetroTink) https://www.retrotink.com
With this file you will be able to print FamiCoun - Famicom Front Expansion for NES & SNES Controller with your 3D printer. Click on the button and save the file on your computer to work, edit or customize your design. You can also find more 3D designs for printers on FamiCoun - Famicom Front Expansion for NES & SNES Controller.