Fan Shroud for Geeetech Aluminium Printer
thingiverse
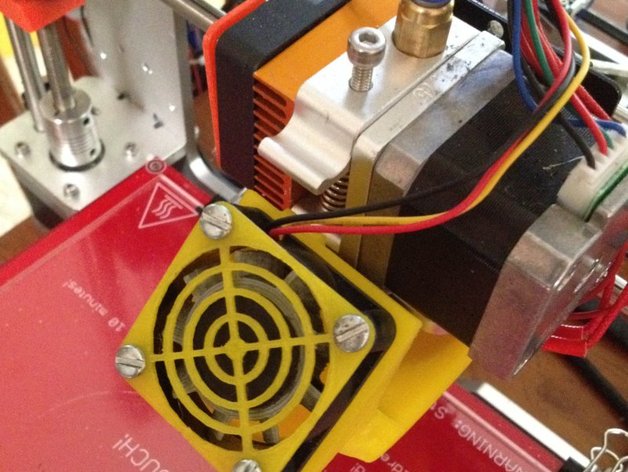
Update!!! File bbNewFanShroudCombinedMoved5mmExtended.stl uploaded where the sliding bracket on the shroud has been extended by 14mm to cater for longer throats and greater height.. Update!!!! 04/05/2016 Added new file FanbracketV2.stl. When printing small parts, with a lot of quick movement, the fan tended to slip down. Added 2 small cone blobs so making the bracket fit tighter. Update!! 17/04/2016 - Added a modified file for the fan shroud with the "bracket" shifted right by 5 mm. This positions the shroud 5mm to the left. Now on my printer, the head is centred in the fan shroud - bbNewFanShroudMoved5mm.stl Important note Remember that with this fan there will be some cooling of your hotend as well. You should re-calibrate and set your PID settings to avoid wild fluctuations in temperature - https://www.youtube.com/watch?v=APzJfYAgFkQ On certain small prints the layers were warping because the layers below had not had time to cool as yet. Looked at a number of shrouds attached to the extruder fan and finally decided to DIY using an additional fan I had lying around. Additional items needed: 1 x 40mm fan 4 x self tapping metal screws for the fan 2 x M3 screws for the bracket Peculiar to this printer, most of the pre designed shrouds do not fit especially as I wanted all round cooling instead of from just one side. So I used this fan shroud - http://www.thingiverse.com/thing:1205439 and modified it to fit my needs since it looked like having the best design for the fan ducting. The fan duct was chopped off a bit because there are 2 screws on the extruder bracket holding the X axis bearings that cannot be moved. Also used this for the fan grille -http://www.thingiverse.com/apps/customizer/run?thing_id=263573 I wanted the height to be adjustable so this also went into the design for the fixing bracket. Print Settings Printer: Geeetech Full Metal Aluminum Rafts: No Supports: No Resolution: 0.2 Infill: 20% Notes: This MUST be printed with NO SUPPORTS and even if you do select supports, provided your slice settings are normal, it will print without the need for any supports. Post-Printing Fix the bracket to the extruder holder. Fix the fan to the shroud using the metal self tapping screws as you cannot get in to hold nuts in place. Wire the fan to the same point as the extruder fan. You could insert a switch here as well to turn this off when not needed. Slip the assembly from the bottom (raise the extruder first) and adjust the height as needed. Then just jam a small wedge to keep the thing in place. How I Designed This Cur off the un - needed parts in netfabb, edited in Sketchup, exported and repaired in netfabb.
With this file you will be able to print Fan Shroud for Geeetech Aluminium Printer with your 3D printer. Click on the button and save the file on your computer to work, edit or customize your design. You can also find more 3D designs for printers on Fan Shroud for Geeetech Aluminium Printer.