fan upgrade for anet a8
thingiverse
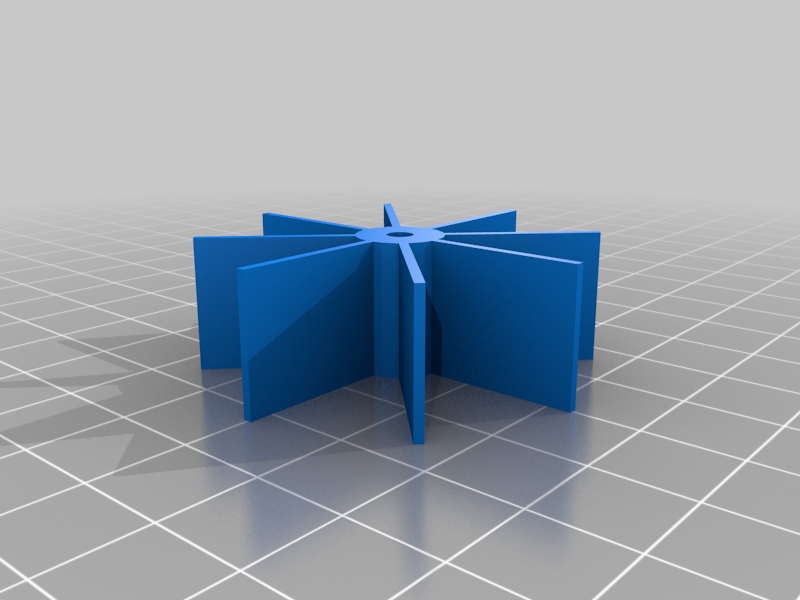
Use an appropriate 12v motor the same or similar to the one shown. Instructions: Step 1 push the motor onto 1anet fan upgrade so it is firmly in place. Step 2 place the motor paddle assembly in 2anet fan upgrade. Step 3 slide 3anet fan upgrade so the notch touches the motor, then plastic weld or hot glue in place as shown. Step 4 lift the motor assembly 2 mm off the bottom of 2anet fan upgrade then hot glue in place as shown. Step 5 hold the two parts of 4anet fan upgrade together and plastic weld or hot glue together as shown. Step 6 Insert the short end of 4anet fan upgrade into the hole in 2anet fan upgrade then hot glue or plastic weld in place as shown. Step 7 screw in the finished product where the old fan used to be, using the holes as shown. Step 8 cut off the old fan leaving a lot of wire. Step 9 using the old wire solder the new motor as shown. Step 10 set to 25 per cent power and enjoy.
With this file you will be able to print fan upgrade for anet a8 with your 3D printer. Click on the button and save the file on your computer to work, edit or customize your design. You can also find more 3D designs for printers on fan upgrade for anet a8.