Fast Bed Leveling, Test Fits and Temp Tower
thingiverse
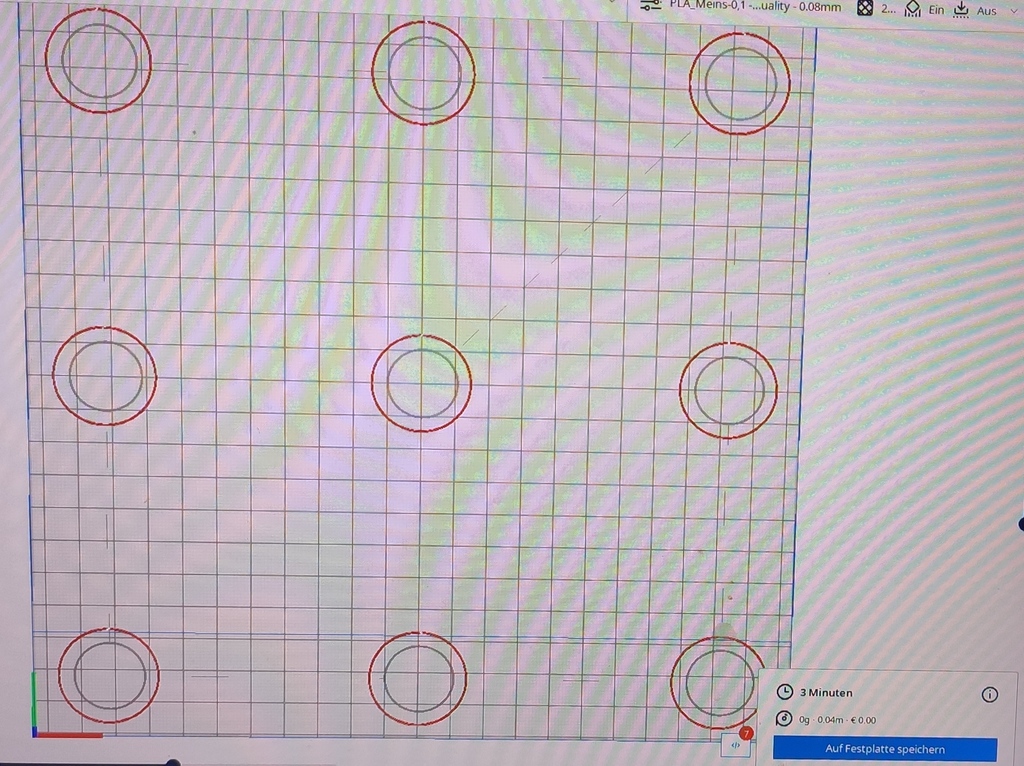
Hy Bed_Leveling_Short - nutze ich zur schnell überprüfung ob meine Glasplatte noch sitzt und ob die Druckplattenhaftung stimmt. Zum grundsätzlichen Einstellen des Druckbetts verwende ich Bed_Leveling_Inner_Rings und Bed_Leveling_Outer_Rings in einem Druckdurchgang. Die Datein müssen passend ineinander gelegt werden (bei Cura). Das programm erkennt somit zwei Objekte und fährt beide nacheinander ab, auf gleicher Schichthöhe. Somit hat erhält man pro Position 2 durchläufe auf einer schichthöhe zum Einstellen und der Kontrolle des Druckbetts. Test_Cube und Test_Fits - sollte mir eine einfache und schnelle Überprüfung der Masshaltigkeit bieten. Somit fand ich heraus das ich Bohrungen +0,2mm Größer auslegen muss oder welche Höhe Stützstruck bei einflusst ect. oder die Höhenänderung des Elefantenfuß meiner ersten Schicht. Test_Temp_Tower - soll ein Material sparsamer Stringing und Schichthaftungstest bei verschiedenen temperaturen sein. Dazu sind in den Cura "->Einstellungen -> Nachbearbeitung ->G Code änder" Temperatur änderungen bei Schichthöhe X aktiviert werden. Die Bohrungen in den Towern sind alle 2,5mm und bieten eine optische Hilfe. Info: Meine Test und Bed Levelings sind nur für 0,4mm Nozzel Durchmesser, die Höhe ändere ich vorab in Cura das keine Zweite schicht angefahren wird. Meines Wissens hat die Druckplatte meines Ender 5 Pro´s hat die gleichen Abmasse wie die üblichen Ender 3 Modelle. Ich habe nur den Start und End G Codes meines Gerätes abgeändert, sodass beim Start der Modelle nicht mehr sinnlos solch große Linien gezogen werden und eine lastabhängige Abschaltung des Drucker´s durch entsprechende Steckdosen ermöglicht wird, damit der Drucker nach fertigstellen des Bauteils abgeschalten wird. Grüße --------------------------------------------------------------------------------------------------------- Hy Bed_Leveling_Short - I use it to quickly check whether my glass plate is still sitting and whether the pressure plate adhesion is correct. For basic bed leveling, I use Bed_Leveling_Inner_Rings and Bed_Leveling_Outer_Rings in one print pass. The files must fit into one another (with Cura). The program thus recognizes two objects and drives off both one after the other, at the same layer height. This gives you 2 passes per position at one layer height for setting and checking the print bed. Test_Cube and Test_Fits - should give me an easy and quick dimensional check. So I found out that I have to make holes +0.2mm larger or what height influences the support structure, etc. or the change in height of the elephant foot of my first shift. Test_Temp_Tower - intended to be a material economical stringing and layer adhesion test at various temperatures. To do this, temperature changes at layer height X must be activated in the Cura "-> Settings -> Post-processing -> Change G code". The holes in the towers are all 2.5mm and offer visual help. Info: My test and bed levelings are only for 0.4mm nozzle diameter, I change the height in advance in Cura so that no second layer is approached. As far as I know, the pressure plate of my Ender 5 Pro has the same dimensions as the usual Ender 3 models. I only changed the start and end G codes of my device so that such large lines are no longer drawn pointlessly when the models are started and a load-dependent switch-off of the printer is made possible by appropriate sockets, so that the printer is switched off after the component has been completed. Greetings
With this file you will be able to print Fast Bed Leveling, Test Fits and Temp Tower with your 3D printer. Click on the button and save the file on your computer to work, edit or customize your design. You can also find more 3D designs for printers on Fast Bed Leveling, Test Fits and Temp Tower.