Fastening Laser Cut Acrylic
thingiverse
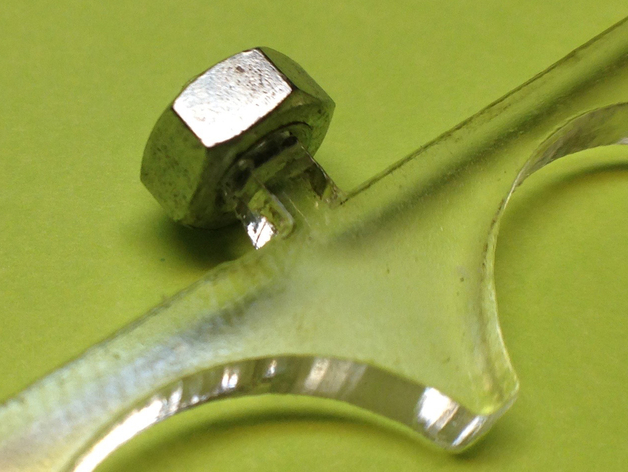
There are all sorts of ways to connect laser cut pieces, each with its advantages and disadvantages; some are more complex, bulkier, stronger... T-bolt joints, slotted joints, etc. But I haven't seen this one anywhere... Threading a square cross-section length of the plexiglas itself. Design an appropriate length tab on your piece. The width should be the thickness of the material (I used 3 mm), the length should be the thickness of the part it will go through plus the thickness of the nut plus some margin. I also rounded the ends a little bit; it makes starting the threads easier, but it's not necessary. The mating piece should have a corresponding 3 mm square hole. Using a tap & die set, thread the tab; 4 mm works well for 3 mm material, which is what I use the most. The ratio should hold for other thicknesses, but you'll want to experiment. I was able to thread the piece holding it and the die with my hands. It's a little tricky to start, since the die is expecting a cylinder and has three cutting edges and the piece has four corners. Keep it straight, go slowly, and once it's started a bit it gets much easier. The attached file is a test piece you can try this out on. It's probably not the strongest method, but it suited my purpose for my current project, and I pass it along to the maker community, enjoy!
With this file you will be able to print Fastening Laser Cut Acrylic with your 3D printer. Click on the button and save the file on your computer to work, edit or customize your design. You can also find more 3D designs for printers on Fastening Laser Cut Acrylic.