Fat dragon hotend sock (DIY injection mold)
prusaprinters
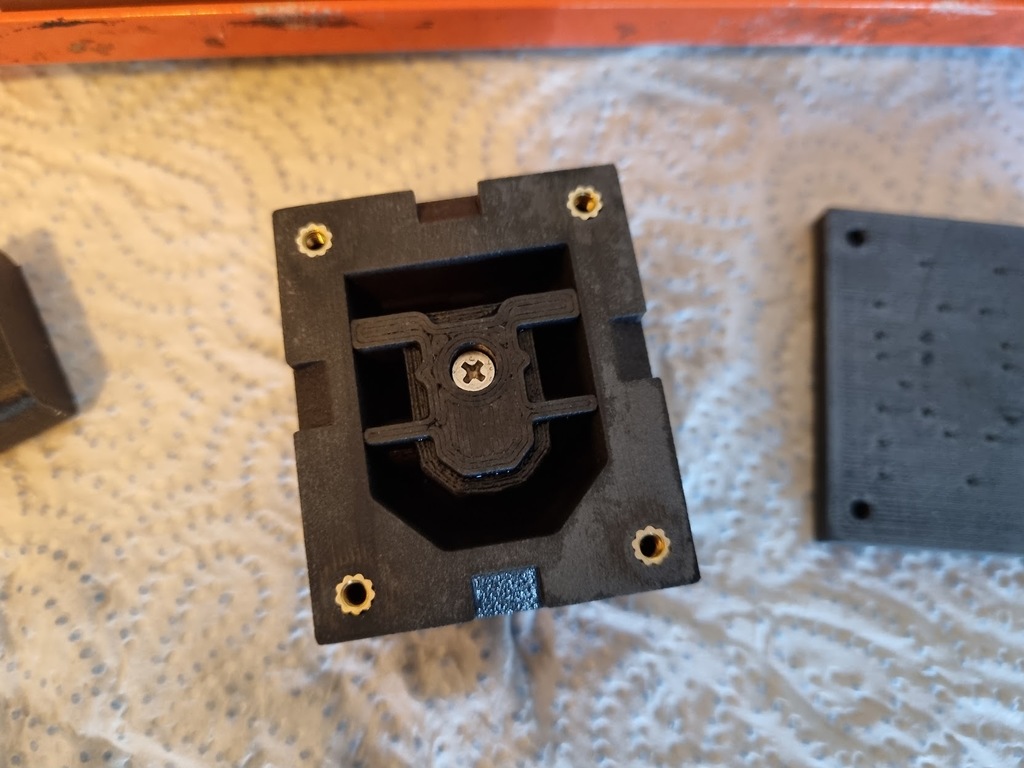
<p>I designed this hotend sock for the Phaetus Dragon because I wasn't happy with the original at all.</p> <ul> <li>It is too thin</li> <li>It is quickly destroyed by high temperatures</li> <li>It isn't good for air flow</li> </ul> <p>I couldn't run my 4028 fan at more than 50% without the heater struggling to keep up. With this new sock, I can run it at 100% easily. It also stays on the heater block a lot better and gives much more stable temperatures. By insulating the block better, the potential temperature differences in the block between heater and sensor are much lower. I have included 3 views to compare the original sock with this fat sock. It is much thicker on the sides, but not on the bottom. The bottom has slightly rounder corners for better air flow around them.</p> <p>I tried 2-component silicone first, but the process was messy. Then I came up with DIY injection molding using a caulk gun and RTV silicone and the process is much cleaner and easier.</p> <p>This mold has thread on the bottom that fits a regular silicone caulk tube. A sock can me made with the following simple steps:</p> <p>Materials needed:</p> <ul> <li>5 M3 threaded inserts. The holes are 4mm in diameter and 5.5mm deep. Your inserts should be suitable for that.</li> <li>4 M3x10 screws</li> <li>1 M3x16 screw</li> <li>1 tube of high-temp RTV silicone</li> </ul> <p>Preparation:</p> <ol> <li>Print the bottom, top and insert of the mold. Use low layer height for best results. Don't use many walls. 3 is enough. It is better if the mold is a bit leaky. RTV silicone cures due to moisture, you want to let it in. Do NOT use mold release, it blocks water from getting in. The model for the sock is included for reference. It should not be printed.</li> <li>Melt the threaded inserts into bottom.</li> <li>Screw the insert into the bottom.</li> <li>Optionally sand the surfaces. I forgot to this this on my top surface and it is ugly.</li> <li>Soak the printed parts in water. I printed these in nylon (ePA-CF), which absorbs water well.</li> </ol> <p>Molding</p> <ol> <li>Close the mold by screwing the top plate on. Make sure the holes align with the cavity.</li> <li>Insert silicone tube into gun and screw the mold onto the tube.</li> <li>Inject the silicone until it pours out of all holes in the top.</li> <li>Do not wipe off the silicone that comes out. It is easier to let it harden first</li> <li>Take the pressure of the caulk gun, unscrew the mold and close it with the included threaded plug.</li> <li>I have also included a cap for the silicone tube so it doesn't dry out and you can re-use it many times.</li> <li>Dunk the mold in water for faster curing. RTV silicone hardens when it comes into contact with moisture. Mine hardened in just 12 hours. A mold not printed in nylon might take longer.</li> </ol> <p>Unmolding</p> <ol> <li>Take the screws out and gently pry the mold open. A thin knife can help.</li> <li>When you have the top off, take the final screw out.</li> <li>Take the bottom plug out and pull all the silicone out of the hole.</li> <li>Use the end of a tie-wrap to help release the sock from the mold.</li> <li>A wood screw can help to grip the printed insert and pull it out, taking the finished sock with it.</li> <li>Clean up any flash (the thin bits that peeped through the cracks)</li> </ol> Category: 3D Printer Extruders
With this file you will be able to print Fat dragon hotend sock (DIY injection mold) with your 3D printer. Click on the button and save the file on your computer to work, edit or customize your design. You can also find more 3D designs for printers on Fat dragon hotend sock (DIY injection mold).