Fennekin Colorific
thingiverse
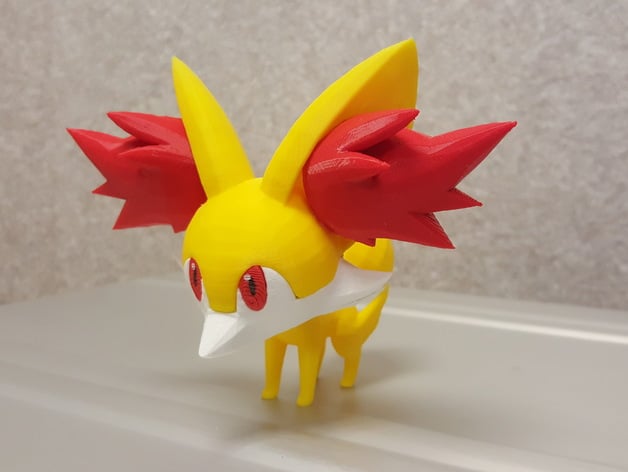
Reviewing her color scheme, I managed to dissect the major colors into pieces allowing you to print her in color. Print Settings Printer Brand: SeeMeCNC Printer: Rostock MAX Rafts: No Supports: Yes Resolution: .2 Infill: See notes Notes: See Print Notes since Markdown doesn't appear to work properly here. How I Designed This I doubled the size and corrected the model in Meshmixer before dissecting the pieces in Tinkercad. I returned to Meshmixer for the troublesome body adding custom support to make it as clean of a print as possible. Print Notes I printed many failed pieces to get this right. She's head heavy so to get her to stand on her own pay attention to the infill settings of the pieces. Notice I use brims instead of rafts, that's a personal preference since it uses less plastic and I can print with little-to-no hair spray on a frosted glass plate. Fennekin-Body.stl - Yellow at 20% infill, no support necessary, my printer was choking on the feet and the Meshmixer support, so I created Fennekin-Body-Lozenge.stl that places an oval piece in the middle to calm the printer down and print better legs with less chance of failure. Fennekin-Ear-Left.stl & Fennekin-Ear-Right.stl - Red at 10% infill, use support. Fennekin-Eyes.stl - Red at 10% infill, no support or brim necessary. I used enamel model paint for the pupils. Fennekin-Head-Bottom.stl - White at 10% infill with support. Fennekin-Head-Crown.stl - Yellow at 10% infill with support. Fennekin-Tail-Base.stl - Yellow at 50%+ infill, no support. You want higher infill to act as a counterweight for the head. Fennekin-Tail-Tip.stl - Red at 50%+ infill, no support. Like the base, higher infill to act as a counterweight for the head. Assembly: Remove support, clean and make sure all the pieces fit, you may not want to fully insert the posts for the head and tail until glued. I use a heat gun to soften crown and holes for better fit. Glue the eyes and make them flush with the outer surface. If you are painting pupils on the eyes, I recommend doing that before gluing them in case you have to print new ones. Do'h! Glue the tail tip to the tail base, there isn't a gap at the bottom so a generous drop or two at the bottom will suffice. Glue the tail to the body, before affixing you'll notice the hole is not centered on the tail. Rotate the base of the tail where the larger portion is facing the rear to help with counterbalance. Glue the crown of the head to the bottom of the head. Again, use a heat gun if necessary to get the top flush with the bottom. Glue the head to the body. Glue the ear inserts with a dab of glue in the hole and where it touches the inside wall of the ear. I use rubber bands to around the head to hold while curing. If the head is still too heavy you can use the heat gun to soften the base of the head and body to pull the chin up, or just have her stand the front feet on a ledge.
With this file you will be able to print Fennekin Colorific with your 3D printer. Click on the button and save the file on your computer to work, edit or customize your design. You can also find more 3D designs for printers on Fennekin Colorific.