Fiber Optic Light Engine
prusaprinters
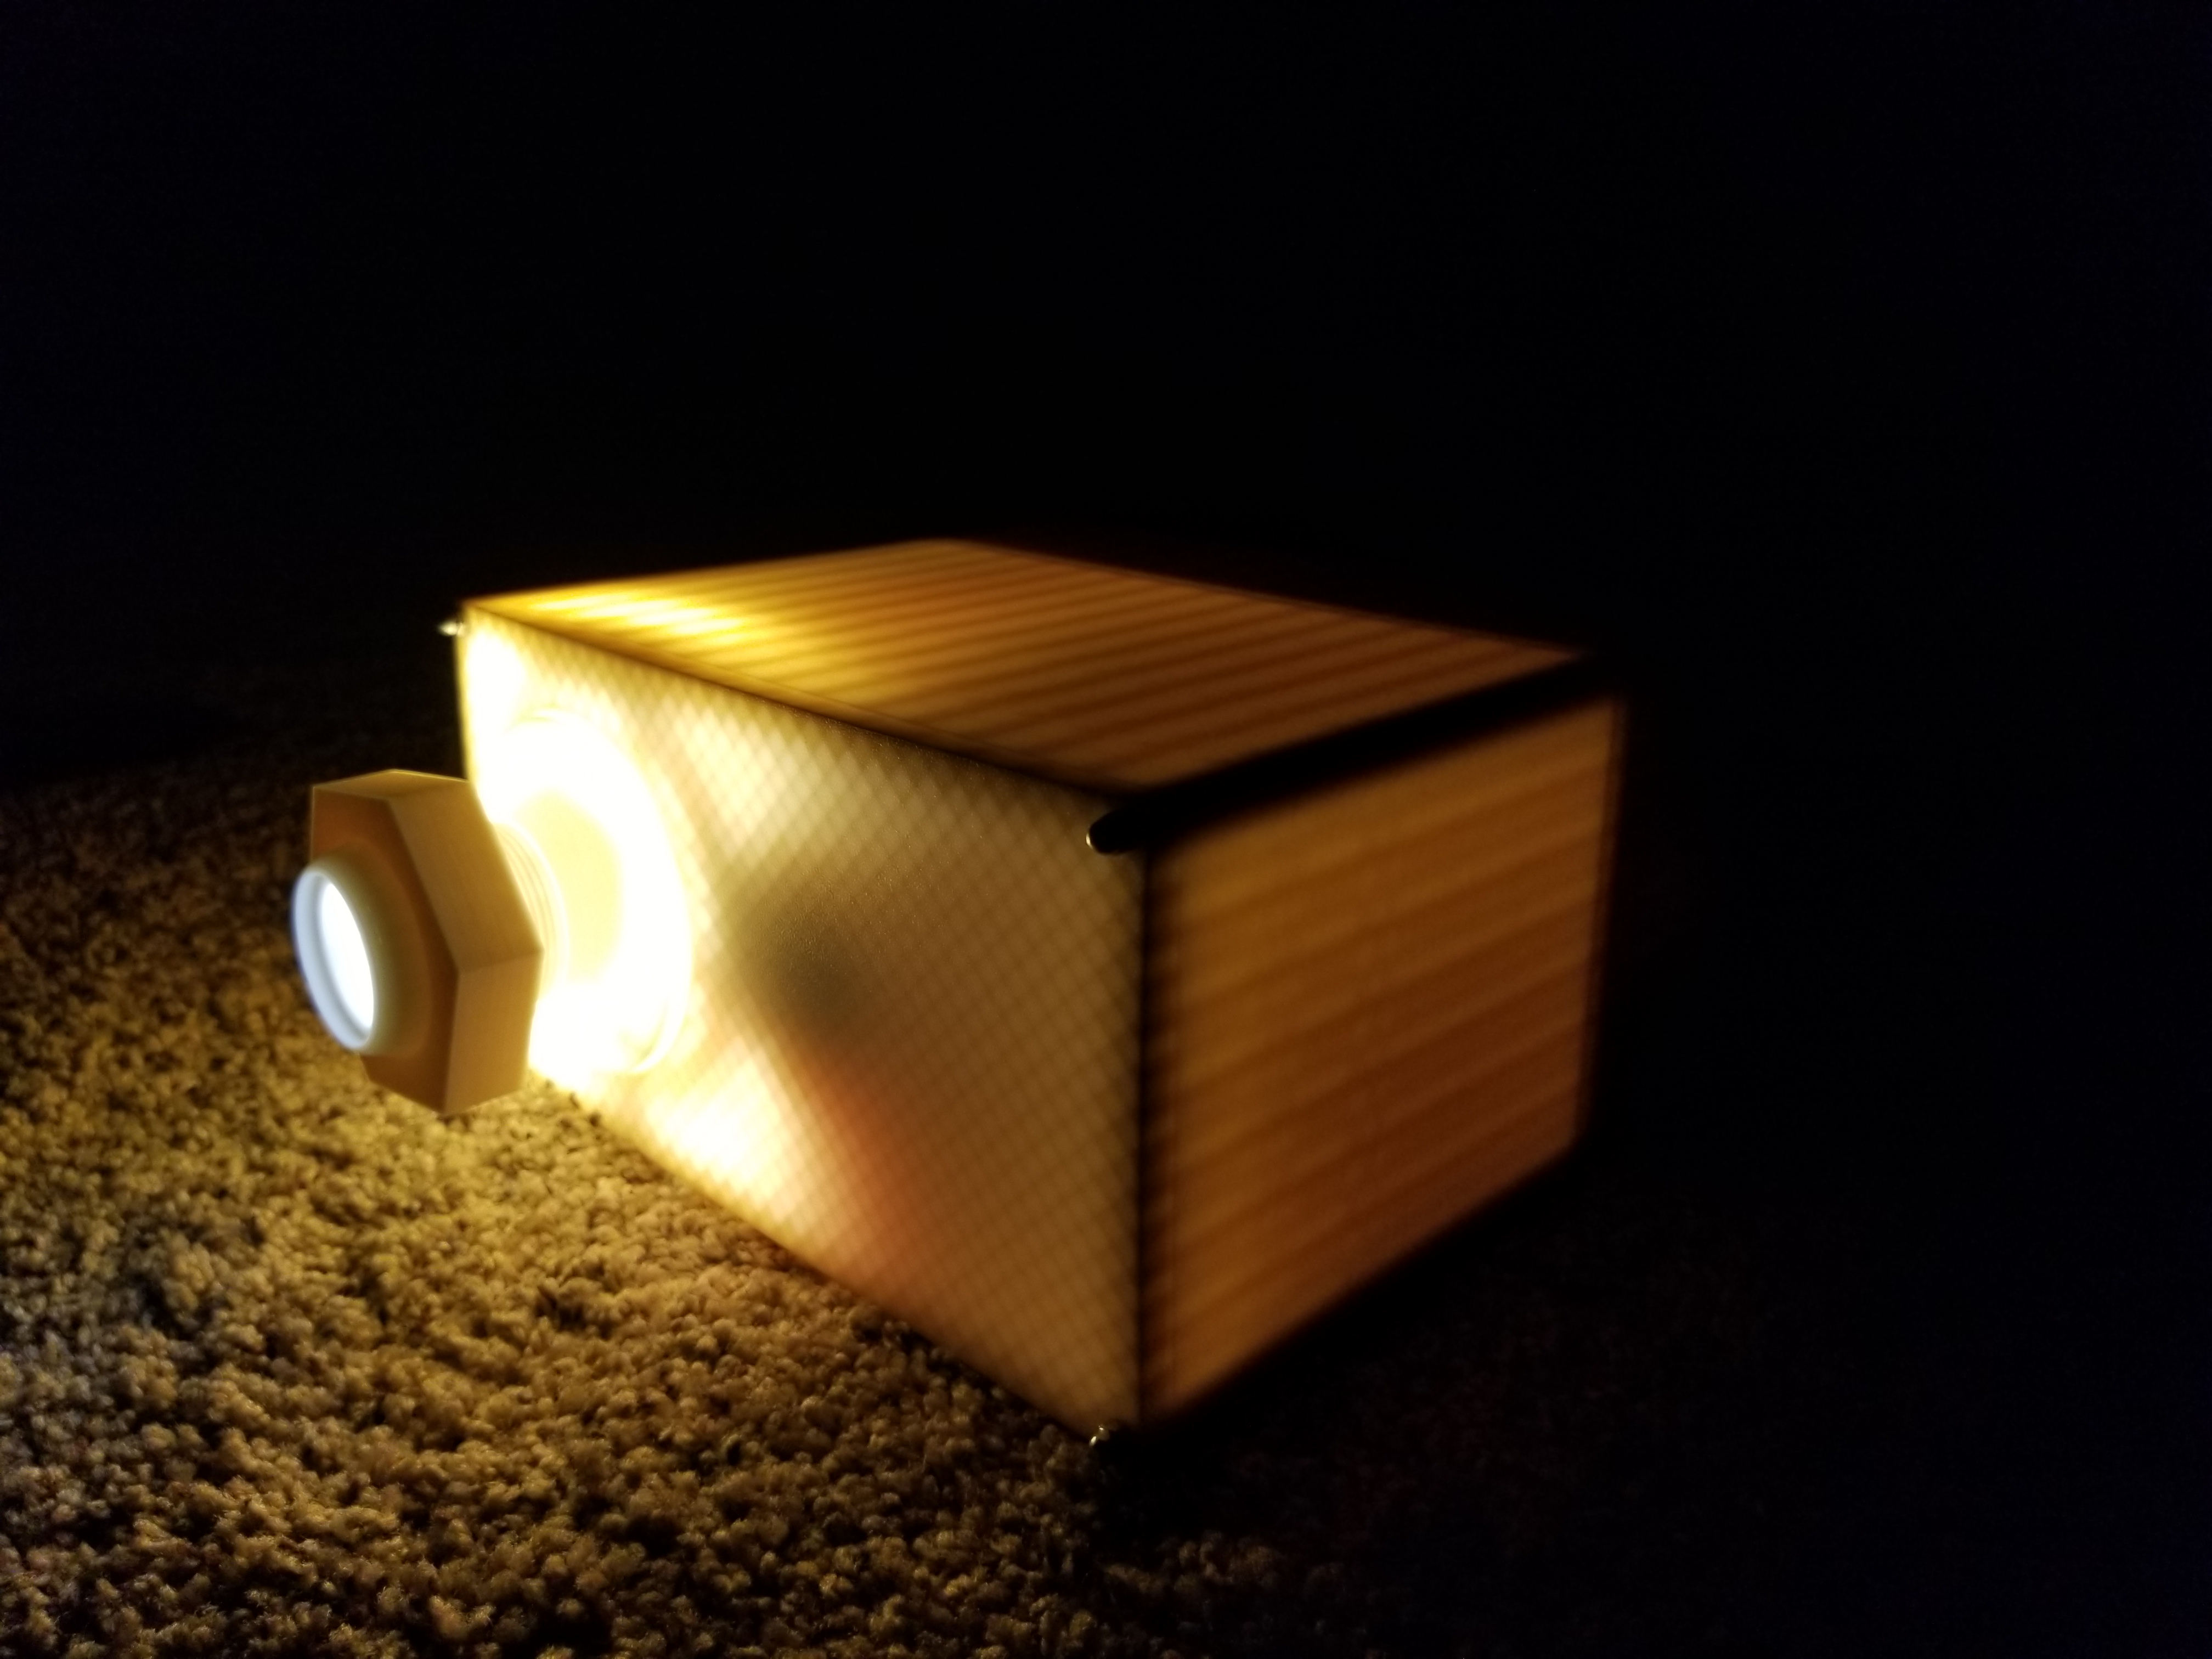
<p>This is a model and instructions for how to build your own fiber optic light engine that is smart and can be controlled through google home. This version uses a smart LED light bulb as the source of light. It can use any smart light bulb that is compatible with IFTT. 3D printing helps decrease the cost of implementing fiber optic lights in your ceiling to make it look like the night sky. Light engines with a twinkle effect can cost upwards of $300 (which aren't smart), and this light engine is around $150.</p> <h3>Print instructions</h3><p>All the parts except the coupler O ring were printed in ASA to prevent deformation from the possible attic heat and heat from the bulb. The main housing will tend to warp during printing because of how large it is, so keep that in mind. The O ring was printed out of ninja flex cheetah material.</p> <p>All of the parts were printed with 20% infill except for the coupler and O ring which was 100%.</p> <p>I used 0.3mm layer height for the housing parts and 0.2mm for all other parts. The 3mf files for the light cover have modifiers present in them to print 0.2mm layer height for the threads present in the cover and then 0.3mm for the rest of the cover. The difference between light cover V1 and V2 is that for V1 you will have to take the diffuser cover off of the LED light bulb whereas for V2 I increased the length of the cover to accommodate the diffuser cover for the Yee light bulb I used. If you use the version without the diffuser cover some of the fibers may be a different color depending on which LED it is in front of. I thought this was cool and looked nice, but the diffuser helps keep the color uniform.</p> <p>All the hardware you will need is as follows:<br/> 1) AC Rocker Switch (<a href="https://rb.gy/mcky1c">https://rb.gy/mcky1c</a>)<br/> 2) 12V AC DC Converter Module (<a href="https://rb.gy/n6kzpx">https://rb.gy/n6kzpx</a>) - For this, you can order this or take apart a barrel plug converter you may have laying around at home. That's what I did.<br/> 3) Phenolic Keyless Light Socket (<a href="https://rb.gy/zifmbl">https://rb.gy/zifmbl</a>)<br/> 4) DC to DC step down module (<a href="https://rb.gy/dpjh6f">https://rb.gy/dpjh6f</a>)<br/> 5) ESP 32s (<a href="https://rb.gy/kaqkrd">https://rb.gy/kaqkrd</a>)<br/> 6) 5V Relay (<a href="https://rb.gy/fdiyl9">https://rb.gy/fdiyl9</a>)<br/> 7) DC Motor (<a href="https://rb.gy/macpyn">https://rb.gy/macpyn</a>) – I used a 5 rpm motor, which was pretty fast. I would suggesting using anywhere from 2 to 5 rpm to get a decent twinkle effect. Faster than 5 or 6 rpm may be to fast.<br/> 8) Yeelight Smart Bulb (<a href="https://rb.gy/vb2lme">https://rb.gy/vb2lme</a>) - you can use any smart lightbulb that is compatible with IFTTT, just make sure it has similar dimensions as the Yeelight.<br/> 9) M3 Threaded Rod and Cap Nuts (<a href="https://rb.gy/xkj9ya">https://rb.gy/xkj9ya</a>) (<a href="https://rb.gy/nftnbg">https://rb.gy/nftnbg</a>) – The threaded rods will need to be cut to about 135mm length.<br/> 10) Brass Inserts (<a href="https://rb.gy/luvplf">https://rb.gy/luvplf</a>)<br/> 11) 608 ZZ Bearings (<a href="https://rb.gy/dfdqhg">https://rb.gy/dfdqhg</a>) – This is for the twinkle gear.<br/> 12) Extra stuff: M3X8 screws, zip ties, electrical wire/hook up wire, wire nuts, spade connectors, soldiering station and supplies.</p> <p>To start the build, get all the parts printed. I suggest using either white or black printed parts. If you don’t have these two colors, then print the parts and then paint them. I printed the motor gear and twinkle gear out of orange prusament ASA and then spray painted it black. The reason for this is that when the parts are different colors, any reflected lights off the printed parts cause the light at the end of the fibers to look that color.</p> <p>Once all the parts are printed, start by inserting the brass inserts into the electrical housing, motor mount, and twinkle gear mount. There should be a total of 13 brass inserts that need to inserted.</p> <p>Next will be the electrical wiring of the system. Look at the uploaded picture of the wiring diagram. This will give you an overview of how all the components need to be connected. Starting with the switch, use the close-up picture of the back of the switch to get it wired using spade connectors. Then insert it into the back of the electrical housing and screw it in using the M3x8 screws.</p> <p>Use the uploaded picture of the electrical housing with all the components to help guide you in where certain components will go. There are shelves to help organize the components. The top shelf will have the AC to DC converter, then below that will be the DC to DC step down module, then at the bottom will be the relay and ESP32.</p> <p>Go ahead and get all the wiring/soldiering/crimping done before you start placing all the components down in the electrical housing. Use the holes in the shelves to guide wires from one component to the next.</p> <p>The code and instructions that you will upload to the ESP using the Arduino IDE can be found at this link:<br/> <a href="https://github.com/colinpeth/ESP32RelayGoogleControl">https://github.com/colinpeth/ESP32RelayGoogleControl</a></p> <p>This github link has the Arduino file that you will need, just follow the read me file to make the adjustments that are specific for your own wifi and adafruit account information.</p> <p>Here is also a YouTube video that walks you through the process: <a href="https://www.youtube.com/watch?v=XTa6r6hLNB8">https://www.youtube.com/watch?v=XTa6r6hLNB8</a></p> <p>Once the code has been uploaded and the ESP is working perfectly you are basically done with the electronics. Finish attaching and wring all the electrical components. Attach the bulb socket to the socket holder.</p> <p>Next, you will work on the motor that helps with the twinkle effect. Screw in the motor into the printed motor mount and fasten the motor gear onto the shaft of the motor. Take a 608zz bearing and push it into the center of the twinkle gear, then attach it onto the twinkle gear mount. It should be a tight fit, but if the mount for the twinkle gear is loose and does not have a tight fit to the bearing use hot glue to fasten it. Lastly, screw in both gear mounts into the light cover. Make sure the motor gear and twinkle gear are lined up perfectly so that the motor will be able to rotate the twinkle gear.</p> <p>Now take the thread rods and cut 4 of them down to a length of approximately 135mm. It doesn’t need to be perfect but try to get as close as possible. Then take four cap nuts and screw them on to one side of each of the threaded rods. If you have some Loctite I would suggest using it on the cap nut side, but not the side that will go into the brass inserts. Now push them through the holes in the light cover and socket holder and line them up with the brass inserts on the electrical housing. Tighten everything together and the light engine is ready to go. All that is left is the coupler and fiber optic cable.</p> <p>To learn how to place fiber optic cable in your ceiling or a drop-down ceiling follow this link:<br/> <a href="https://www.wiedamark.com/starfieldceilings_1.aspx">https://www.wiedamark.com/starfieldceilings_1.aspx</a></p> <p>The process is very simple, but it can take a very long time. I have over 700 stars in my ceiling which you can see in the picture and it took about a total of 25 hours of work to get them all placed. Try to do this when it’s not hot in your attic.</p> <p>Once the fibers are in, create one bundle and cut the fibers flush. This will go into the light engine. You will need to first place the fiber bundle through the front opening of the coupler, then go ahead and thread the coupler onto the light engine. Once this is done, the final step is to tighten the bundle together by tightening part 2 of the coupler. This will hold the bundle of fibers in place.</p> <p>Your light engine and stars are now complete!! Enjoy the night sky!!</p>
With this file you will be able to print Fiber Optic Light Engine with your 3D printer. Click on the button and save the file on your computer to work, edit or customize your design. You can also find more 3D designs for printers on Fiber Optic Light Engine.